Getting Started with Android Wear with Kotlin
In this Android Wear tutorial, you’ll learn how to build an Android app for the Android Wear platform using the Kotlin language. By Alex Sullivan.
Listening for Data Items
Next up is adding code to your mobile app to listen for Data API items.
Open your MealListActivity class. In the onConnected method, add the following code after the connectedNode = it.nodes line:
Wearable.DataApi.addListener(client) { data ->
  val meal = Gson().fromJson(String(data[0].dataItem.data), Meal::class.java)
  adapter?.updateMeal(meal)
}
This code is very similar to the Message code you added previously. It adds a DataListener to the DataApi. The DataListener deserializes the ByteArray contained in the DataItem. Then it makes a call to the adapter to update the newly favorited meal.
Do a few more rain dances and run the mobile app and the Wear app.
Send one of the recipes to the watch again by tapping a recipe list item.
Once the recipe makes it to the watch, tap the star. If everything went well, you should see a black star appear next to that list item on the phone – like so:

After running that test, try sending a new recipe to the watch and putting your phone in airplane mode. Wait a few seconds and then tap the like button on the watch again. Then take your phone out of airplane mode. Once the phone pairs to the watch again, you should see the item starred!
Adding a Confirmation View
One nice thing about developing for Wear is that it comes with a few juicy animations built in. You’re going to take advantage of that by adding a ConfirmationActivity to your Wear app.
First, add the following import to the top of MealActivity in the wear module:
import android.support.wearable.activity.ConfirmationActivity
Then, add a new method in your MealActivity class:
private fun showConfirmationScreen() {
  val intent = Intent(this, ConfirmationActivity::class.java)
  intent.putExtra(
      ConfirmationActivity.EXTRA_ANIMATION_TYPE,
      ConfirmationActivity.SUCCESS_ANIMATION
  )
  intent.putExtra(
      ConfirmationActivity.EXTRA_MESSAGE,
      getString(R.string.starred_meal)
  )
  startActivity(intent)
}
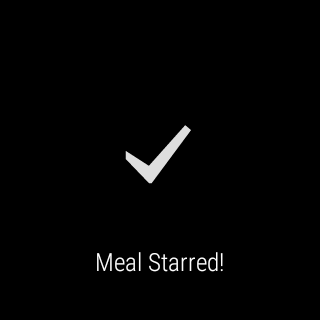
ConfirmationActivity is a built-in activity. Specifically, it’s a fullscreen activity that shows a checkmark and then disappears.
The method above creates an Intent to launch the ConfirmationActivity with two extras.
-
EXTRA_ANIMATION_TYPEdictates the animation type. -
EXTRA_MESSAGEis used to show a small text message below the animation.
Next up you need to trigger the animation. So, In the sendLike method, replace the putDataItem line with the following:
Wearable.DataApi.putDataItem(
    client,
    PutDataRequest.create("/liked")
        .setData(bytes)
        .setUrgent()
).setResultCallback {
  showConfirmationScreen()
}
The only difference is that after the putDataItem call, it adds a ResultCallback where you check to see if the put request was successful. If it was, you make a call to show the confirmation.
Try it out on your watch. Eventually, once you send a like for a recipe, you should see the following view:
Uploading your Wear App to the Play Store
When Android Wear first came out, the only way to get a Wear app to users was to embed the APK in your mobile app. Wear 2.0 changed that. Now you can upload your Wear app to the play store in exactly the same way you’d upload a normal phone app.
The only requirement is that you have the following line in your Wear apps manifest:
uses-feature android:name="android.hardware.type.watch"
As long as you have that line, your Wear app will show up on the Wear play store.
Your Wear app will also be installed whenever a user downloads your phone app from the play store.
Where To Go From Here?
Here is the download for the final project.
In this Android Wear tutorial, you learned:
- how to design for both round and square watches
- how to communicate between the mobile and the Wear device, using both the Message and Data API
- and how to show some snazzy animations right out of the box!
There is a lot more to learn and do with Android Wear! If you’re interested in learning more about Android Wear development, check out the official documentation.
- You can build standalone apps with Wear-specific UI, new interactions and gestures.
- Also, you can create new Watch Faces
- Or you can add Voice Capabilities to control your app with your voice!
- And many more cool features!
If you have any questions, or just want to share your favorite food puns, join the discussion below!