Getting Started with Android Wear with Kotlin
In this Android Wear tutorial, you’ll learn how to build an Android app for the Android Wear platform using the Kotlin language. By Alex Sullivan.
Using the Message API
You’re now going to use the Message API to send a recipe from your phone to your watch.
First, open the MealListActivity file. Add the following code to your imports:
import com.google.android.gms.common.api.GoogleApiClient
import com.google.android.gms.wearable.Node
The Message and Data APIs both use the GoogleApiClient system under the hood, so that’s why you’re importing the GoogleApiClient. A Node is fancy speak for a wearable device.
Under the adapter property declaration add the following two properties:
private lateinit var client: GoogleApiClient
private var connectedNode: List<Node>? = null
One is for your GoogleApiClient and the other is for your Nodes. There could be multiple connected watches (cooouuuullllldd be….) so that’s why it’s a List of Nodes.
Next, make the MealListActivity implement the GoogleApiClient.ConnectionCallbacks interface.
class MealListActivity : AppCompatActivity(),
    MealListAdapter.Callback,
    GoogleApiClient.ConnectionCallbacks {
When you connect to the GoogleApiClient, the ConnectionCallbacks will provide you with a callback to store your nodes.
Now, you need to implement two methods – onConnected and onConnectionSuspended. Add the following below your onCreate method:
override fun onConnected(bundle: Bundle?) {
  Wearable.NodeApi.getConnectedNodes(client).setResultCallback {
    connectedNode = it.nodes
  }
}

override fun onConnectionSuspended(code: Int) {
  connectedNode = null
}
The onConnected method gets called once the GoogleApiClient connects. At that point, you want to get all of the Nodes from the Wearable.NodeApi and save them in your list.
onConnectionSuspended is called when the GoogleApiClient you’re using gets disconnected. In this scenario you no longer have access to your Nodes (wearable devices) so you clear out your connectedNode list.
Next, in your onCreate method, add the following:
client = GoogleApiClient.Builder(this)
    .addApi(Wearable.API)
    .addConnectionCallbacks(this)
    .build()
client.connect()
Here your building up a GoogleApiClient that has access to the Wearable API. You’ll use this client shortly to actually send messages to the watch!
You’ll notice that there’s a stub for the mealClicked method in your activity. Replace that with the following:
override fun mealClicked(meal: Meal) {
  val gson = Gson()
  connectedNode?.forEach { node ->
    val bytes = gson.toJson(meal).toByteArray()
    Wearable.MessageApi.sendMessage(client, node.id, "/meal", bytes)
  }
}
This method uses Gson to serialize your meal. It then uses the MessageApi.sendMessage method to send the meal to your watch. The String can be used to filter messages on the receiving side. You can ignore it for this tutorial.
Alright – onto the watch!
Listening for Messages
Good news: your phone app is sending messages! Bad news: your watch isn’t receiving any messages.

But that’s all about to change.
The code you’re going to add to your watch app is very similar to the code you just added to your phone app.
To start, open the MealActivity class in your Wear module.
Add the following import: import kotlinx.android.synthetic.main.activity_meal.*.
This will allow you to reference your views without using all that old-school findViewById junk!
Next, add the following two properties to your activity:
private lateinit var client: GoogleApiClient
private var currentMeal: Meal? = null
One is your now-familiar GoogleApiClient, which you’ll use to listen for messages. The other is the current meal being displayed.
Next make your activity implement the GoogleApiClient.ConnectionCallbacks interface. Then, add the following code below your onCreate method:
override fun onConnected(bundle: Bundle?) {
  Wearable.MessageApi.addListener(client) { messageEvent ->
    currentMeal = Gson().fromJson(String(messageEvent.data), Meal::class.java)
    updateView()
  }
}

override fun onConnectionSuspended(code: Int) {
  Log.w("Wear", "Google Api Client connection suspended!")
}

private fun updateView() {
  currentMeal?.let {
    mealTitle.text = it.title
    calories.text = getString(R.string.calories, it.calories)
    ingredients.text = it.ingredients.joinToString(separator = ", ")
  }
}
The updateView() method is pretty simple – it looks at the current Meal and updates your view accordingly.
The onConnectionSuspended method isn’t doing too much. You don’t have anything to clear out when the connection ends.
The onConnected method is where the magic is. Once the GoogleApiClient has connected, you added a MessageListener to listen for new Message API events from the phone. In the callback, you are doing the opposite of what you did on the phones side. The MessageEvent object has a data parameter. You used Gson to deserialize the ByteArray into a Meal.
Finally, initialize your GoogleApiClient in onCreate:
client = GoogleApiClient.Builder(this)
    .addConnectionCallbacks(this)
    .addApi(Wearable.API)
    .build()
client.connect()
Boom! Your Wear app is listening for messages for your phone.
Testing the App
First run the mobile app on your phone. After that, run the Wear app on your watch.
Now, do a rain dance. Followed by a little prayer. Followed by an offering of chocolates to the Android gods.
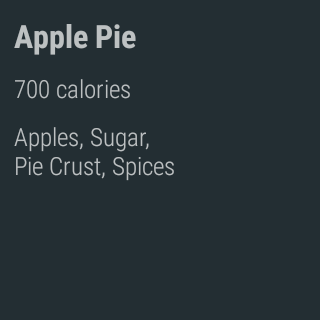
Then tap the Apple Pie list item on your phone app.
If everything runs smoothly, you should see this screen on your watch:
Using the Data Api
This app is already pretty hot, but its time to make it a bit spicier. Maybe throw some red pepper on there.
You’re going to add a star button to your watch layout so you can favorite specific meals.
Open up the activity_meal.xml file in your wear module.
Add the following widget as the last item in your LinearLayout:
<ImageView
    android:id="@+id/star"
    android:layout_width="wrap_content"
    android:layout_height="0dp"
    android:layout_gravity="center"
    android:layout_weight="1"
    android:src="@drawable/ic_star_border_black_24dp"
    android:tint="@android:color/white"/>
You just added a simple ImageView with a black border star. This will be your “like” button. The height is set to 0dp and the layout_weight is set to 1 so the star fills the rest of the screen.
In your MealActivity class, adding the following method:
private fun sendLike() {
  currentMeal?.let {
    val bytes = Gson().toJson(it.copy(favorited = true)).toByteArray()
    Wearable.DataApi.putDataItem(client, PutDataRequest.create("/liked").setData(bytes).setUrgent())
  }
}
Here’s the breakdown of the new method: First it creates a copy of your meal with the favorited flag set to true. Then it serializes that new copy into a ByteArray. Next it creates a PutDataRequest. You can think of a PutDataRequest as the DataApi version of a Message. Why didn’t they call it something like…DataItem? Again – that’d be too easy. Finally, the method sends that request on the /liked path with the ByteArray attached as the data.
You may also notice the setUrgent call. You can toggle that option to gently encourage the system to deliver the PutDataRequest as fast as possible.
Next, add the following code in your MealActivity onCreate method:
star.setOnClickListener {
  sendLike()
}
Now your Wear app is sending Data API items to your mobile app.