Getting Started with Android Wear with Kotlin
In this Android Wear tutorial, you’ll learn how to build an Android app for the Android Wear platform using the Kotlin language. By Alex Sullivan.
Using the BoxInsetLayout Widget
The BoxInsetLayout is a top-level widget that can box its children into a square that will fit inside a round screen. If your code is running on a square screen it will have no affect. You can define which sides to box in by using the app:boxedEdges attribute on a direct child of the BoxInsetLayout. The possible values are left, right, top, bottom, and all. You can combine different values too – so app:boxedEdges:"left|top|bottom" is totally legal.
Now that you’ve got the idea down, open the wear/res/layout/activity_meal.xml file and replace its contents with the following:
<android.support.wear.widget.BoxInsetLayout
  xmlns:android="http://schemas.android.com/apk/res/android"
  xmlns:app="http://schemas.android.com/apk/res-auto"
  android:layout_width="match_parent"
  android:layout_height="match_parent">

  <LinearLayout
    android:layout_width="match_parent"
    android:layout_height="match_parent"
    app:boxedEdges="all">

    <TextView
      android:layout_width="wrap_content"
      android:layout_height="wrap_content"
      android:text="Hello World!"/>
  </LinearLayout>
</android.support.wear.widget.BoxInsetLayout>
Here’s what’s happening in this new layout:
- The top level layout is now a
BoxInsetLayout - The
BoxInsetLayouthas one child – aLinearLayout - That
LinearLayouthas theapp:boxedEdges="all"layout attribute, meaning that this view will be boxed in on all sides.
Note: In the preview tab, you can change the device type used to render the preview.
Feel free to change to Wear Round or Wear Square to see how the BoxInsetLayout works.

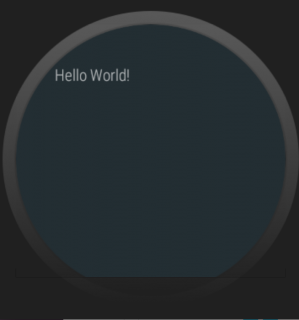
Run the Wear app again. You should see that the text is no longer being clipped, and the screen now looks like this:
Just for fun, you can set the background of the LinearLayout to gray to see where the bounding box is.
Add android:background="@android:color/darker_gray" to the LinearLayout. If you run the app again you should see the following:

Since you specified app:boxedEdges="all", the box is bounded on all four sides. Cool stuff!
Fleshing out the Recipe Layout
Replace the contents of the wear/res/layout/activity_meal.xml file you just edited with the following:
<android.support.wear.widget.BoxInsetLayout
    xmlns:android="http://schemas.android.com/apk/res/android"
    xmlns:app="http://schemas.android.com/apk/res-auto"
    android:layout_width="match_parent"
    android:layout_height="match_parent">

  <LinearLayout
      android:layout_width="match_parent"
      android:layout_height="match_parent"
      android:orientation="vertical"
      android:padding="8dp"
      app:boxedEdges="all">

    <TextView
        android:id="@+id/mealTitle"
        android:layout_width="wrap_content"
        android:layout_height="wrap_content"
        android:text="Meal title"
        android:textSize="18sp"
        android:textStyle="bold"/>

    <TextView
        android:id="@+id/calories"
        android:layout_width="wrap_content"
        android:layout_height="wrap_content"
        android:paddingTop="8dp"
        android:text="Number of calories"/>

    <TextView
        android:id="@+id/ingredients"
        android:layout_width="wrap_content"
        android:layout_height="wrap_content"
        android:paddingTop="8dp"
        android:text="Ingredients"/>
  </LinearLayout>
</android.support.wear.widget.BoxInsetLayout>
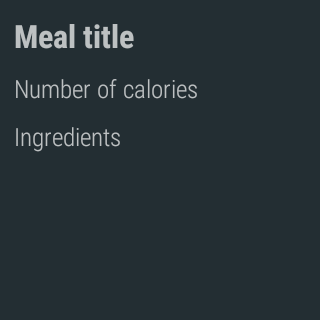
Nothing too crazy going on here – you added 3 new TextView that will contain the recipes title, calories and ingredients. You’ll update them soon, so don’t worry about the placeholder values.
Run the watch app now so that you should see a screen like this:
Sharing Code Between the Watch and the Phone
When you create a wearable app you’ll want to share code between the phone and watch apps. The app you’re creating has a Meal model that should be shared across both apps. You can accomplish this by using a shared module.
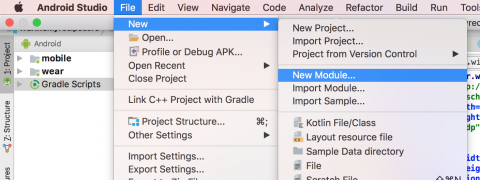
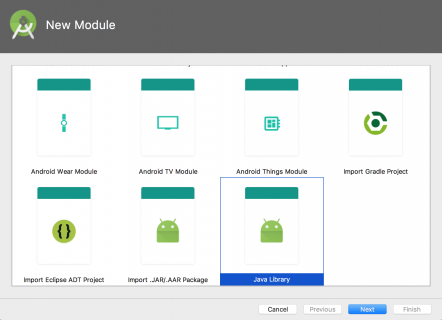
In the toolbar, click File -> New -> New Module
Choose a Java Library.
A Java library contains no Android references. If you wanted to include drawable files or other Android files, you would instead choose the Android library option.
Note: Ideally you’d create a Kotlin library instead of a Java library. But this is Android land, and that would be WAY too easy. Android Studio doesn’t have the option to create a pre-configured Kotlin module yet.
Name the module shared and name the class Meal. You can leave the Create .gitignore file option checked.

Click Finish.
Gradle will run a sync and if you’ve done the right Gradle dance it will succeed!
However, we now have a Java library. Not a Kotlin library. And let’s be serious – who uses Java anymore? ;]
Navigate to Gradle Scripts/build.gradle for the shared module:
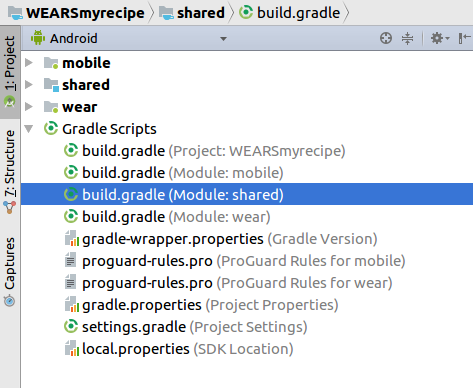
Replace the contents with the following code:
apply plugin: 'java-library'
apply plugin: 'kotlin'

dependencies {
  compile fileTree(dir: 'libs', include: ['*.jar'])
  compile "org.jetbrains.kotlin:kotlin-stdlib-jre7:$kotlin_version"
}

sourceCompatibility = "1.7"
targetCompatibility = "1.7"
The code above adds Kotlin support to the new module.
Importing the Shared Library
Now that you’ve got a helpful shared library, it’s time to actually share that library.
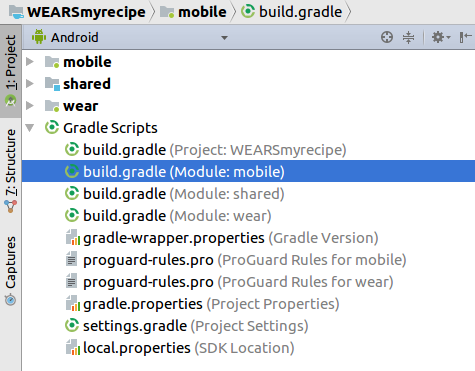
Open the build.gradle file for your mobile app:
in the dependencies block, add the following line: compile project(':shared')
Your dependencies block should now look like this:
dependencies {
  compile fileTree(dir: 'libs', include: ['*.jar'])
  compile project(':shared')
  compile "org.jetbrains.kotlin:kotlin-stdlib-jre7:$kotlin_version"
  compile 'com.google.android.gms:play-services-wearable:11.6.0'
  compile "com.android.support:support-v4:$support_version"
  compile "com.android.support:appcompat-v7:$support_version"
  compile "com.android.support:recyclerview-v7:$support_version"
  compile "com.android.support:cardview-v7:$support_version"
  compile 'com.android.support.constraint:constraint-layout:1.0.2'
  compile 'com.google.code.gson:gson:2.8.2'
  androidTestCompile('com.android.support.test.espresso:espresso-core:2.2.2', {
    exclude group: 'com.android.support', module: 'support-annotations'
  })
  testCompile 'junit:junit:4.12'
}
The compile project method is the way to include a local module in your project.
Now you need to do the same thing for the watch app.
Open the build.gradle file for your Wear app:
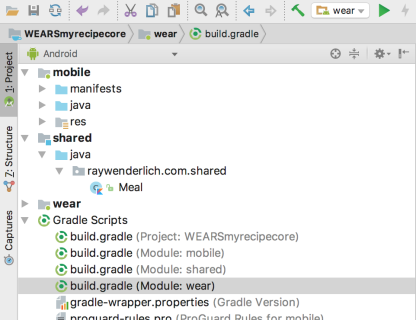
Just like before, in the dependencies block, add the compile project(':shared') line.
The dependencies block of the Wear app should now look like this:
dependencies {
  compile fileTree(dir: 'libs', include: ['*.jar'])
  compile project(':shared')
  compile "org.jetbrains.kotlin:kotlin-stdlib-jre7:$kotlin_version"
  compile "com.android.support:support-v4:$support_version"
  compile "com.android.support:wear:$support_version"
  compile 'com.google.android.gms:play-services-wearable:11.6.0'
  compile 'com.google.android.support:wearable:2.1.0'
  provided 'com.google.android.wearable:wearable:2.1.0'
  compile 'com.google.code.gson:gson:2.8.2'
}
This recipe app is really HEATING up! Because you cook with heat. And the app has to do with meals. Which you cook. With heat. Why does no one understand my witty humor?
Adding the Meal Class
Your shared library contains one class – a Meal model written in Java. However, your mobile module actually already contains an even better meal class written in Kotlin. That’s the model that you want to share – so go ahead and delete the java Meal class in your shared library:
Click OK on the delete dialog:
BOOM! No more Java.
Now drag the Kotlin Meal class from your mobile module to your shared module:

Click the Refactor button in the popup. Now the phone app is using the Meal class from the shared module.
Sending Messages Between Devices
Now that both the watch app and the phone app know about your Meal class, it’s time to pass some data around.
Phone apps communicate with Wear apps via the Message API and the Data API.
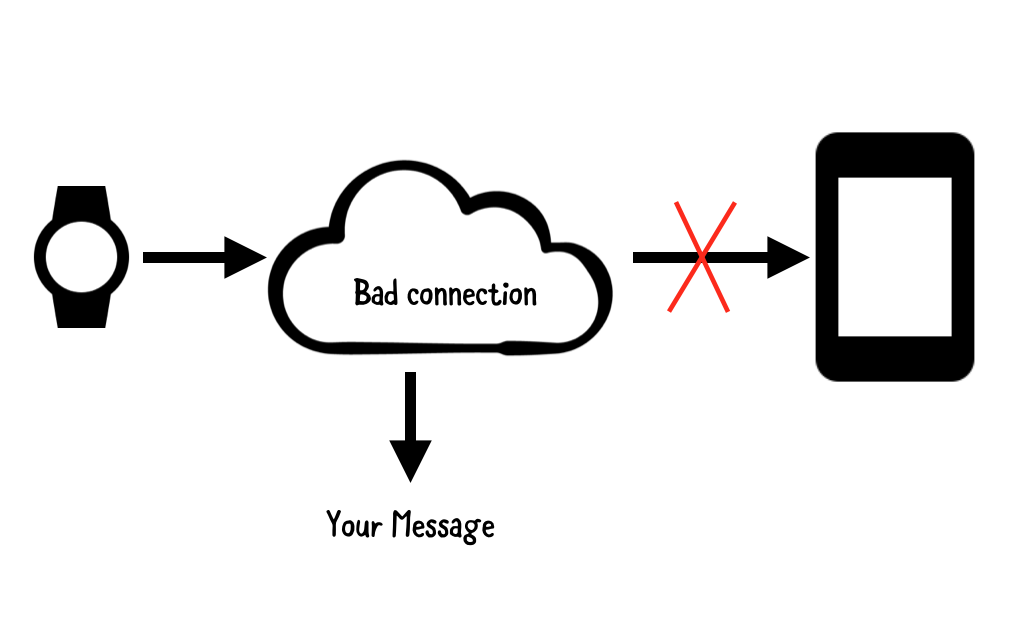
The Data API should be used for messages you need delivered. If the system can’t immediately deliver it, it will queue it up until the watch is connected to the phone.
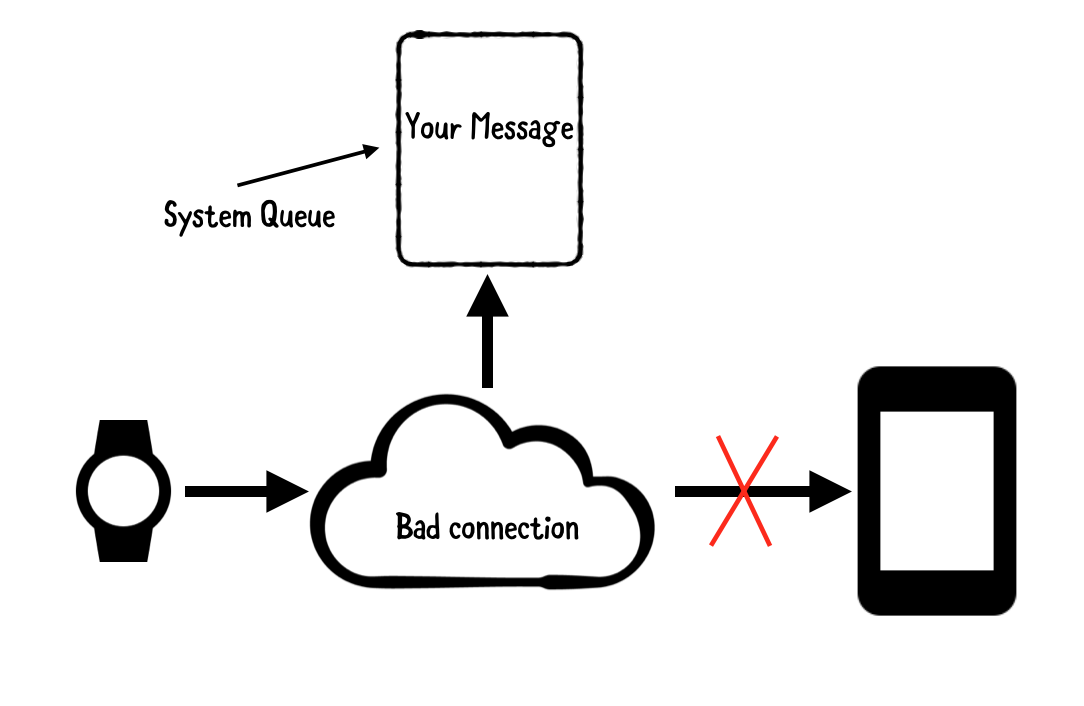
The Message API, on the other hand, should be used for short messages that you don’t mind losing. If the system can’t immediately deliver the message it won’t try again and that will be that. Your message will be dropped on the floor.