Unity 4.3 2D Tutorial: Scrolling, Scenes and Sounds
In this final long awaited part of the Unity 2D series, you will create the conga line as well as the win and lose states for the game. By Chris LaPollo.
Audio
Find the folder named Audio in the resources you downloaded earlier. This folder contains music and sound effects made by Vinnie Prabhu for our book, iOS Games by Tutorials.
Add all five files to your project by dragging Audio directly into the Project browser.
Open the Audio folder in the Project browser to reveal your new sound assets, as shown below:

Select congaMusic in the Project browser to reveal the sound's Import Settings in the Inspector, shown in the following image:
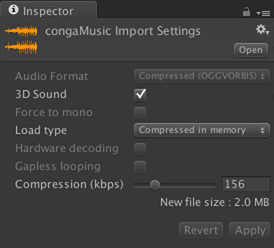
Notice in the image above that Audio Format is disabled. That's because Unity will not let you choose the format when importing compressed audio clips.
Unity can import .aif, .wav, .mp3 and .ogg files. For .aif and .wav files, Unity lets you choose between using the native format or compressing into an appropriate format for the build target. However, Unity automatically re-encodes .mp3 and .ogg files if necessary to better suit the destination. For example, .ogg files are re-encoded as .mp3 files for iOS.
There is a slight loss of sound quality if Unity needs to convert from one compressed format to another. For that reason, Unity's documentation recommends that you import audio files in lossless formats like .aif and .wav and let Unity encode them to .mp3 or .ogg as needed. You're using an .mp3 file here because I didn't have a lossless version and this one sounds good enough.
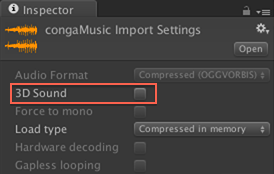
For each of the five audio files you imported, you'll leave most settings with their default values. However, you won't be placing your sounds in 3D space, so uncheck 3D Sound, as shown below, and then click Apply:
When you hit Apply, Unity reimports the sound clip. If this takes a while, you'll see a dialog that shows the encoding progress, as shown below:

Disable 3D sound for each of the other four sounds files: hitCat, hitEnemy, loseMusic and winMusic.
With your sound files imported properly, you'll first add sounds to CongaScene. Save the current scene if necessary and open CongaScene.
To play a sound in Unity, you need to add an Audio Source component to a GameObject. You can add such a component to any GameObject, but you'll use the camera for Zombie Conga's background music.
Select Main Camera in the Hierarchy. Add an audio source from Unity's menu by choosing Component\Audio\Audio Source. The Inspector now displays the Audio Source settings shown below:

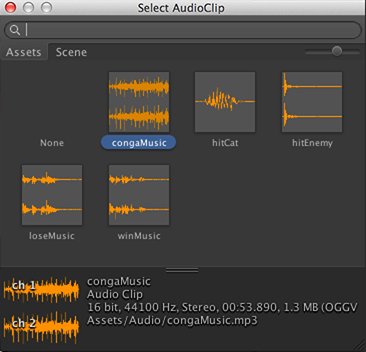
Just like how you've set assets in fields before, click the small circle/target icon on the right of the Audio Source component's Audio Clip field to bring up the Select AudioClip dialog. Select congaMusic from the Assets tab, as shown in the following image:
Note that Play On Awake is already checked in the Audio Source component. This instructs Unity to begin playing this audio clip immediately when the scene loads.
This background music should continue to play until the player wins or loses, so check the box labeled Loop, shown below:

This instructs Unity to restart the audio clip when the clip reaches its end.
Play the scene and you'll finally hear what the cats have been dancing to all this time.
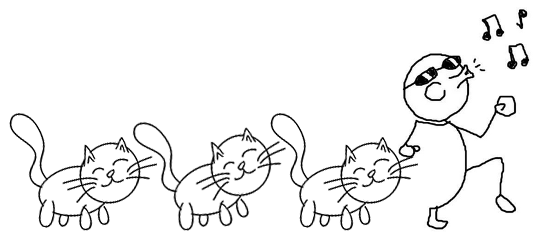
Artist's rendering of musical good times.
Before you worry about the win and lose scenes, you'll spice up the gameplay with a few collision sound effects.
Open ZombieController.cs in MonoDevelop and add the following variables to ZombieController:
public AudioClip enemyContactSound;
public AudioClip catContactSound;
These variables store the AudioClips you'll play during specific collisions. You'll assign them later in the editor.
In OnTriggerEnter2D, add the following line inside the block of code that runs when the zombie collides with a cat:
audio.PlayOneShot(catContactSound);
This calls PlayOneShot on audio to play the audio clip stored in catContactSound. But where did audio come from?
Every MonoBehaviour has access to certain built-in fields, like the transform field you've been accessing throughout this tutorial series. If a GameObject contains an AudioSource component, you can access it through the built-in audio field.
Now add the following line to OnTriggerEnter2D, inside the block of code that runs when the zombie collides with an enemy:
audio.PlayOneShot(enemyContactSound);
This code plays enemyContactSound when the zombie collides with an enemy.
Save the file (File\Save) and switch back to Unity.
Select zombie in the Hierarchy. The Zombie Controller (Script) component now contains two new fields in the Inspector:

Set Enemy Contact Sound to the hitEnemy sound asset. Then set Cat Contact Sound to hitCat. If you don't remember how to set these audio clips, review the steps you used earlier to set congaMusic in the camera's Audio Source.
Play the scene now and run the zombie into an enemy or a cat. Oops. Unity prints out the following exception each time the zombie collides with someone, letting you know there's a component missing:
![]()
The exception points out the problem and helpfully suggests the solution. ZombieController tried to access the zombie's AudioSource via its audio field, but zombie doesn't currently have an Audio Source.
Correct this now by adding an Audio Source component to zombie. Select zombie in the Hierarchy and choose Component\Audio\Audio Source in Unity's menu.
The Audio Source's default settings are fine. You won't set an Audio Clip on it because ZombieController provides the clips when it plays them.
Play the scene again and listen as the beach comes to life with Realistic Sound Effects Technology!

Now add some background music to WinScene and LoseScene on your own. Make WinScene play winMusic and make LoseScene play loseMusic. In both cases, make the sound play as soon as the scene starts and do not let it loop.
[spoiler title=""]Open WinScene. Add an Audio Source to Main Camera, then set the Audio Source component's Audio Clip to winMusic. Be sure Play On Awake is checked and Loop is unchecked.
Open LoseScene. Add an Audio Source to Main Camera, then set the Audio Source component's Audio Clip to loseMusic. Be sure Play On Awake is checked and Loop is unchecked.
[/spoiler]
And that's it! To get the full Zombie Conga experience, play LaunchScene and then enjoy the music as it kicks in when the gameplay starts. If you win, you'll be rewarded with WinScene's fun image and music, but if you lose you'll see a sad zombie listening to a sad tune. Enjoy!
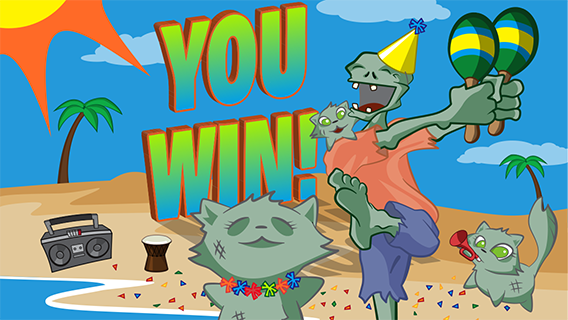
Who's the big winner? You are!