fastlane Tutorial: Getting Started
In this fastlane tutorial, you’ll learn how to provision, screenshot, build and upload an app to the App Store using fastlane. By Lyndsey Scott.
Creating a Test Target
Open mZone Poker.xcodeproj in Xcode then navigate to File ▸ New ▸ Target. Within the iOS tab’s Test section, select iOS UI Testing Bundle then click Next.

In the Product Name field, enter mZone Poker UITests then click Finish.

An mZone Poker UITests folder should now appear in Xcode’s left-hand navigator menu.
Go to the target’s General page. Below the mZone Poker target, you’ll now see mZone Poker UITests. Select mZone Poker UITests and if you see an error stating that Signing for “mZone Poker UITests” requires a development team, select a team.

Return to the fastlane directory then drag SnapshotHelper.swift below the mZone Poker UITests folder in Xcode’s project navigator. When the Choose options for adding these files window appears, select:
- Copy items if needed.
- Create groups.
- mZone Poker UITests.
Deselect the mZone Poker target before clicking Finish.

Next, open mZone_Poker_UITests.swift in mZone Poker UITests. Remove both setUp() and tearDown(), then replace the contents of testExample() with:
// 1
let app = XCUIApplication()
setupSnapshot(app)
app.launch()
// 2
let chipCountTextField = app.textFields["chip count"]
chipCountTextField.tap()
chipCountTextField.typeText("10")
// 3
let bigBlindTextField = app.textFields["big blind"]
bigBlindTextField.tap()
bigBlindTextField.typeText("100")
// 4
snapshot("01UserEntries")
// 5
app.buttons["what should i do"].tap()
snapshot("02Suggestion")
Here’s what this code does:
- Sets up the test to take snapshots and launches the app.
- Taps the Chip Count text field (the accessibility identifier of which was pre-set to “chip count” in the Storyboard) and enters 10 into that field.
- Taps the Big Blind text field and enters 100.
- Takes a snapshot to show how the app looks with user entries.
- Taps the What Should I Do? button then takes another screenshot to capture the resulting alert.
Next, to create the mZone Poker UITests scheme, click the button immediately to the right of the run and stop buttons and select Manage Schemes…. Select Show next to mZone Poker UITests and Shared next to both targets to grant fastlane access. Then, click the mZone Poker UITests row and Edit….
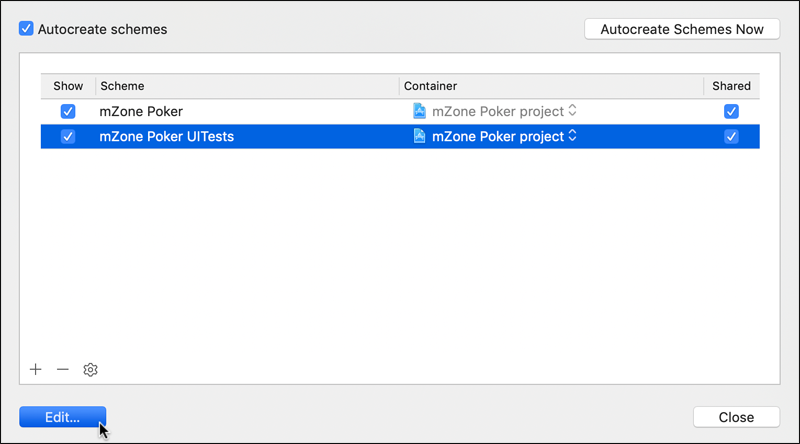
Click Build in the scheme editor’s left-hand menu. Then, next to the mZone Poker UITests target, select the Test and Run options before clicking Close to save your changes.

Leave Xcode, open Fastfile and, below the create_app lane, add:
  desc "Take screenshots"
  lane :screenshot do
    snapshot
  end
This screenshot lane uses snapshot to take screenshots as per Snapfile’s settings.
Save Fastfile, return to Terminal and enter:
bundle exec fastlane screenshot
Now, watch… the screenshots are captured without you having to do anything else! Bask in the joy of skipping grunt work. :]
An HTML preview of the screenshots should automatically open once snapshot completes.

If you see warnings about ambiguous simulator names, you may need to either delete duplicate simulators or change simulator names to match those in the Snapfile.
All your device screenshots in both English and French with just one command — it doesn’t get better than that!
Creating the IPA File
Building and uploading the app can also be a time-consuming process. But guess what — fastlane can do this with its gym tool!
In Terminal, run:
fastlane gym init
To create Gymfile.
Open Gymfile and replace its contents with:
# 1
scheme("mZone Poker")
# 2
output_directory("./fastlane/builds")
# 3
include_bitcode(false)
# 4
include_symbols(false)
#5
export_xcargs("-allowProvisioningUpdates")
This code does the following:
- Specifies mZone Poker’s scheme.
- Specifies where fastlane should store the .ipa app binary file.
- Excludes bitcode from the build. Bitcode allows Apple to optimize your app, but exclude it for now to speed up the build.
- Excludes symbols from the build. Including symbols allows Apple to access the app’s debug information, but exclude it for now to speed up the build.
- Allows Xcode to use automatic provisioning.
Open Fastfile and add the following below the screenshot lane:
  desc "Create ipa"
  lane :build do
    # 1
    enable_automatic_code_signing
    # 2
    increment_build_number
    # 3
    gym
  end
This build lane:
- Enables automatic provisioning in Xcode.
- Increases the build number by 1 (so each build number is unique per App Store Connect’s upload requirement).
- Creates a signed .ipa file.
Save Fastfile, then run build in Terminal:
bundle exec fastlane build
If you’re prompted to enter your keychain password in order for fastlane to access your certificates, do so. Select Allow Always if you don’t want to repeatedly grant the same permission. Once build successfully completes, the signed .ipa should appear in fastlane/builds.

Uploading to App Store Connect
To upload the screenshots, metadata and .ipa file to App Store Connect, you’ll use deliver.
First, replace Deliverfile‘s contents with:
# 1
price_tier(0)
# 2
submission_information({
    export_compliance_encryption_updated: false,
    export_compliance_uses_encryption: false,
    content_rights_contains_third_party_content: false,
    add_id_info_uses_idfa: false
})
# 3
app_rating_config_path("./fastlane/metadata/app_store_rating_config.json")
# 4
ipa("./fastlane/builds/mZone Poker.ipa”)
# 5
submit_for_review(true)
# 6
automatic_release(false)
Here you:
- Set price tier to 0, indicating it’s a free app.
- Answer the questions Apple would present to you upon manually submitting for review.
- Provide the app rating configuration location.
- Provide the .ipa file location.
- Set
submit_for_reviewtotrueto automatically submit the app for review. - Set
automatic_releasetofalseso you’ll have to release the app manually after it’s accepted by app review.
Open Fastfile. After the build lane, add:
  desc "Upload to App Store"
  lane :upload do
    deliver
  end
Then, for fastlane to create a preview of the metadata, open Terminal and enter:
bundle exec fastlane upload
If everything looks good, type y into Terminal to approve.
Once the lane completes, log in to App Store Connect. The screenshots, metadata and build should be there, waiting for review.

Putting It All Together
You now have separate lanes for creating your app, taking screenshots, building and uploading. While you could call them one-by-one, you don’t want to, right?
Oh, no — you want
Open Fastfile. After the upload lane, add:
  desc “Create app, take screenshots, build and upload to App Store"
  lane :do_everything do
    create_app
    screenshot
    build
    upload
  end
Fittingly, do_everything takes care of everything. :]
Furthermore, to make the lane completely hands-free, open Deliverfile and, at the bottom, add:
force(true)
This causes fastlane to skip screenshot and metadata approval.
Now, to let fastlane do all the heavy lifting, run:
bundle exec fastlane do_everything