Drag and Drop Tutorial for SwiftUI
Learn how to use the drag and drop API in SwiftUI by building your own simple iPadOS and iOS bug reporting app. By Warren Burton.
Receiving Dropped Data
Add this method to the end of the extension in ContentDropController.swift:
@discardableResult
func receiveDrop(
  dropIndex: Int,
  itemProviders: [NSItemProvider],
  create: Bool = true
) -> Bool {
  var result = false
  for provider in itemProviders {
    if provider.canLoadObject(ofClass: String.self) {
      result = true
      createBugWithString(from: provider, at: dropIndex)
    } else if provider.canLoadObject(ofClass: UIImage.self) {
      result = true
      if create {
        createBugWithImage(from: provider, at: dropIndex)
      } else {
        updateBugWithImage(from: provider, at: dropIndex)
      }
    }
  }
  return result
}
receiveDrop(dropIndex:itemProviders:create:) is the public face of ContentDropController. In this method, you iterate through the array of NSItemProviders. If a provider holds a String, you create a Bug with that text. Otherwise, if the provider contains a UIImage, you create or update a bug with that image. The return value says whether you found something you wanted to use or not.
Next, you’ll use ContentDropController in BugListView to receive the drop.
Finishing the Drop
Open BugListView.swift and locate the onInsert(of:perform:) call that you added before. In the trailing closure, add the following lines:
let dropController = ContentDropController(
  bugID: nil,
  bugController: bugController)
dropController.receiveDrop(
  dropIndex: index,
  itemProviders: itemProviders)
Here, you instantiate a ContentDropController and then ask it to receive the drop. All the hard work you did in the previous section has paid off in the form of a tidy calling site in your view. You’re going to use ContentDropController again later.
Build and run to see your drag support in action. You need to drag an image into the master list view. When the app has launched:
- Rotate your simulated device to landscape.
- Go to the home screen by pressing Command-Shift-H. This simulates the hardware home button.
- Open Photos.app.
- Invoke multitasking by pressing Command-Shift-H twice quickly.

Drag the Photos icon from the Dock over the PointyBug window. Drop the Photos icon near the right side of the PointyBug window to add a slide-over Photos window to your screen. You can hide a slide-over window by grabbing the handle at the top and dragging it to the right off the screen. To reveal it again swipe in from the edge of the screen.

If you end up with a Split View instead of a Slide Over window, that’s cool, too. Drag an image from Photos to the bug list view.

If you’re shipping an app with a List and drag support anytime soon, you might need to mitigate this bug for your customers. One approach could be to make the List presence conditional on the content array not being empty.
Add an if statement just above the List inside the body and wrap the List inside the else block.
If there are no bugs, you’ll show an empty view and add a drop handler to the view. When a drop occurs, you’ll perform the same steps you did earlier to handle the drop, but drop the new bug at index 0. You’ll learn more about handling dragging and dropping in SwiftUI views later in this tutorial.
List. It looks like someone forgot to check for an empty list. Oh no!
if bugController.bugs.isEmpty {
  Rectangle()
    .fill(Color.white)
    .onDrop(of: [.image, .text], isTargeted: nil) { providers in
      let dropController = ContentDropController(
        bugID: nil,
        bugController: bugController)
      return dropController.receiveDrop(
        dropIndex: 0,
        itemProviders: providers)
    }
} else {
//  List { ...
}
Adding a Bug
Build and run again. This time, tap Add Bug to add a bug to the database, then drag the screenshot you took in the Getting Started section from Photos to the list. Tap the new bug in the list to show the image:

Tap the description field to edit the text. Press Return to commit the text change, then press Command-Shift-H to save your changes. If you want to see how the save works, look at AppMain.swift in the Views folder. The bugs are persisted in a file when the app goes to the background, which is invoked by pressing Command-Shift-H.
You’ve got the first part of your list drag support done. Next, you’ll find out how to add re-ordering and delete support to the list.
Adding Reorder and Delete Support
Your list should behave like a good iOS citizen and allow your content to be deleted or reordered. You’ll add this support now with a small change.
Open BugListView.swift again, then locate the closing brace of onInsert(of:perform:). Add these two modifiers to the ForEach loop after the closing brace:
.onDelete { indexSet in
  bugController.deleteBugs(atOffsets: indexSet)
}
.onMove { indexSet, i in
  bugController.moveBugs(fromOffsets: indexSet, toOffset: i)
}
Here, you tell BugController to either delete a bug from the list at the requested indices or move some bugs from one point to another in the list. BugController makes the changes to the list. SwiftUI observes the changes and then updates the on-screen display.
Build and run and add at least two bugs. Tap the Edit button in the list navigation bar:
Your list now shows reorder handles and delete controls. All the expected list behaviors are now available by adding onDelete and onMove to the List.
Your List looks good for now. In the next section, you’ll add drop support to the detail view.
Adding Drop Support to any View
In the previous section, you saw that you can add the methods onInsert, onDelete and onMove to any View that conforms to DynamicViewContent. To add drag and drop to views that don’t represent some sort of collection, you need to use onDrop. In this section, you’ll add image drop support to the editor.
Adding Image Drop Support
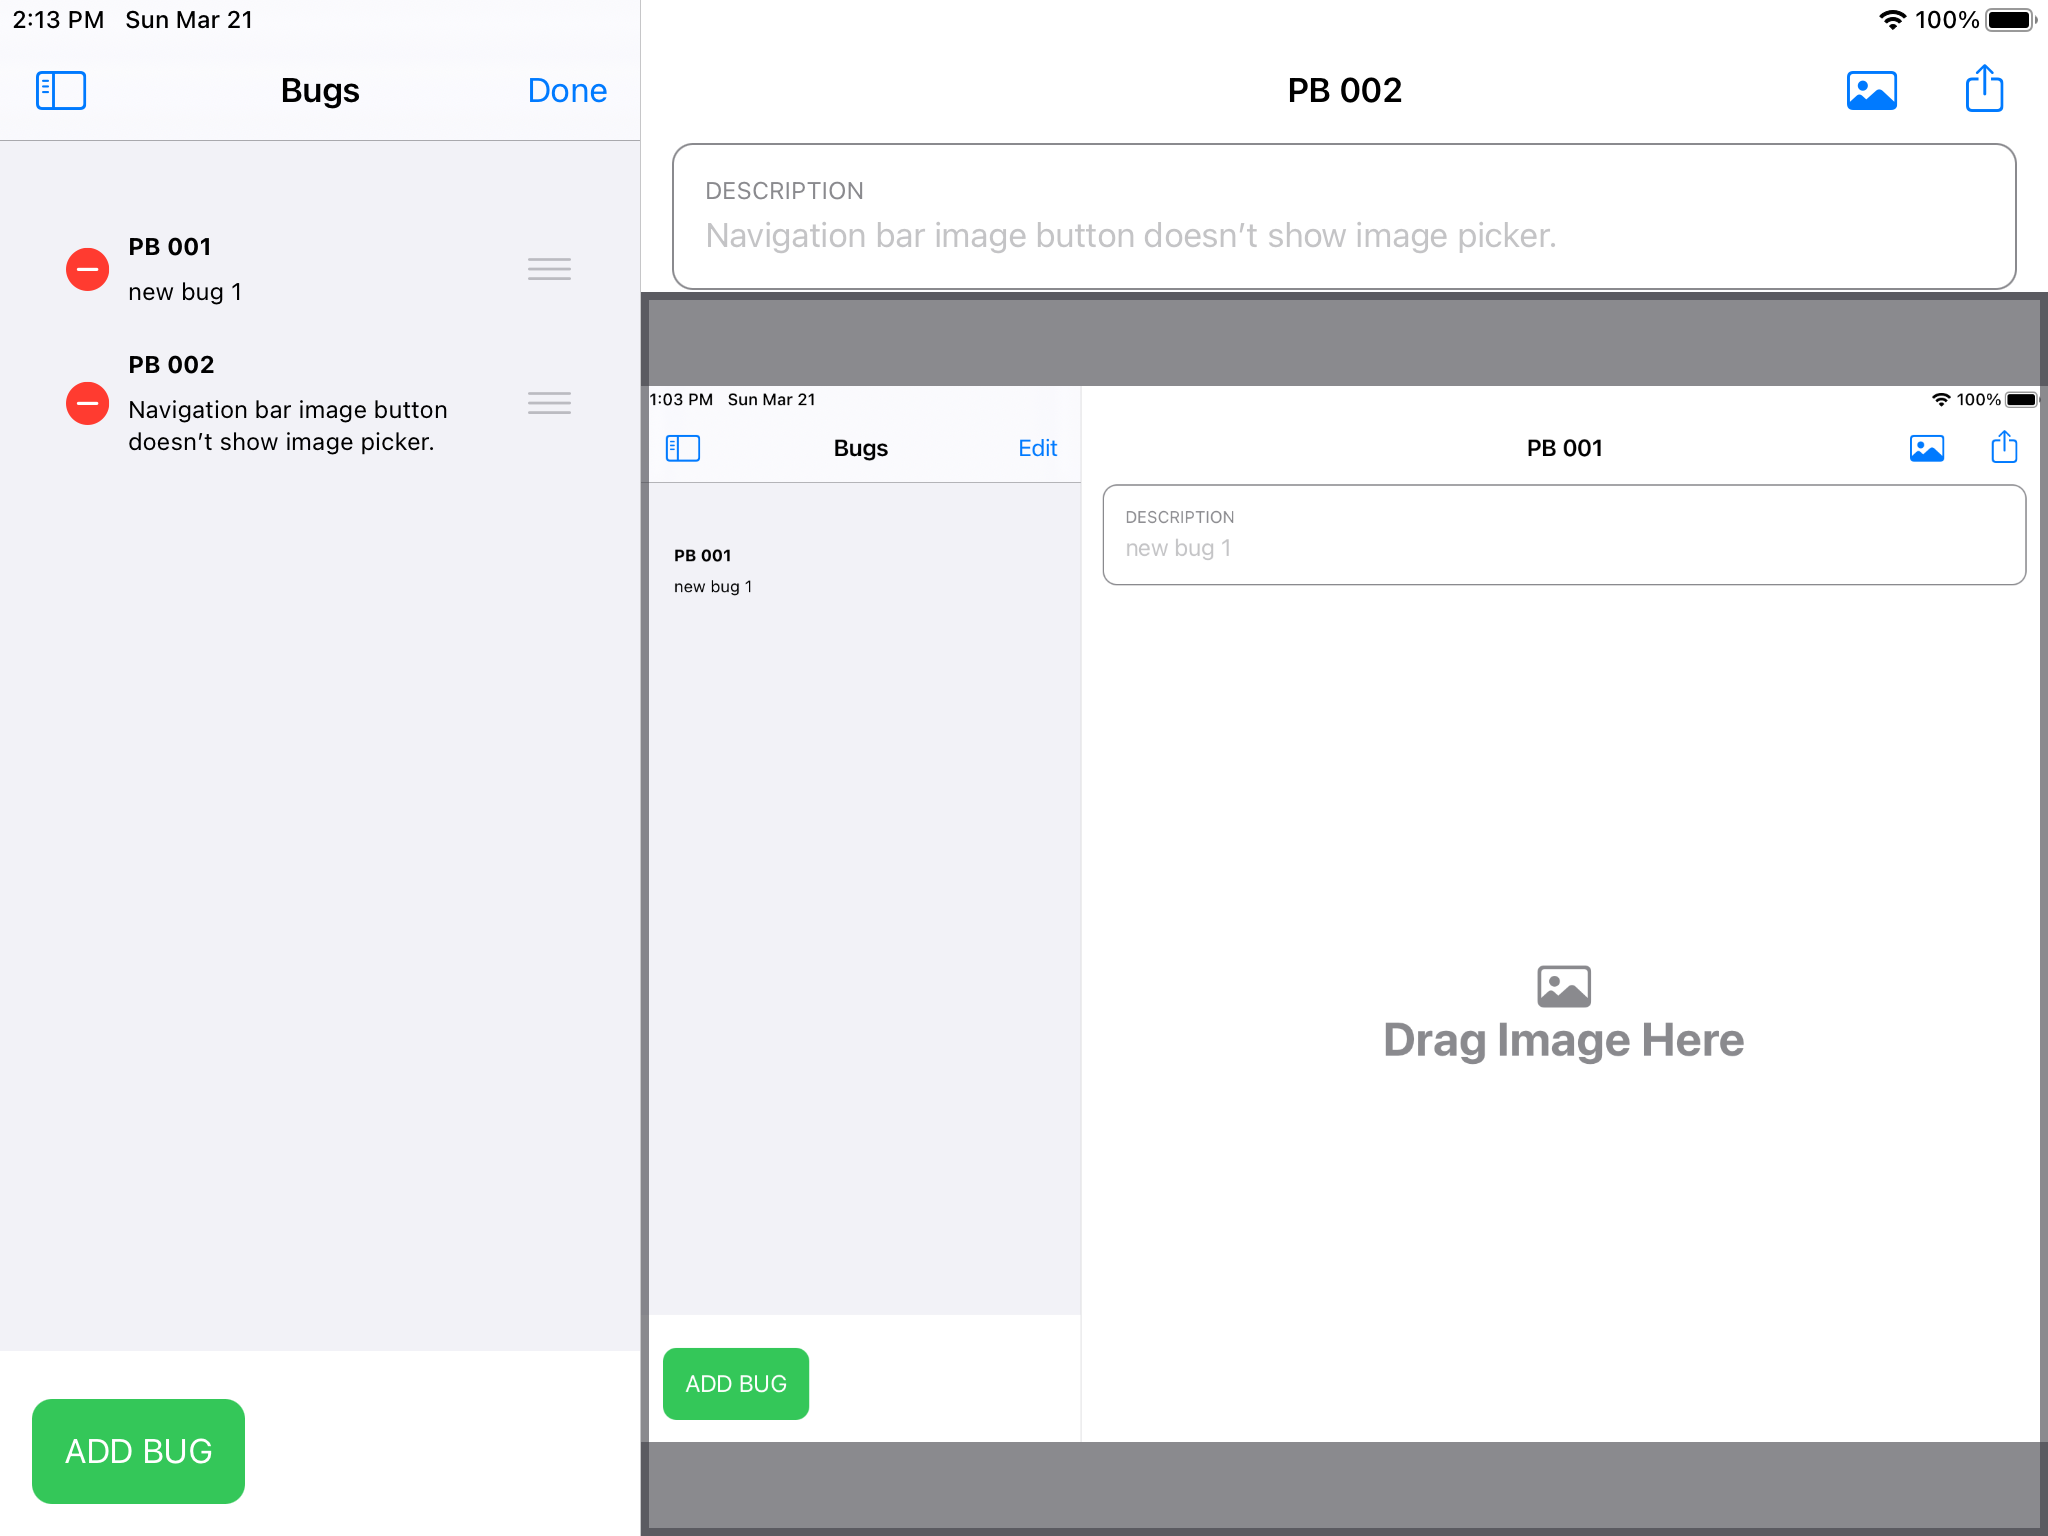
Build and run the app again, then press Add Bug. Tap the new bug in the list to select.

There’s a placeholder “Drag Image Here” text. You’ll get this feature working now. The first thing to do is upgrade ContentDropController to help with this task.
In the Project navigator, inside the Controller group, open ContentDropController.swift. Add this extension to the end of the file:
extension ContentDropController: DropDelegate {
  func performDrop(info: DropInfo) -> Bool {
    guard info.hasItemsConforming(to: [.image]) else {
      return false
    }
    return receiveDrop(
      dropIndex: 0,
      itemProviders: info.itemProviders(for: [.image]),
      create: false)
  }
}
In this extension, you conform ContentDropController to DropDelegate, which SwiftUI declares. If DropInfo contains an image, you call receiveDrop(dropIndex:itemProviders:create:) with create as false to update an existing Bug with the dropped image.
Next, in the Project navigator, in the Views group, open EditorView.swift. In the body of EditorView, locate PhotoView, then add this modifier on PhotoView:
.onDrop(of: [.image], delegate: ContentDropController(
  bugID: bug.bugID,
  bugController: bugController))
onDrop(of:delegate:) is available for any View. This code tells PhotoView to accept drops of the type UTType.image and to use ContentDropController as the DropDelegate. When you drop an image, SwiftUI calls the DropDelegate protocol method performDrop(info:).
Build and run, then tap Add Bug. Tap the new bug in the list to select, then drag an image from Photos to EditorView:

Add a description for your chosen image, and you now have another bug logged. Press Command-Shift-H to save.
You now have a list of several bugs with images. Wouldn’t it be nice if you could point at what the problem is in your image? In the next section, you’ll add the ability to drag a marker to your image.