Google Maps iOS SDK Tutorial: Getting Started
Learn how to use the Google Maps iOS SDK to retrieve the user’s current location and search for nearby points of interest, such as bars and restaurants. By Ron Kliffer.
Finding Something to Eat
Now that the map is set up and you have the user’s location in hand, it’s time to get this user fed!
You’ll use the Google Places API to search for places to eat and drink around the user’s location. Google Places API is a free web service API you can use to query to find establishment, geographic locations, or other points of interest near any given point.
Google Maps iOS SDK provides you with the GMSMarker class to mark locations on a map. Each marker object holds a coordinate and an icon image and renders on the map when added.
For this app you’ll need some more info on each marker, so you’ll need to create a subclass of GMSMarker.
Create a new Cocoa Touch Class, name it PlaceMarker and make it a subclass of GMSMarker. Ensure you choose Swift as the language for this file.
Replace the contents of PlaceMarker.swift with the following:
import UIKit
import GoogleMaps

class PlaceMarker: GMSMarker {
  // 1
  let place: GooglePlace

  // 2
  init(place: GooglePlace) {
    self.place = place
    super.init()

    position = place.coordinate
    icon = UIImage(named: place.placeType+"_pin")
    groundAnchor = CGPoint(x: 0.5, y: 1)
    appearAnimation = .pop
  }
}
This is a relatively straightforward bit of code:
- Add a property of type
GooglePlaceto thePlaceMarker. - Declare a new designated initializer that accepts a
GooglePlaceas its sole parameter and fully initializes aPlaceMarkerwith a position, icon image, anchor for the marker’s position and an appearance animation.
Next, add two more properties to MapViewController.swift as follows:
private let dataProvider = GoogleDataProvider()
private let searchRadius: Double = 1000
You’ll use dataProvider (defined in GoogleDataProvider.swift) to make calls to the Google Places Web API, and searchRadius to determine how far from the user’s location (in meters) to search for places.
Add the following method to MapViewController:
private func fetchNearbyPlaces(coordinate: CLLocationCoordinate2D) {
  // 1
  mapView.clear()
  // 2
  dataProvider.fetchPlacesNearCoordinate(coordinate, radius:searchRadius, types: searchedTypes) { places in
    places.forEach {
      // 3
      let marker = PlaceMarker(place: $0)
      // 4
      marker.map = self.mapView
    }
  }
}
Let’s go over what you just added:
- Clear the map of all markers.
- Use
dataProviderto query Google for nearby places within thesearchRadius, filtered to the user’s selected types. - Iterate through the results returned in the completion closure and create a
PlaceMarkerfor each result. - Set the marker’s map. This line of code is what tells the map to render the marker.
Here’s the $64,000 question: when do you want to call this method?
First, the user can reasonably expect to see places nearby when the app launches.
Locate locationManager(_:didUpdateLocations:) and add the following line of code at the end:
fetchNearbyPlaces(coordinate: location.coordinate)
Second, the user has the ability to change the types of places to display on the map, so you’ll need to update the search results if the selected types change.
Locate typesController(_:didSelectTypes:) and add the following line of code to the end:
fetchNearbyPlaces(coordinate: mapView.camera.target)
Finally, you’ll need to give the user the option to fetch new places when their location changes.
Open Main.storyboard and drag a UIBarButtonItem from the Object Library to the left side of the MapViewController’s navigation bar. Change the button’s Identifier to Refresh, as shown below:

Select the Assistant Editor and ctrl+drag from the Refresh button to MapViewController.swift. Choose Action and name the method refreshPlaces. Insert the following code into the newly added method:
fetchNearbyPlaces(coordinate: mapView.camera.target)
Build and run your project; you’ll see location pins popping up around the map. Change the search types in the TypesTableViewController and see how the results change:
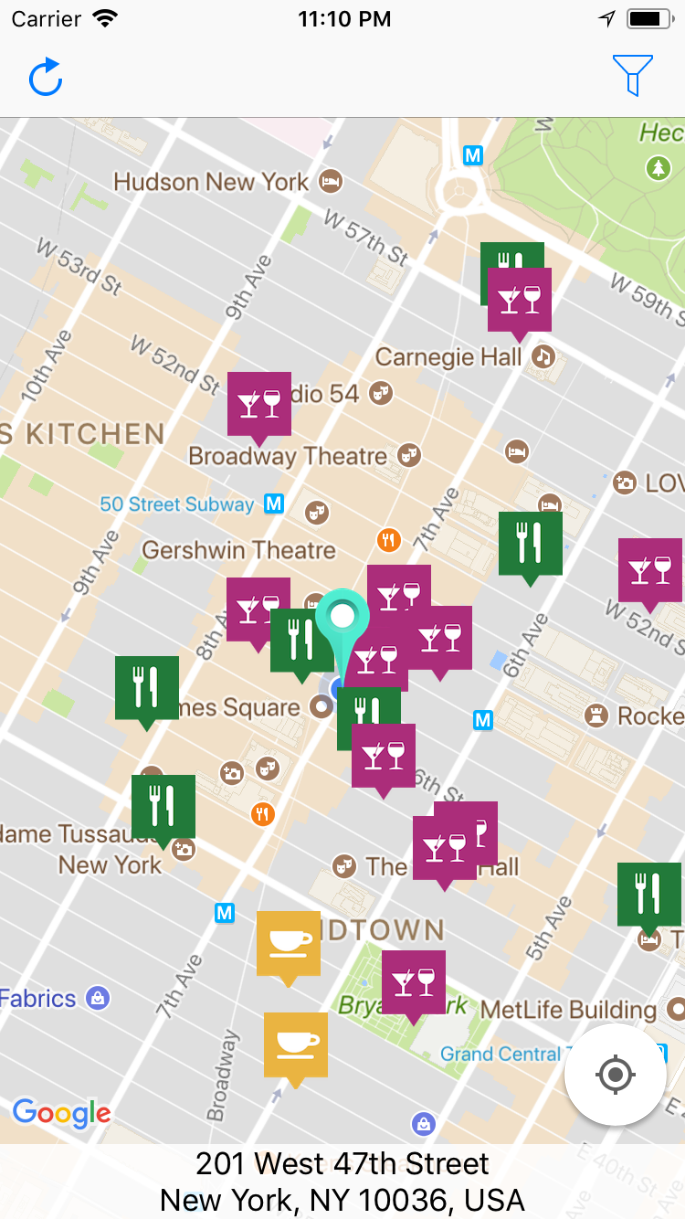
All these markers sure add some color to the map, but they’re not much use without additional info to give the user some details on the pinned location.
Add the following method to the GMSMapViewDelegate extension in MapViewController.swift:
func mapView(_ mapView: GMSMapView, markerInfoContents marker: GMSMarker) -> UIView? {
  // 1
  guard let placeMarker = marker as? PlaceMarker else {
    return nil
  }

  // 2
  guard let infoView = UIView.viewFromNibName("MarkerInfoView") as? MarkerInfoView else {
    return nil
  }

  // 3
  infoView.nameLabel.text = placeMarker.place.name

  // 4
  if let photo = placeMarker.place.photo {
    infoView.placePhoto.image = photo
  } else {
    infoView.placePhoto.image = UIImage(named: "generic")
  }

  return infoView
}
This method is called each time the user taps a marker on the map. If you return a view, then it pops up above the marker. If nil is returned, nothing happens. How does that happen?
- You first cast the tapped marker to a
PlaceMarker. - Next you create a
MarkerInfoViewfrom its nib. TheMarkerInfoViewclass is aUIViewsubclass that comes with the starter project for this tutorial. - Then you apply the place name to the
nameLabel. - Check if there’s a photo for the place. If so, add that photo to the info view. If not, add a generic photo instead.
Before you run the app, you want to make sure the location pin doesn’t cover the info window. Add the following method to the GMSMapViewDelegate extension:
func mapView(_ mapView: GMSMapView, didTap marker: GMSMarker) -> Bool {
  mapCenterPinImage.fadeOut(0.25)
  return false
}
This method simply hides the location pin when a marker is tapped. The method returns false to indicate that you don’t want to override the default behavior — to center the map around the marker — when tapping a marker.
Obviously, the pin needs to re-appear at some point. Add the following to the end of mapView(_:willMove:):
if (gesture) {
  mapCenterPinImage.fadeIn(0.25)
  mapView.selectedMarker = nil
}
This checks if the movement originated from a user gesture; if so, it un-hides the location pin using the fadeIn(_:) method. Setting the map’s selectedMarker to nil will remove the currently presented infoView.
Finally, add the following method to the GMSMapViewDelegate extension:
func didTapMyLocationButton(for mapView: GMSMapView) -> Bool {
  mapCenterPinImage.fadeIn(0.25)
  mapView.selectedMarker = nil
  return false
}
This method runs when the user taps the Locate button; the map will then center on the user’s location. Returning false again indicates that it does not override the default behavior when tapping the button.
Build and run your app; select a marker and you’ll see the location pin fade out. Scrolling the map closes the infoView and brings the pin back:

That’s it, you’ve done it! You now have a fully functioning Google Maps app. :]