Creating a Framework for iOS
Learn how to build an iOS framework, which lets you share code between apps, modularize your code or distribute it as a third-party library. By Emad Ghorbaninia.
Access Control
Although the framework is part of the project, the project’s code doesn’t know about it. Out of sight, out of mind.
Go to ItemDetailViewController.swift, and add the following line to the list of imports at the top of the file:
import CalendarControl
While it’s critical, this inclusion still won’t fix the build errors because Swift uses access control to let you determine whether constructs are visible to other files or modules.
By default, Swift makes everything internal — visible only within its own module.
To restore functionality to the app, you have to update the access control on the CalendarControl classes.
Although it’s a bit tedious, the process of updating access control improves modularity by hiding code not meant to appear outside the framework. You do this by leaving certain functions with no access modifier or explicitly declaring them internal.
Swift has five levels of access control. Use the following rules of thumb when creating your own frameworks:
- Open and public: For code called by the app or other frameworks, such as a custom view.
- Internal: For code used between functions and classes within the framework, such as custom layers in that view.
- Fileprivate: For code used within a single file, such as a helper function that computes layout heights.
-
Private: For code used within an enclosing declaration, such as a single
classblock and extensions of that declaration in the same file.
When CalendarControl was part of the RWCalendarPicker app, internal access wasn’t a problem. Now that it’s in a separate module, you must make it public for the app to use it. You’ll do that in the next section.
open and public, take a look at the Access Control Documentation.Updating the Framework Access Level
Open CalendarPickerViewController.swift. Make the class public by adding the public keyword to the class definition, like so:
public class CalendarPickerViewController: UIViewController {
Now CalendarPickerViewController is visible to any app file that imports the CalendarControl framework.
Next, add the public keyword to:
CalendarPickerViewController.init(baseDate:selectedDateChanged:)CalendarPickerViewController.init(coder:)CalendarPickerViewController.viewDidLoad()CalendarPickerViewController.viewWillTransition(to:with:)CalendarPickerViewController.collectionView(_:numberOfItemsInSection:)CalendarPickerViewController.collectionView(_:cellForItemAt:)CalendarPickerViewController.collectionView(_:didSelectItemAt:)CalendarPickerViewController.collectionView(_:layout:sizeForItemAt:)
init as public. Apple explains this and other finer points of access control in their Access Control Documentation.Build and run. Now you get your CalendarControl.
Congratulations! You now have a working stand-alone framework and an app that uses it!

Publishing the XCFramework
You might have heard about XCFramework during WWDC 2019. Yes, you’re right: This is the name of the binary framework you can generate with Xcode.
Before 2019, you only had one opportunity to make your own binary framework: Universal Static Library, also known as Fat Framework.
To support multiple architectures, like a simulator and devices, you had to combine them under one library in the fat framework. However, after this article, your frameworks don’t have to be fat anymore.
Archiving Your Framework
For this section, you’ll work with your old friend, Terminal. Woohoo!
Open your terminal and navigate to the framework folder with the following command. Alternatively, you could drag your project folder to your terminal after the cd command:
cd "CreateFrameworkForiOS/starter/2-Framework"
Next, start archiving your framework for the following targets:
- iOS
- Simulator
- macOS
Start with iOS. Enter the following command into the terminal:
xcodebuild archive \
-scheme CalendarControl \
-configuration Release \
-destination 'generic/platform=iOS' \
-archivePath './build/CalendarControl.framework-iphoneos.xcarchive' \
SKIP_INSTALL=NO \
BUILD_LIBRARIES_FOR_DISTRIBUTION=YES
This command will generate an archive of your framework by using the following list as inputs :
- -scheme CalendarControl: It’ll use this scheme for archiving.
- -configuration Release: It’ll use the release configuration for building.
- -destination ‘generic/platform=iOS’: This is the architecture type.
- -archivePath: It saves archives into this folder path with the given name.
- SKIP_INSTALL: Set NO to install the framework to the archive.
- BUILD_LIBRARIES_FOR_DISTRIBUTION: Ensures your libraries are built for distribution and creates the interface file.
Next, target Simulator. Make an archive by adding this command to your terminal:
xcodebuild archive \
-scheme CalendarControl \
-configuration Release \
-destination 'generic/platform=iOS Simulator' \
-archivePath './build/CalendarControl.framework-iphonesimulator.xcarchive' \
SKIP_INSTALL=NO \
BUILD_LIBRARIES_FOR_DISTRIBUTION=YES
These command options are the same as those for iOS except for the following differences:
- -destination ‘generic/platform=iOS Simulator’: This is where you set the architecture type.
- -archivePath: This generates the archive into the folder path with the given name.
Finally, generate a new archive for macOS. Add the following command in the terminal:
xcodebuild archive \
-scheme CalendarControl \
-configuration Release \
-destination 'platform=macOS,arch=x86_64,variant=Mac Catalyst' \
-archivePath './build/CalendarControl.framework-catalyst.xcarchive' \
SKIP_INSTALL=NO \
BUILD_LIBRARIES_FOR_DISTRIBUTION=YES
This command is the same as the others except for the following differences:
- -destination ‘platform=macOS,arch=x86_64,variant=Mac Catalyst’: This is where you indicate the architecture type.
- -archivePath: This generates the archive into the folder path with the given name.
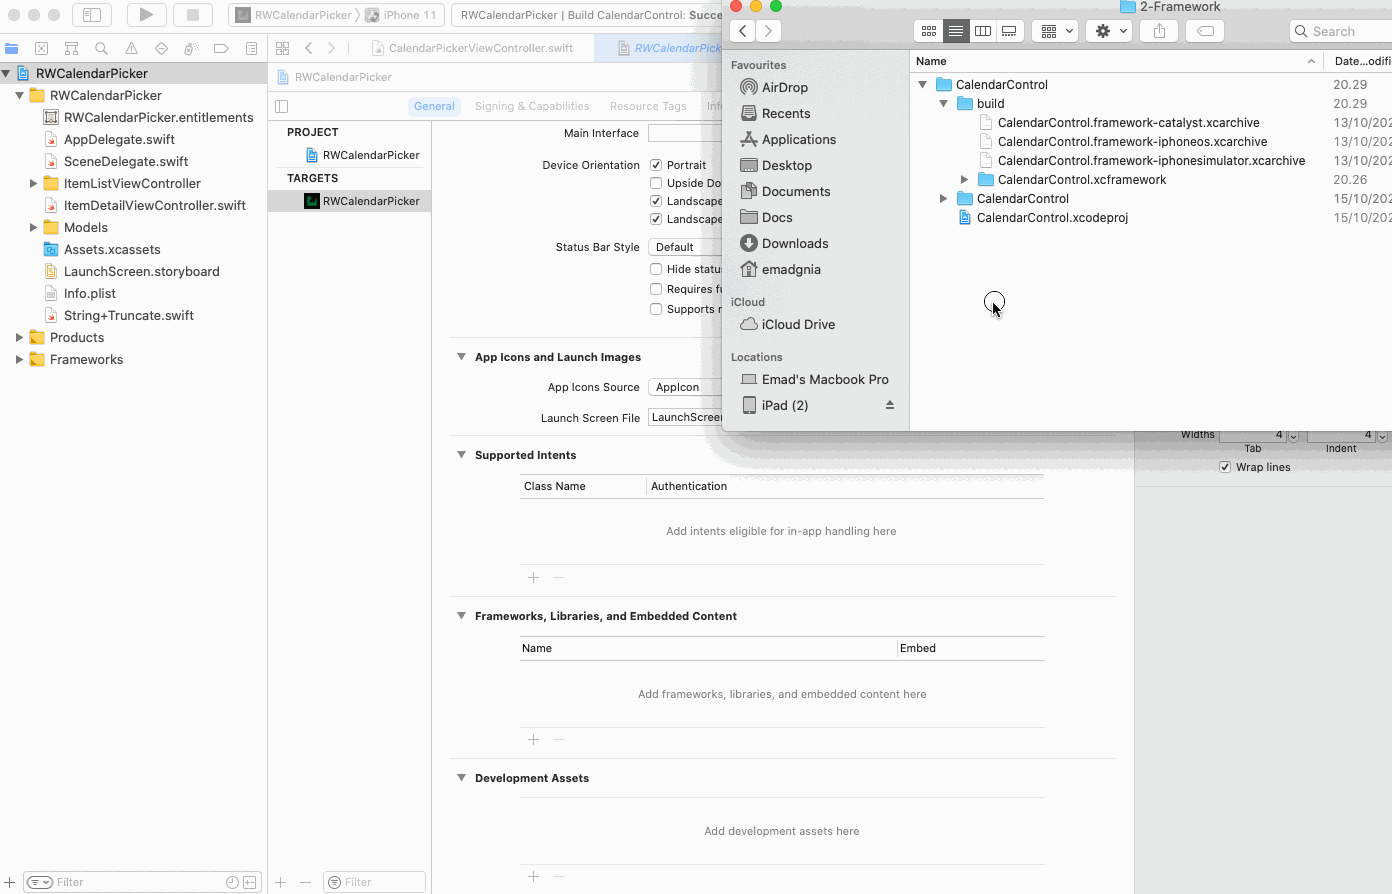
As you can see in your finder and the following screenshot, you generate three different archives files from your framework.

Generating the XCFramework
Now, make the binary framework, XCFramework. Add the following command to the terminal:
xcodebuild -create-xcframework \
-framework './build/CalendarControl.framework-iphonesimulator.xcarchive/Products/Library/Frameworks/CalendarControl.framework' \
-framework './build/CalendarControl.framework-iphoneos.xcarchive/Products/Library/Frameworks/CalendarControl.framework' \
-framework './build/CalendarControl.framework-catalyst.xcarchive/Products/Library/Frameworks/CalendarControl.framework' \
-output './build/CalendarControl.xcframework'
This command adds your XCFramework to the build folder using the previous archives you generated.
Check the build folder to see what the XCFramework includes.

Boooooom! You’ve now made your first XCFramework.

Integrating XCFramework Into Your Project
It’s time to remove the CalendarControl reference from the RWCalendarPicker project, like this:

You do this because you don’t need to have an access to your framework’s source code anymore. Drag XCFramework to the Frameworks, Libraries and Embedded Content section of your project target:
Build and run. You’ll have access to the same classes as before but this time your framework is only binary.
Distributing XCFramework as a Swift Package
At WWDC 2020, Apple announced that you can easily distribute your XCFramework within Swift Packages. Isn’t that awesome?
You should have a Swift Package for distributing your XCFramework. You’ll create one in the next section. Then you can share your fancy framework by publishing it on GitHub.