Swift Package Manager for iOS
Learn how to use the Swift Package Manager (SwiftPM) to create, update and load local and remote Swift Packages. By Tom Elliott.
The concept of a package is nothing new. Packages let you use third-party, open-source code with ease. They also make it easier to split your code into reusable, logical chunks you can easily share across your projects, or indeed with the entire world. :]
The Swift Package Manager, or SwiftPM, has been around since Swift 3.0. It was initially only available for server-side or command line Swift projects. Since the release of Swift 5 and Xcode 11, SwiftPM is compatible with the iOS, macOS and tvOS build systems for creating apps. This is great news for app developers because they can now unleash its power on their codebases!
A package is simply a collection of Swift source code files and a metadata, or manifest, file called Package.swift that defines various properties about the package, such as its name and any code dependencies it has.
In this tutorial, you’ll use learn all about the power of SwiftPM. You’ll add extra functionality into an app called Pen of Destiny, which is a silly app to solve a common problem: randomly choosing a person for a task. You’ll reuse an existing package and you’ll also create your very own package.
Getting Started
Download the project materials using the Download Materials button at the top or bottom of this tutorial. Open the starter project in Xcode. Build and run.

Within my team, the same person always volunteers to start a stand-up or scribe meeting notes. Ideally, everyone should share this load, so I started spinning a pen on the table to pick somebody at random for each task. This method worked well, but we didn’t always have a pen or a table.
So, like any good app developer, I built an app the team can use instead.
Tap the pen. It’ll spin before settling in a random direction. A slider controls the number of resting positions under the pen. These represent the number of people in your team.
You can access a settings screen via the gear icon in the navigation bar. There you can set the style of the pen.
Apple has acknowledged the bug and is working on a fix. Workarounds are available, but they add complexity to the app. Since this isn’t a navigation tutorial, I decided not to add the fix to the sample code.
Just run the sample on a device, or you’ll have to restart the app if navigating to Settings a second time doesn’t work.
Customizing the App
The app works, but is also missing functionality.
Navigate to the settings screen and select the fountain pen. Now navigate to the main screen. Notice the pen image hasn’t updated.
In Xcode, open SpinningPenView.swift. This file contains a simple SwiftUI view.
The body property defines a VStack. This starts with a Button control which renders an Image that’s hard coded to the sharpie asset. No wonder the image isn’t updating!
You could add images for the other pen types to the asset catalog, but this solution isn’t scalable. What if you wanted to add more pen types later, perhaps triggered by an in-app purchase or as a reward after unlocking extra functionality?
Instead, you’ll add functionality to generate the list of available pens at run time and load remote images from a server.
Add a new file using File ▸ New ▸ File…. Select an Empty file underneath the Other heading. Click Next, name your file pens.yml and click Create.

This file will contain the data about the available pens. In a real project, you’d download this from an API running on a server, but to keep things simple you’re including it in your app directly.
Open pens.yml and add the following text:
- key: sharpie
  label: Sharpie
  url: https://koenig-media.raywenderlich.com/uploads/2019/12/sharpie-1.png
- key: fountain
  label: Fountain Pen
  url: https://koenig-media.raywenderlich.com/uploads/2019/12/fountainPen-2.png
- key: biro
  label: Biro
  url: https://koenig-media.raywenderlich.com/uploads/2019/12/biro-1.png
YAML stands for Yet Another Markup Language. It’s an extensive and human readable format for structured data. Even if you haven’t seen YAML before, it should be fairly easy to understand. Each new pen starts with a dash character and contains three properties: a key, label and url.
But how to parse the YAML? You could write your own YAML parsing code, but surely somebody has already done this. This is where SwiftPM comes in.
Adding Open Source Packages
Yams is an open source YAML parser that’s already done all the hard work.
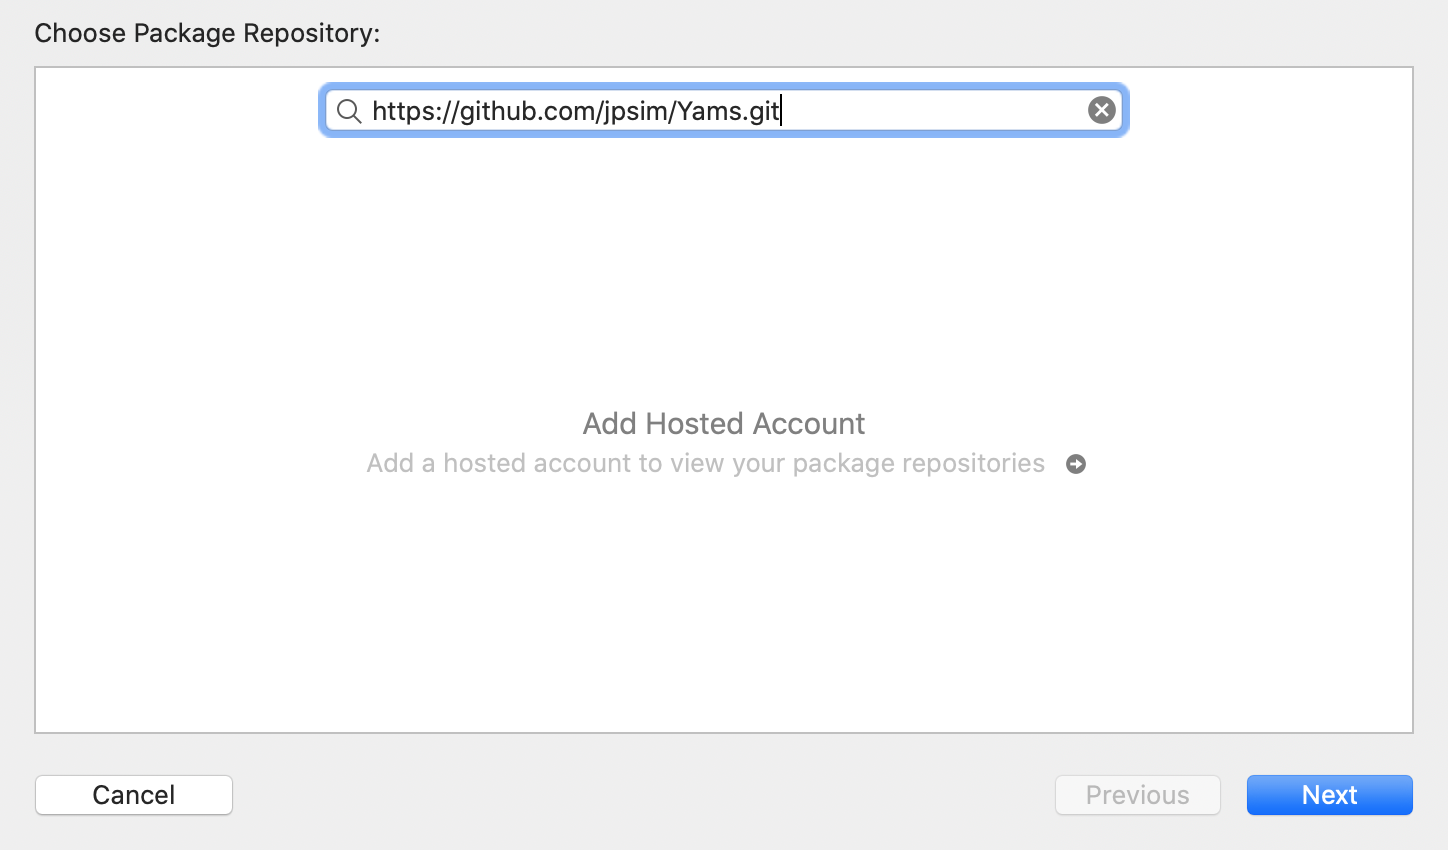
In Xcode, select File ▸ Swift Packages ▸ Add Package Dependency…. Copy the following and paste into the combined search/input box:
https://github.com/jpsim/Yams.git
This is the location of the GitHub repository containing the package. Click Next.
The next screen asks you to define the package options for this package. For now, select the default which accepts any version of the package up to the next major version. (As of writing this is therefore from 2.0.0, inclusive, to 3.0.0, exclusive.) Click Next.
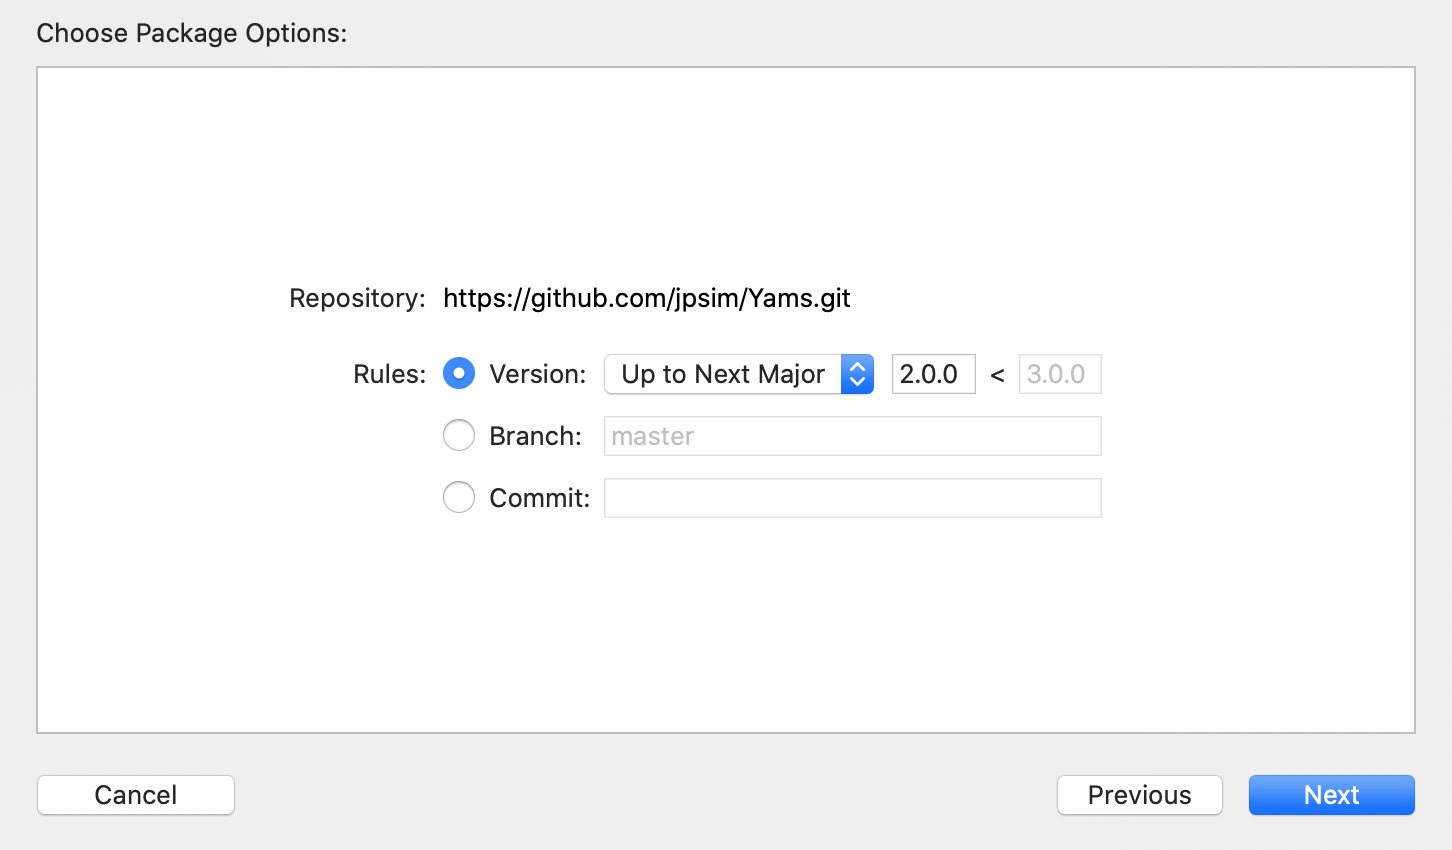
Xcode downloads the code from GitHub and adds the Yams package to the PenOfDestiny target. Click Finish.
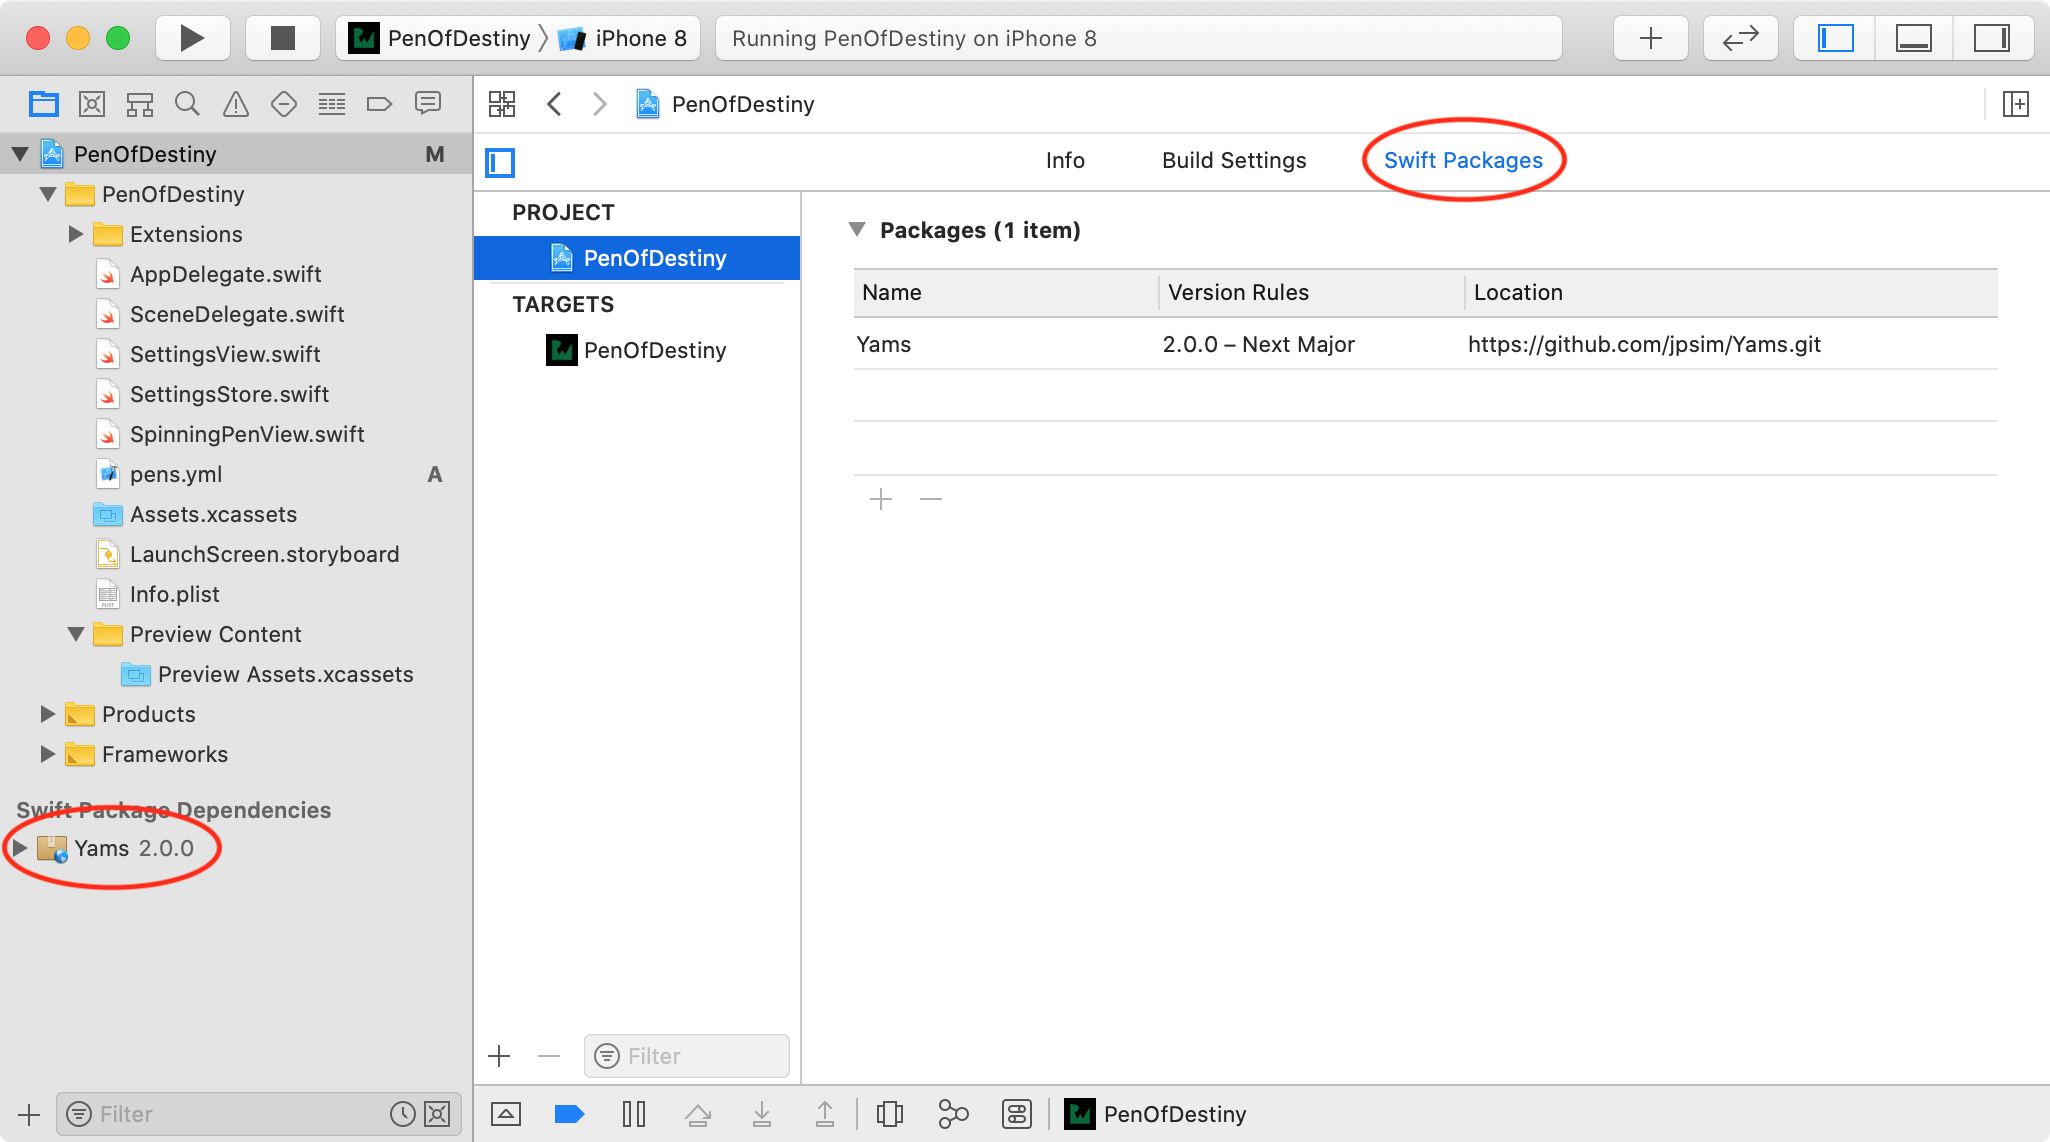
Note that there’s now a Swift Package Dependencies section in the Project Navigator on the left and a Swift Packages tab in the Project settings.
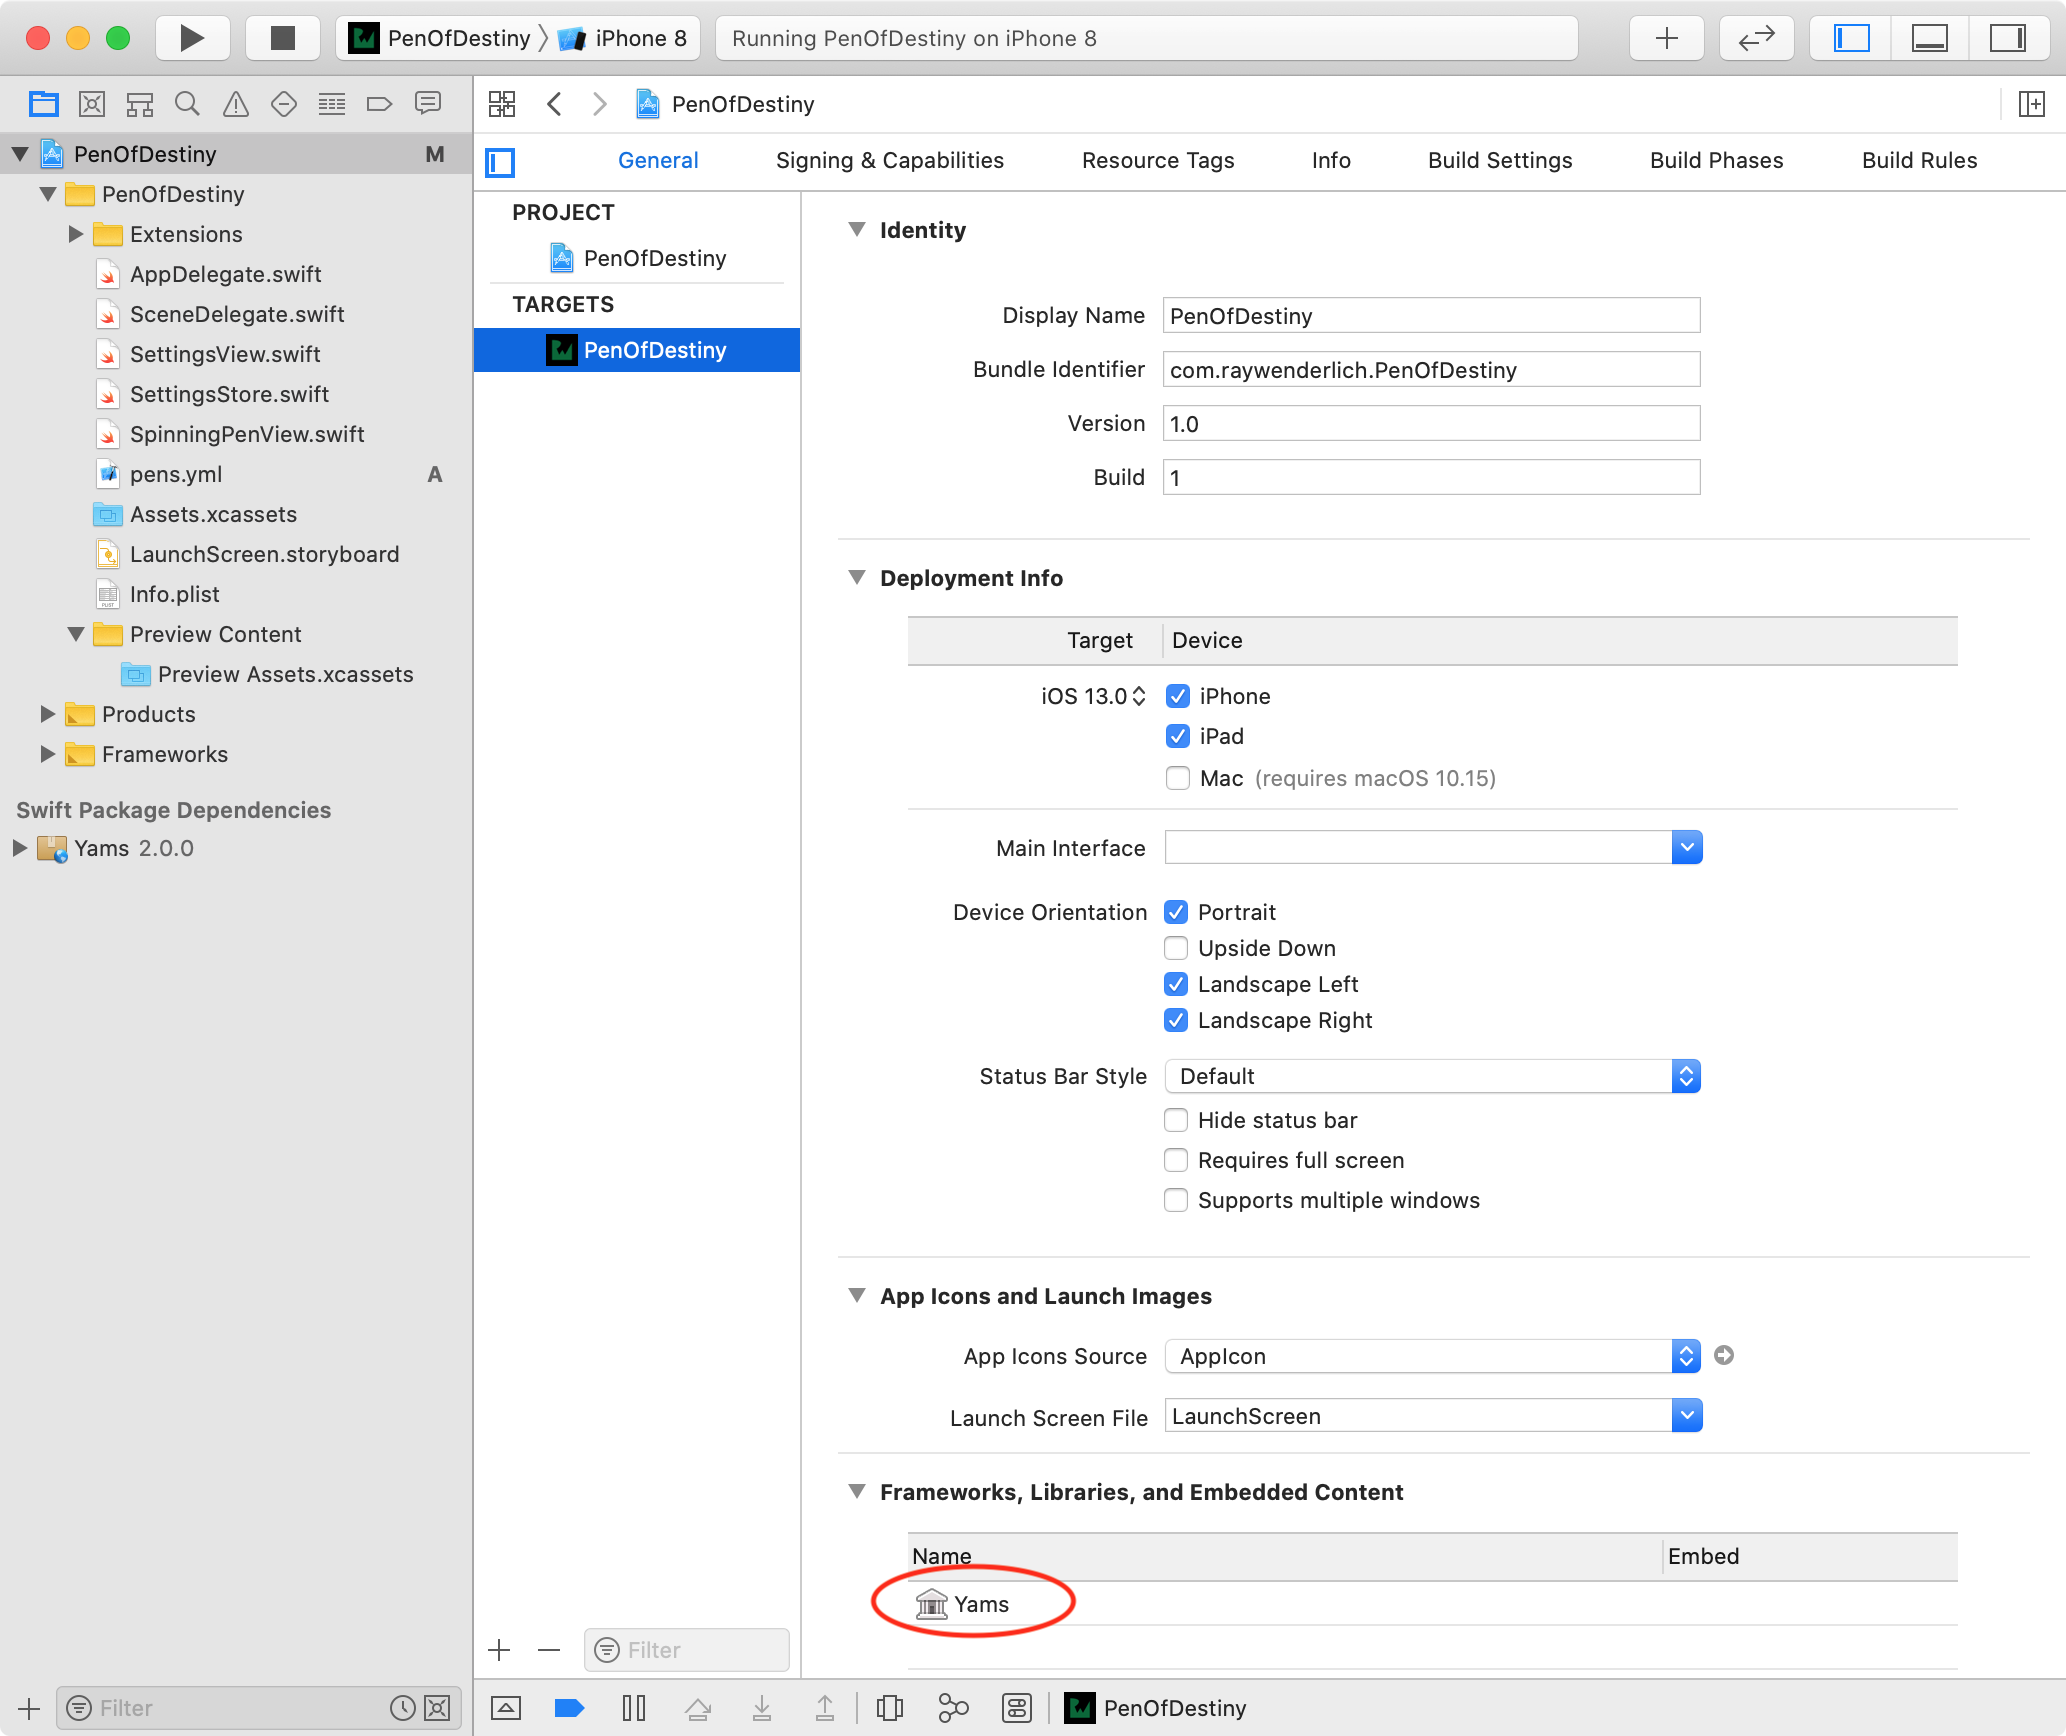
Select the PenOfDestiny target and note that Yams is automatically linked as a framework to your project target. Neat!
Build and run just to check that everything is still working. Yams will now be built as well and linked to your app.
Using Packages
Now that Yams is available in your project, it’s time to use it. Open SettingsStore.swift. This class defines a simple data store that saves the selected pen to UserDefaults as well as a function to get all available pens and the array of pens themselves.
At the top of the file, after importing Foundation, import the Yams library:
import Yams
Next, delete the availablePens static variable and replace the contents of getAvailablePens with the following:
// 1
if let path = Bundle.main.path(forResource: "pens", ofType: "yml") {
  do {
    // 2
    let yamlString = try String(contentsOfFile: path)
    // 3
    let decoder = YAMLDecoder()
    return try decoder.decode([Pen].self, from: yamlString)
  } catch {
    print("Could not load pen JSON!")
  }
}
// 4
return []
In this code, you:
- Obtain the path of the YAML file you created earlier.
- Fetch the contents of that file.
- Use the
YAMLDecoderclass provided by Yams to decode the YAML file and return an array of typePen. - Return an empty array if an error occurs along the way.
Build and run the app. Navigate to the settings screen and confirm that the three pens from before are still available.

You haven’t added any user facing changes to your app yet, but now the list of available pens is determined at run time rather than compile time. Furthermore, your app is running code you didn’t write and haven’t seen.