UICollectionView Custom Layout Tutorial: A Spinning Wheel
In this UICollectionView custom layout tutorial, you’ll learn how create a spinning navigation layout, including managing view rotation and scrolling. By Rounak Jain.
Bonus Material: Optimizations
You’ve successfully recreated the spinning navigation wheel, so give yourself a well deserved pat on the back! You could put your feet up on the desk and end the session here, but why would you stop there when there’s room for some scroll-smoothing optimization?
In prepareLayout() you create instances of CircularCollectionViewLayoutAttributes for every item, but not all of them end up on the screen at once. For these off-screen items, you can completely skip calculations and just not create layout attributes at all.
But there is a bit of a challenge here: you need to determine which item is inside the screen and which is off-screen. In the diagram below, any item that lies outside the range of (-θ, θ) will be off-screen.
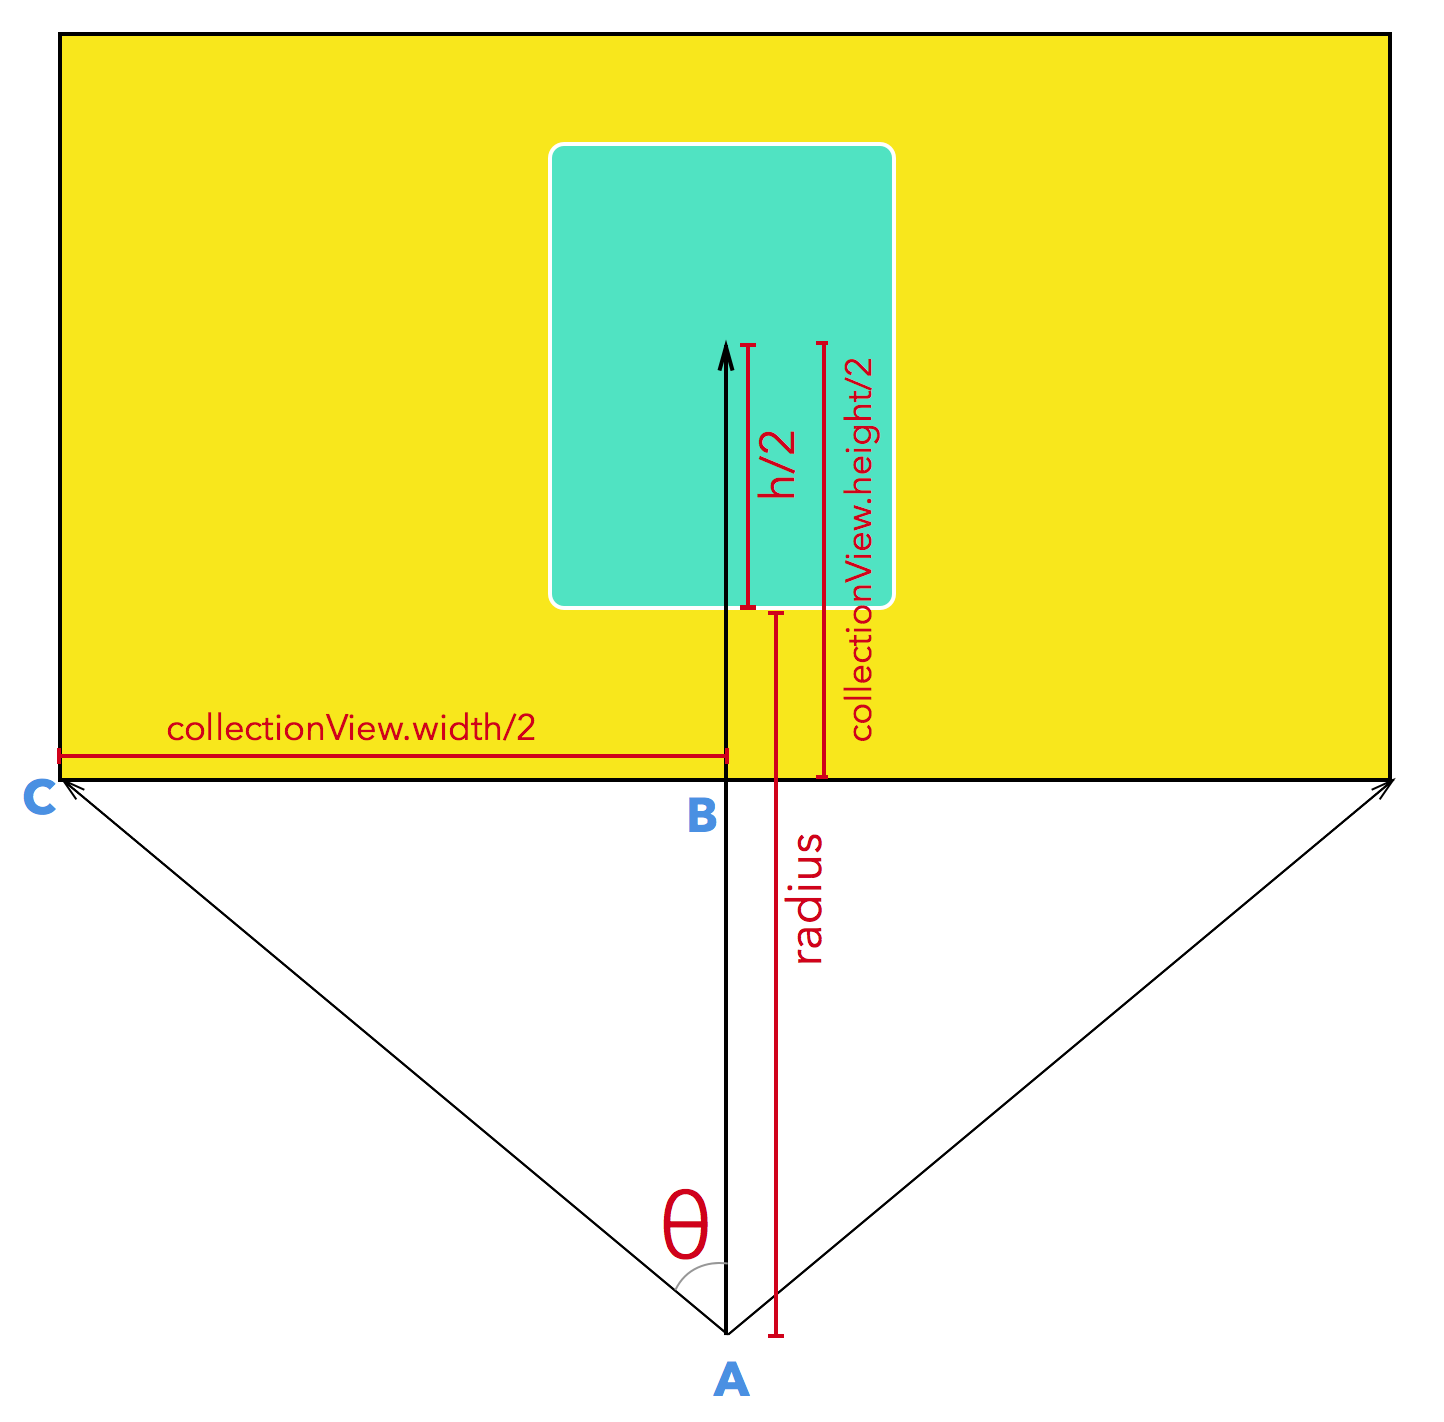
For instance, to calculate θ in triangle ABC, you’d do this:
tanθ = (collectionView.width / 2) / (radius + (itemSize.height / 2) - (collectionView.height / 2))
Add the following code to prepareLayout(), just below the declaration of anchorPointY:
// 1
let theta = atan2(CGRectGetWidth(collectionView!.bounds) / 2.0,
radius + (itemSize.height / 2.0) - (CGRectGetHeight(collectionView!.bounds) / 2.0))
// 2
var startIndex = 0
var endIndex = collectionView!.numberOfItemsInSection(0) - 1
// 3
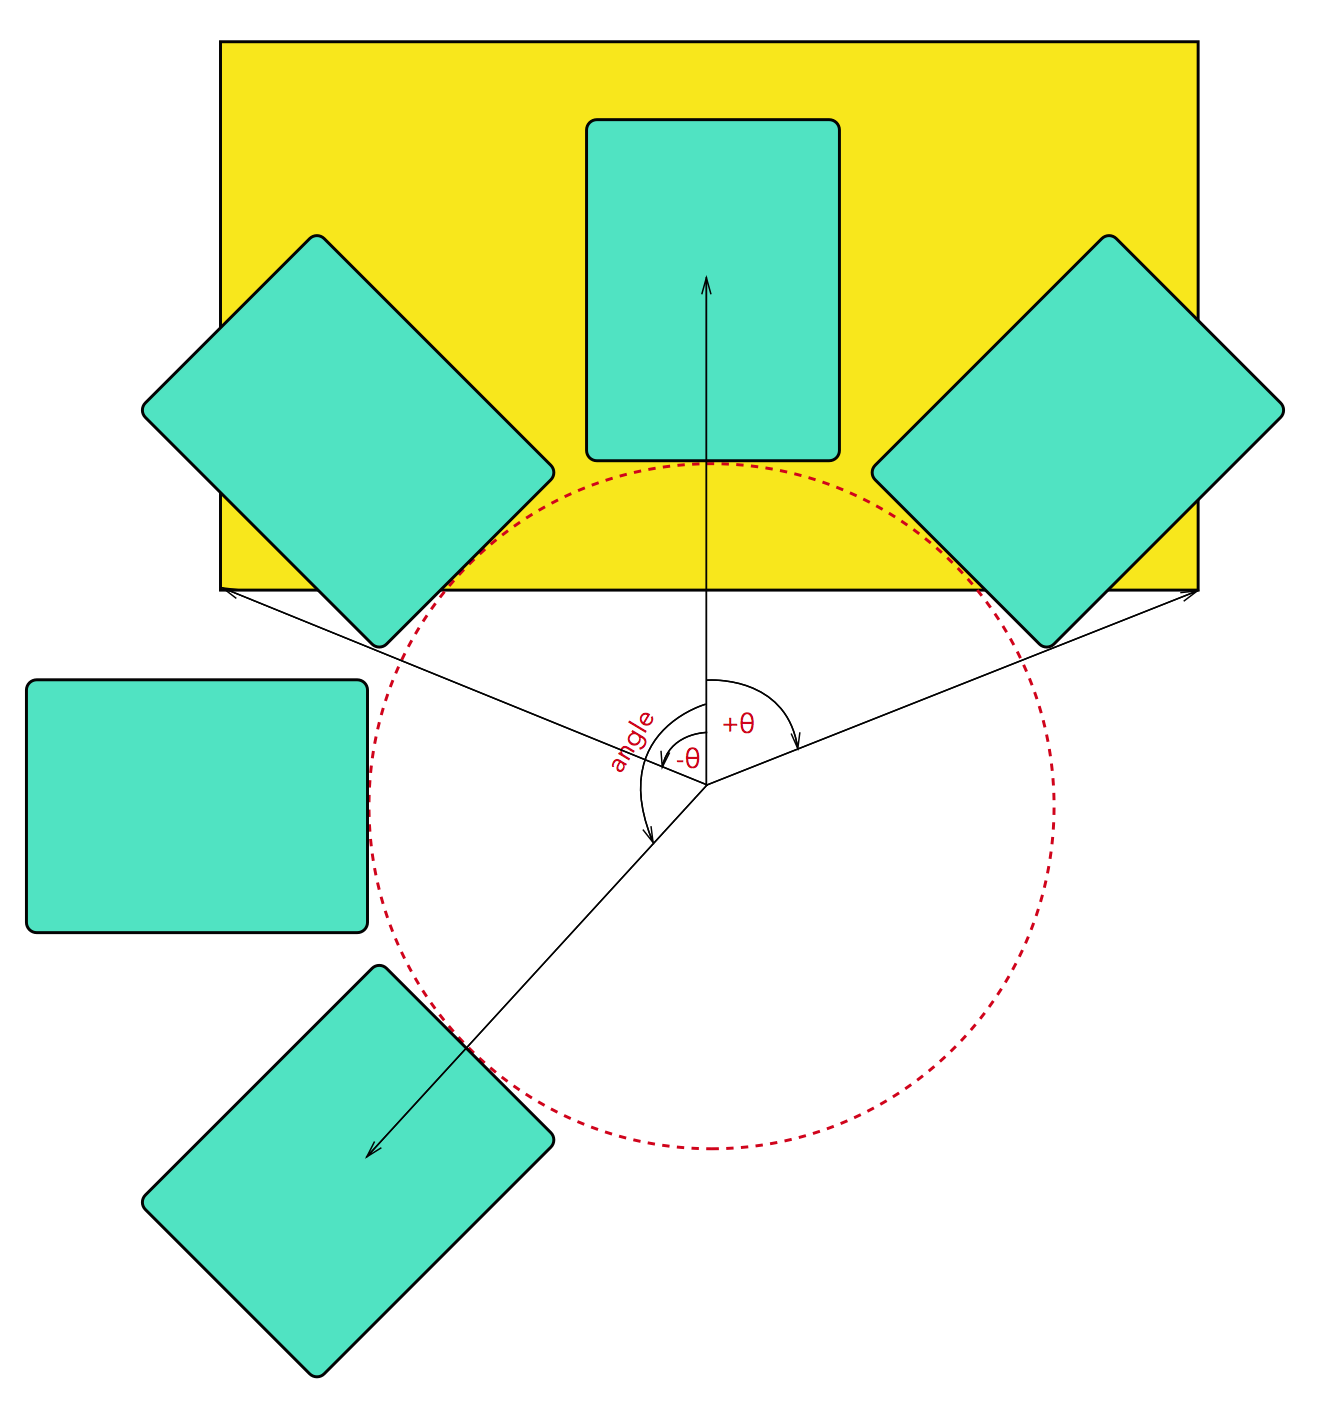
if (angle < -theta) {
startIndex = Int(floor((-theta - angle) / anglePerItem))
}
// 4
endIndex = min(endIndex, Int(ceil((theta - angle) / anglePerItem)))
// 5
if (endIndex < startIndex) {
endIndex = 0
startIndex = 0
}
What are you doing here?:
- You find
thetaby using the tan inverse function; - You initialize
startIndexandendIndexto 0 and the last item index respectively; - If the angular position of the 0th item is less than
-theta, then it lies outside the screen. In that case, the first item on the screen will be the difference between-θandangledivided byanglePerItem; - Similarly, the last element on the screen will be the difference between
θandangledivided byanglePerItem, andminserves as an additional check to ensureendIndexdoesn’t go beyond the total number of items; - Lastly, you add a safety check to make the range
0...0ifendIndexis less thanstartIndex. This edge case occurs when you scroll with a very high velocity and all the cells go completely off-screen.
Here's a diagram to explain the calculations above visually:
Click for higher resolution image
Now that you know which items are on-screen and which aren't, you need to update the range used to calculate the layout attributes in prepareLayout(). Find this line:
attributesList = (0..<collectionView!.numberOfItemsInSection(0)).map { (i)
    -> CircularCollectionViewLayoutAttributes in
and replace it with this one:
attributesList = (startIndex...endIndex).map { (i)
    -> CircularCollectionViewLayoutAttributes in
Now build and run. You’ll see no visual difference because all the changes affect off-screen items, but you should see fewer cells when you open Xcode’s builtin view hierarchy debugger.
And since you're creating fewer objects, you should also see a improvement in the performance.

Where To Go From Here
You can download the completed project here.

Congratulations, you've successfully used a UICollectionView custom layout to implement a spinning navigation wheel.
You've learned a number of things in this tutorial, including how to rotate views, change their anchor point, create your own custom collection view layout from scratch, and how to make it all look pretty.
To keep the learning party going, try playing around with values likes radius and anglePerItem in the layout to see how they affect the final circular arrangement. While this tutorial focuses on 2D transforms, you can create interesting effects by employing similar techniques to apply rotations in 3D space with transform3D.
You can also implement snapping behavior by overriding targetContentOffsetForProposedContentOffset(_:withScrollingVelocity:) in CircularCollectionViewLayout.
Think you're up to the task? Go for it. If you get stuck, open the spoiler below.
[spoiler title="Snapping behavior"]
override func targetContentOffsetForProposedContentOffset(proposedContentOffset: CGPoint, withScrollingVelocity velocity: CGPoint) -> CGPoint {
  var finalContentOffset = proposedContentOffset
  let factor = -angleAtExtreme/(collectionViewContentSize().width -
      CGRectGetWidth(collectionView!.bounds))
  let proposedAngle = proposedContentOffset.x*factor
  let ratio = proposedAngle/anglePerItem
  var multiplier: CGFloat
  if (velocity.x > 0) {
    multiplier = ceil(ratio)
  } else if (velocity.x < 0) {
    multiplier = floor(ratio)
  } else {
    multiplier = round(ratio)
  }
  finalContentOffset.x = multiplier*anglePerItem/factor
  return finalContentOffset
}
[/spoiler]
If you have questions, comments or would like to show off how you took the concepts in this tutorial to the next level, please join the discussion below!