Introduction to Unity: Getting Started – Part 1/2
Learn about the Unity Interface and how to create your first game in Unity with this Unity Tutorial for Beginners. By Brian Moakley.
4.8 (220) · 1 Review
![]()
When I first started looking into iOS game development, Xcode (before SpriteKit) made game development look very challenging. Unity, on the other hand, had a powerful visual editor and was also capable of publishing to mobile.
Looking at it further, I found the asset store and fantastic developer community made Unity a compelling option.
Today, Unity boasts more game development than any other game technology. And with support for almost 30 platforms including mobile, virtual reality, desktop and console, Unity isn’t just a good place to start, it’s the perfect place to start!
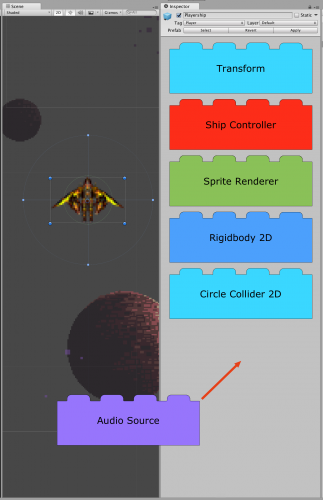
Unity employs a fantastic modular system to build scenes and characters in your game. Even if you’re just starting out, you can still make a pretty awesome spaceship with Unity’s basic lego brick set.
Or, if you feel you’re ready for the “highly sophisticated interlocking brick system” for adults, Unity gives you the ability to customize almost any component, such as writing your own shaders or rewriting the networking stacks to suit the needs of your game!
This is the first in a series of Unity tutorials designed to get you up to speed. In it, you’ll stick to the spaceport while you familiarize yourself with the engine environment and tools. Subsequent tutorials will focus on the details inside each subsystem.
In this Unity tutorial, you’ll learn:
- How to install Unity and the differences between the three different versions
- The views that make up the Unity interface
- Navigating inside the Scene view
- Adding and manipulating GameObjects and their Components
The first part of this tutorial is all about familiarizing yourself with the Unity User Interface.
In the second part of this tutorial, you’ll apply this knowledge to create your first game, a simple spaceship flying / asteroid blasting game. You’ll do so with the help of a fairy godmother who provides all the scripts and models, so you can focus more on the Unity Interface.
This tutorial is geared toward those with little or no Unity experience. Ideally, you should have some programming experience, but if not, don’t sweat it — we’ll walk you through the whole thing! :]
Getting Started
The first step of this tutorial is to download Unity. But wait — there are four different versions. Which should you choose?
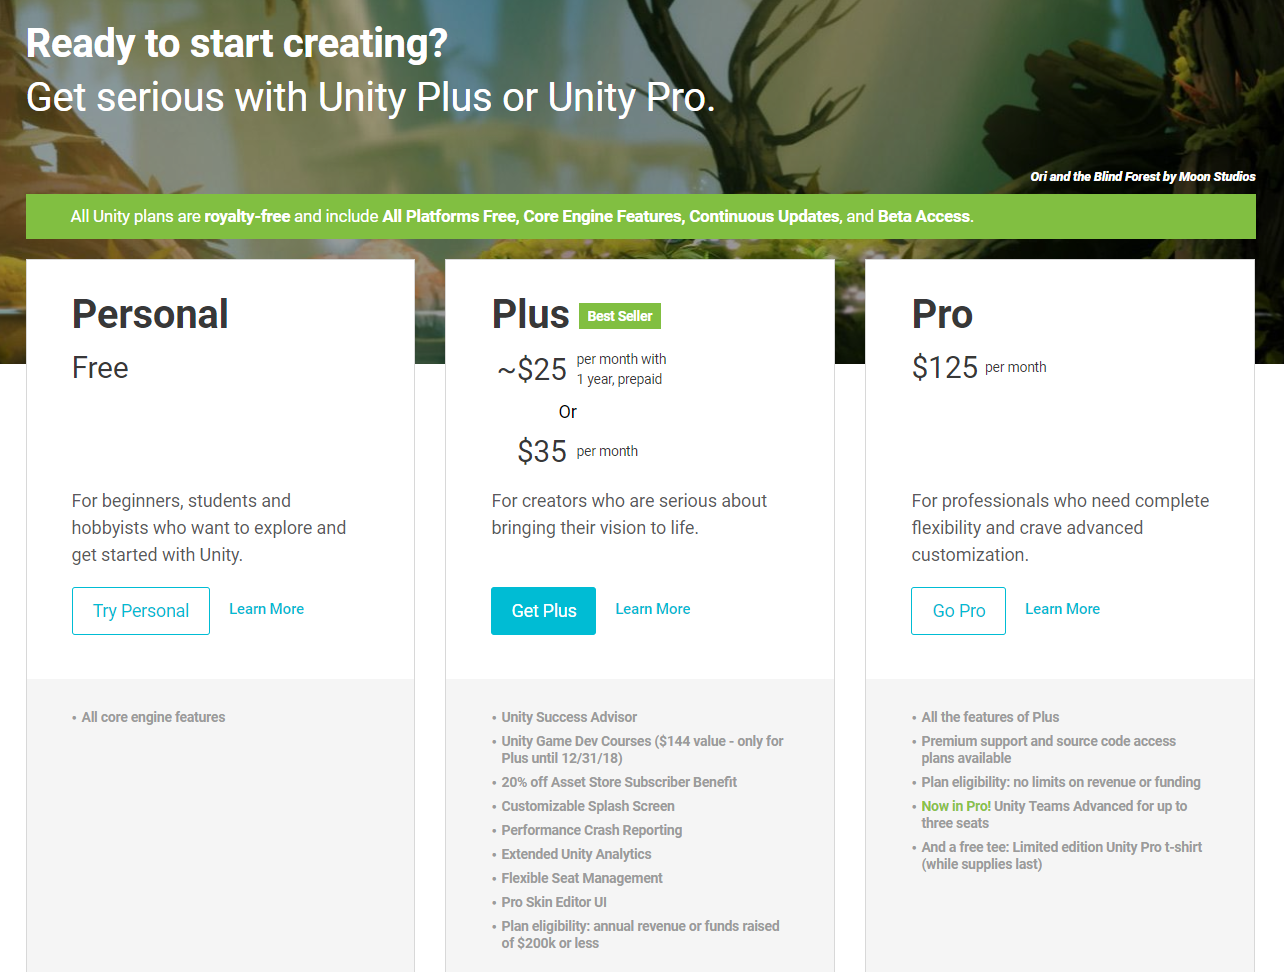
All versions of Unity provide you with the same engine features.
There’s also an Enterprise version where your custom needs dictate the subscription price.
The most noticeable difference between these versions is that games created with the Personal version have to start with a Unity splash screen, whereas any of the paid versions allow you to either remove the splash screen or create your own.
Additionally, there are different tiers of Unity services, such as Cloud Build and Analytics, that are unlocked at each price point.
Unity has some strict rules about how you can use the Personal edition. Before you start writing your next killer Unity app, be sure to check out the Unity FAQ to see if you’re eligible to use it.
For the purpose of following the tutorials, the Personal Edition is sufficient, so click the Try Personal button. This will take you to the download page. Click on the large Download Installer button.

Run the installer and follow the instructions on screen, which means clicking Continue and accepting the license agreement. Wait for the installation to complete and then launch Unity. You’ll be prompted to login before you can go any further.

You’ll need to create a free Unity account in order to use the software if you don’t have one already. To create a Unity account, click the create one link, and fill out the sign-up form.
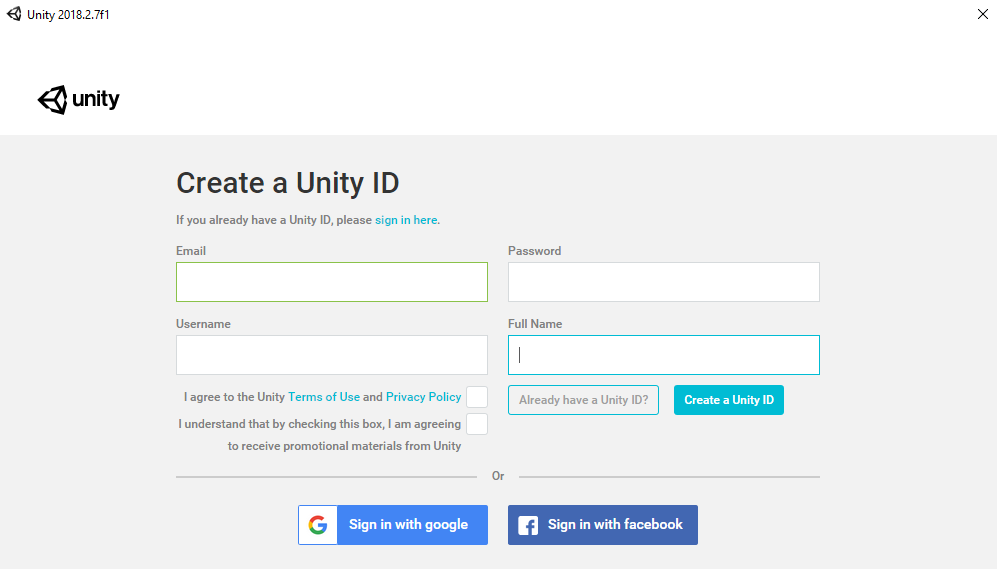
You’ll have to log in every time you use Unity, but there’s an offline mode if you need it.
Once you’ve created an account, log into Unity and confirm all of your license details. The projects dialog will automatically appear. This dialog allows you to create a new project, and looks something like this:

Click the New project button. You’ll see the dialog switch to the following:

- Personal: Free (as in beer)
- Plus: Costs $35/mo per seat
- Pro: Costs $125/mo per seat
- Name your project Space Debris, and pick a location on your hard drive to save it.
- You’ll notice that you have a few options. Each template pre-configures Unity to save you time depending what you want to do. For now, select 3D.
- The Asset packages button lets you import custom packages into your project. For instance, if you’re making a first person shooter, you may want to import Unity’s first-person controller package.

This is simply a convenience feature at the time of project creation. You’re able to import packages at any point during your project’s lifecycle. For this tutorial, you don’t need any of the standard assets.
- Unity Analytics can be left Off since it isn’t covered in this tutorial.
- Finally, click on Create project, and Unity will open your first project.
Breaking Down the Interface
When Unity first opens, you’ll see a window that looks like this:

The interface can be a bit overwhelming at first. Take a deep breath and tell yourself it’s going to be all right! :]
The interface is highly customizable and can provide you with as much or as little information as you need.
In the upper right hand corner, you’ll see five buttons. Select the last one on the right. This is the Layout Dropdown. From the list of options, select the 2 by 3 option.

Your editor should now look like the image below:

Here’s the breakdown of the various sections:
1. Scene View
The Scene view is where you construct your game. It’s where you add all models, cameras, and other pieces that make up your game. This is a 3D window where you can visually place all the assets you’re using.

As you test your game in Unity, the scene view will update itself with the current game’s state. You can even add new elements on-the-fly to the scene.
When you stop the game, the scene view will revert back to its original state. Any changes you make to the Scene view while you’re playing the game will be lost when it stops.