Unreal Engine 4 Cel Shading Tutorial
In this Unreal Engine 4 tutorial, you will learn how to use post process materials to create a cel shader. By Tommy Tran.
5 (27) · 1 Review
Changing LUT Settings
Navigate to the Textures folder and open T_Lut_01. This is what the LUT looks like:

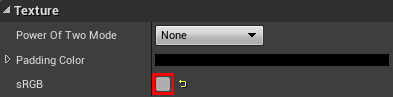
The first setting you need to change is sRGB. When rendering, Unreal will convert any textures with sRGB enabled to linear color. Basically, this makes it easier for Unreal to perform rendering calculations.
The sRGB setting is good for textures which describe appearance. However, textures such as normal maps and LUTs hold values meant for math calculations. As such, Unreal should assume their values are already correct. By disabling sRGB, Unreal will not perform the conversion to linear color.
To do this, uncheck the sRGB checkbox. You can find this setting under the Texture section.
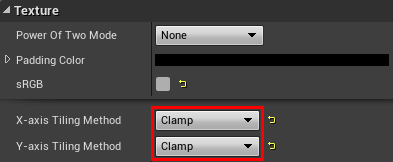
The next setting you need to change is how the texture tiles. Since you are not displaying this texture, there is no need to tile it. Furthermore, leaving tiling enabled will introduce issues when sampling from the edges. For example, if you were to sample a pixel from the left edge, it will try to blend to the right edge because of tiling.
To disable tiling, change X-axis Tiling Method to Clamp. Do the same for Y-axis Tiling Method.
That’s all for the settings. Now you need to use the LUT in the post process material.
Using LUTs
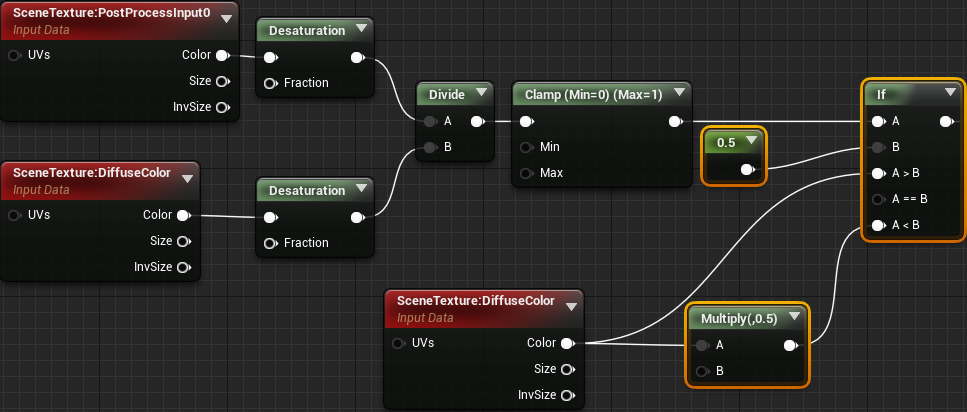
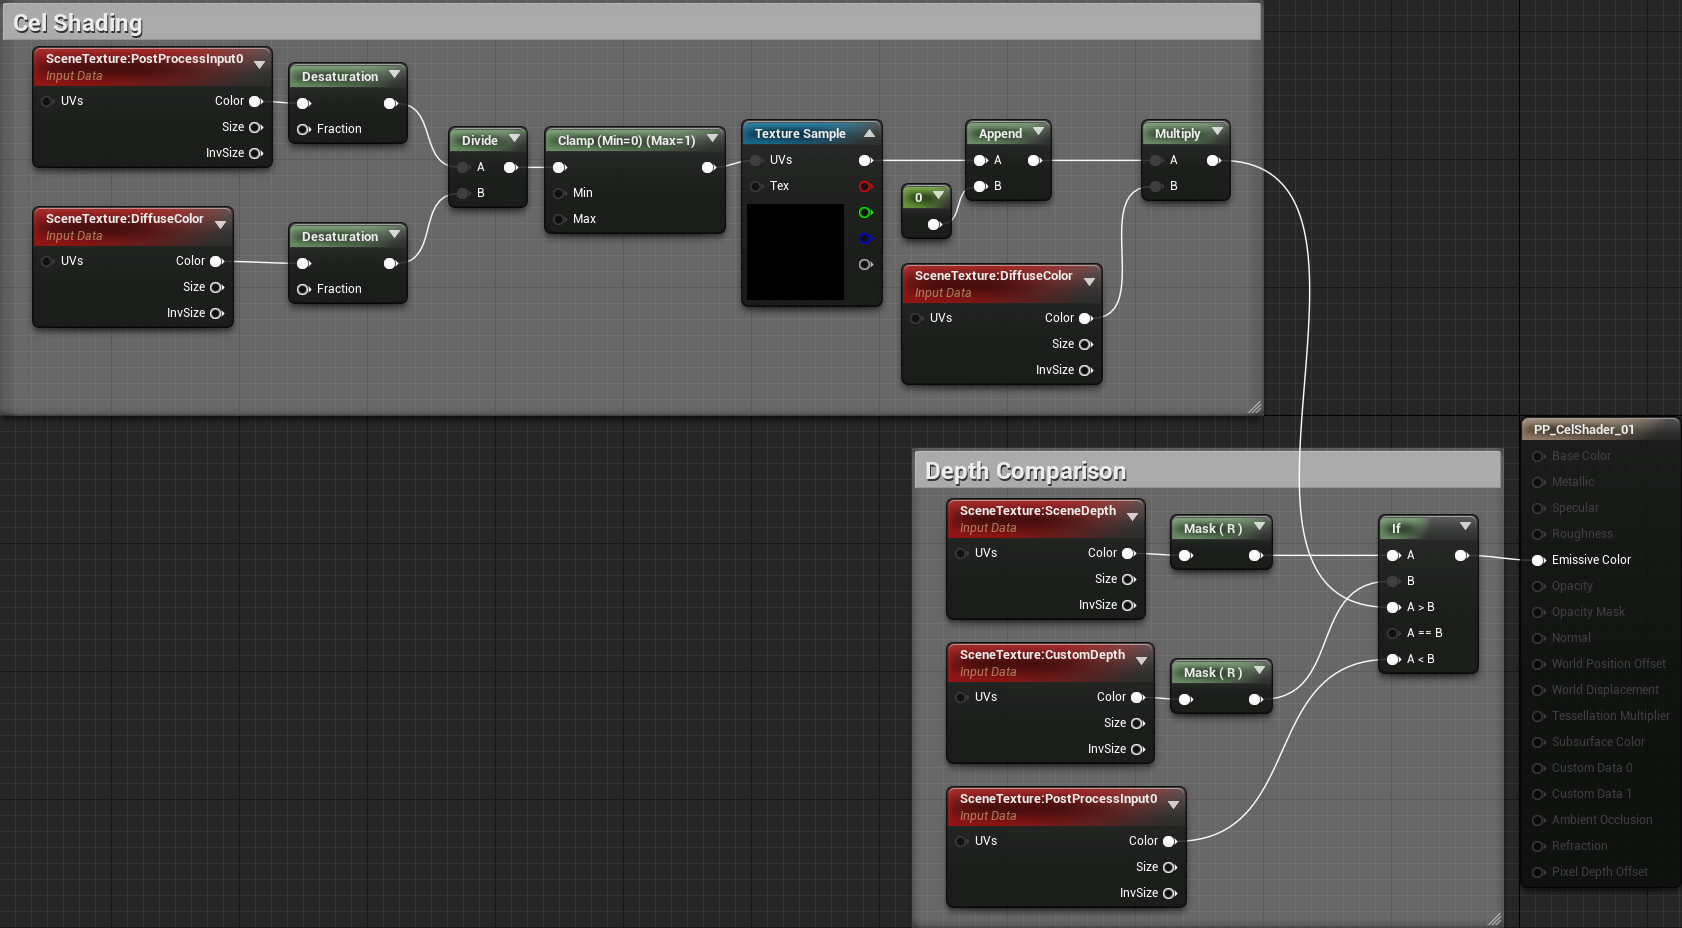
Close T_Lut_01 and open PP_CelShader. First, delete the highlighted nodes:
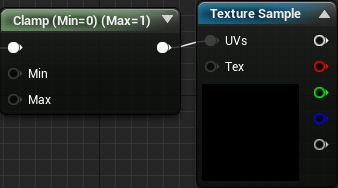
Next, create a Texture Sample and change its Texture to T_Lut_01. This LUT will create three bands with a soft transition.

If you remember, LUTs take inputs to determine which value to output. In this case, you will use the lighting buffer as the input.
To do this, connect the Clamp to the UVs of the Texture Sample.
This works because the lighting buffer and texture coordinates are in the range of 0 to 1. For example, if a pixel from the lighting buffer is 0.5, the LUT will output the pixel value from the middle of the texture.
Next, you need to multiply the diffuse color with the LUT. To do this, recreate the following setup:
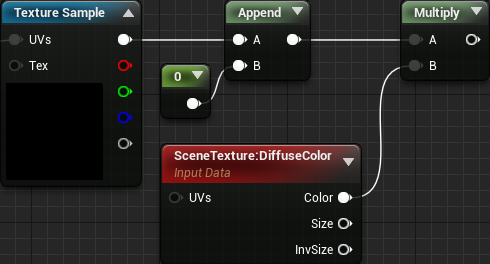
The reason for the Append is to convert the Texture Sample’s output to a four-channel vector. You need to do this because you cannot multiply a three-channel vector by a four-channel vector (SceneTexture).
Finally, connect everything like so:
Now, instead of multiplying diffuse color by a constant, you are multiplying by a value from the LUT. This controls how many bands there are and their transitions (depending on the LUT). The lighting buffer determines which value the LUT will output.
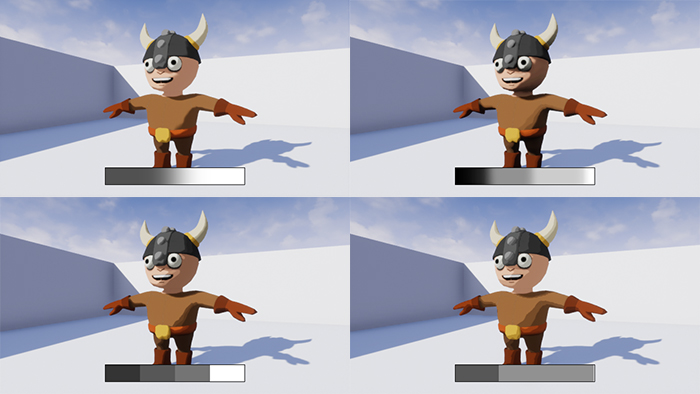
Click Apply and then close PP_CelShader. The shading will now have three bands with a softer transition between bands.

Below is a comparison of what alternative LUTs would look like. These LUTs are also included in the project.
Where to Go From Here?
You can download the completed project here.
As you can see, post process materials are very powerful. They allow you to create a lot of realistic and stylized effects. If you’d like to learn more about post processing, check out the Post Process Effects documentation.
If there are any effects you’d like to me cover, let me know in the comments below!