Unreal Engine 4 Cel Shading Tutorial
In this Unreal Engine 4 tutorial, you will learn how to use post process materials to create a cel shader. By Tommy Tran.
5 (27) · 1 Review
Creating a Threshold
For this cel shader, any pixel with a value greater than 0.5 will use the normal diffuse color. Pixels with a value less than 0.5 will use the diffuse color at half brightness.
First, create an If node. This will let you compare two values. You can then specify different outputs depending on the comparison result.
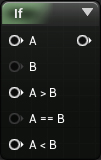
Next, connect the Clamp to the A input. Afterwards, create a Constant with a value of 0.5 and plug it into the B input.

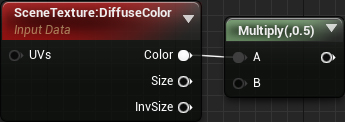
To get the colors, create a SceneTexture and set its Scene Texture Id to Diffuse Color. Afterwards, multiply Color by 0.5 to get the diffuse at half brightness.
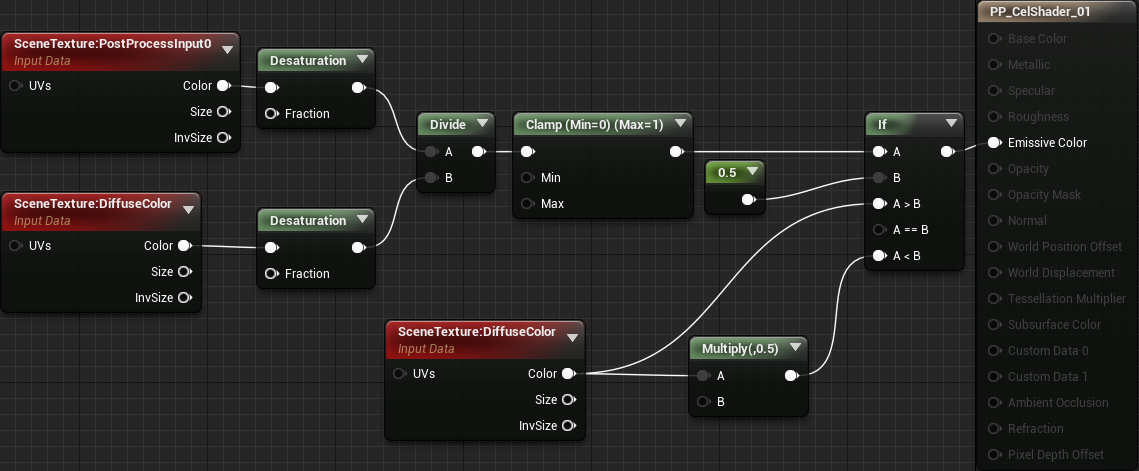
Finally, connect everything like so:
Summary:
- Desaturation will convert Post Process Input and Diffuse Color to grayscale images
- Divide will divide Post Process Input by Diffuse Color. This will give you the lighting buffer.
- The Clamp will keep the values within the 0 to 1 range
- The If will output the normal diffuse color if the lighting value is greater than 0.5. If it is less than 0.5 it will output the diffuse color at half brightness.
Now that you have your cel shader, you need to apply it to the scene.
Using Post Process Materials
To use post process materials, you need to create a Post Process Volume. These are commonly used to control post process effects such as white balance, saturation and contrast.
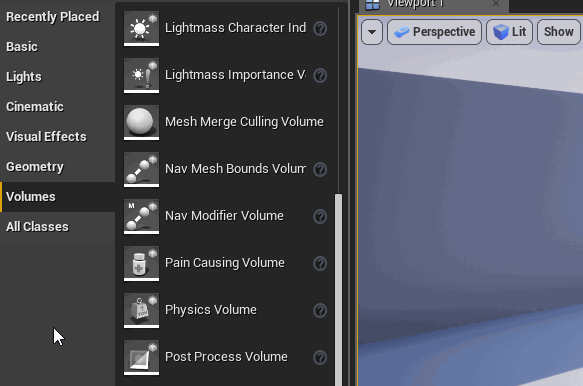
Click Apply and then go back to the main editor. To create a Post Process Volume, go to the Modes panel and select the Volumes category. Afterwards, drag a Post Process Volume into the Viewport to create one.
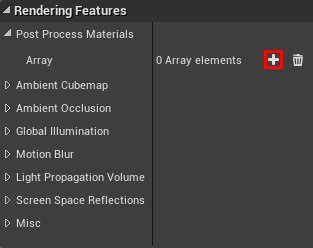
Now you need to tell the Post Process Volume to use the cel shader. With the Post Process Volume selected, go to the Details panel. Afterwards, locate Rendering Features\Post Process Materials and click the + icon. This will add a new entry to the array.
Next, click the Choose drop-down and select Asset Reference.
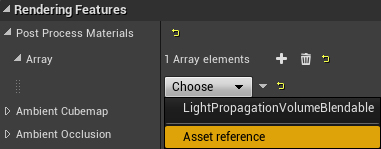
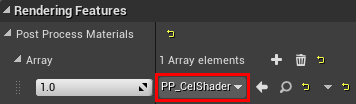
This will allow you to select a material. Click the None drop-down and select PP_CelShader.
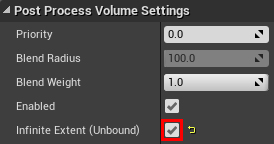
By default, Post Process Volumes will only take affect if you are inside of it. However, in this case, you want it to affect the entire world. To do this, scroll down to Post Process Volume Settings and enable Infinite Extent (Unbound).
Now that the cel shader is being applied to the entire image, you will see this:
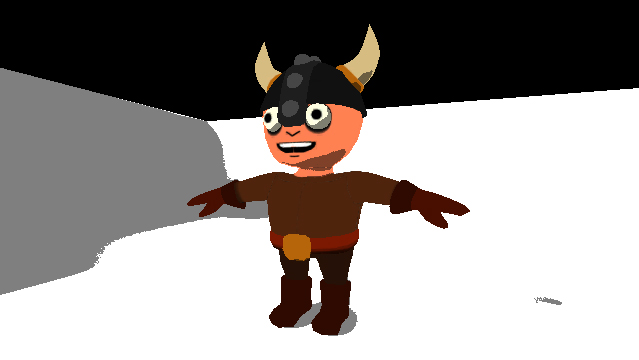
"Hang on, that doesn’t look like the cel shader you showed earlier!"
The main reason it looks different is because the engine is applying the cel shader after tonemapping. To fix this, you need to tell the engine to apply the cel shader before tonemapping.
Applying Cel Shading Before Tonemapping
Before displaying an image to the player, Unreal performs a process called tonemapping. One of the reasons for tonemapping is to make the image look more natural. It does this by taking an input color and then uses a curve to shift it to a new value.
Below are two images of the Post Process Input buffer. One before tonemapping and one after tonemapping:
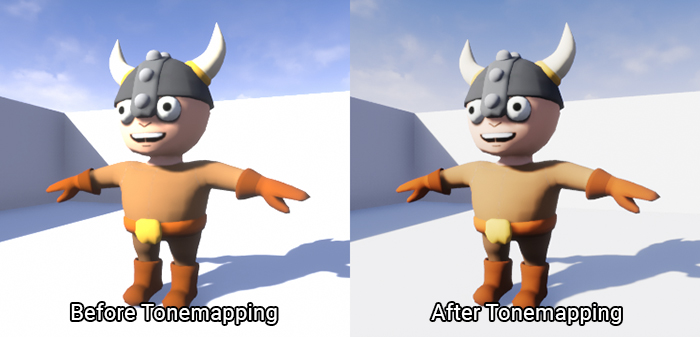
As you can see, the highlights before tonemapping are too bright. However, after tonemapping, the bright areas are softer.
Tonemapping is fine in most cases. However, since you are using the Post Process Input buffer in a calculation, you need its original values.
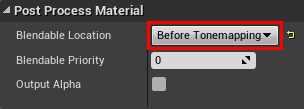
Open PP_CelShader and make sure you do not have anything selected. Afterwards, go to the Details panel and locate the Post Process Material section. Set Blendable Location to Before Tonemapping.
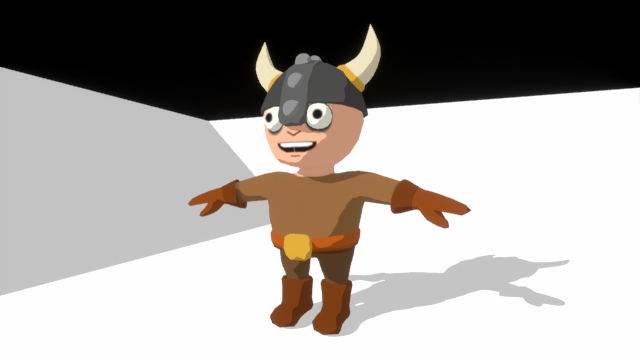
Click Apply and then go back to the main editor. The colors are looking a lot better now!
In the next section, you will learn how to only apply cel shading to specific objects.
Isolating the Cel Shader
To isolate post process effects, you need to use a feature called Custom Depth. Like Post Process Input and Diffuse Color, this is a buffer you can use in post process materials.
Before you learn what Custom Depth is, you should know what the Scene Depth buffer is. Scene Depth stores how far each pixel is from the camera plane. Here is a visualization of Scene Depth:
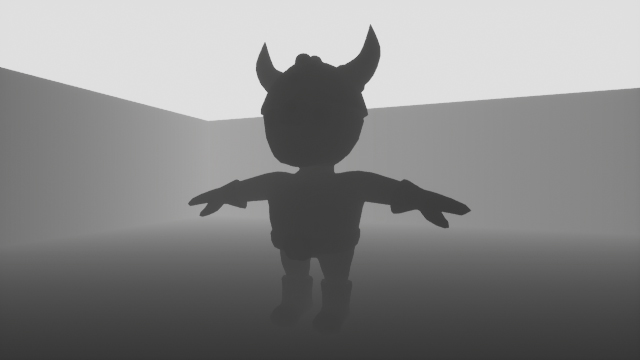
Custom Depth stores the same information but only for meshes you specify. Here is a visualization of it with the viking rendered to Custom Depth:

By comparing Scene Depth against Custom Depth, you can isolate effects. If Scene Depth is less than Custom Depth, use the normal image. If Scene Depth is greater than Custom Depth, use the cel shaded image.
The first step is to render the viking to Custom Depth.
Using Custom Depth
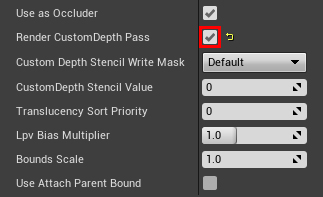
Go to the World Outliner and select SK_Viking. Afterwards, go to the Details panel and locate the Rendering section. Next, enable Render CustomDepth Pass.
Next, you need to perform the depth comparison. Open PP_CelShader and create the following setup:
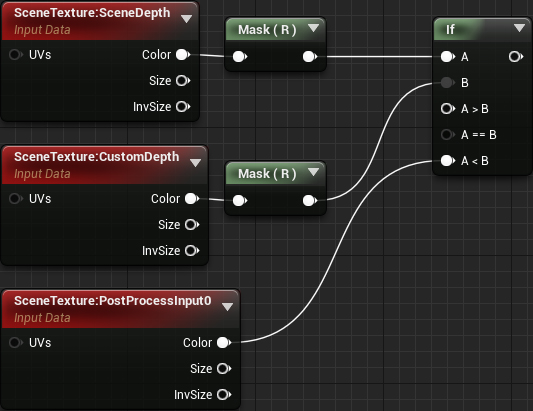
Afterwards, connect the output of the cel shading network to A > B. Finally connect the output of the If you just made into Emissive Color.

Now, only meshes that rendered to Custom Depth will have cel shading.
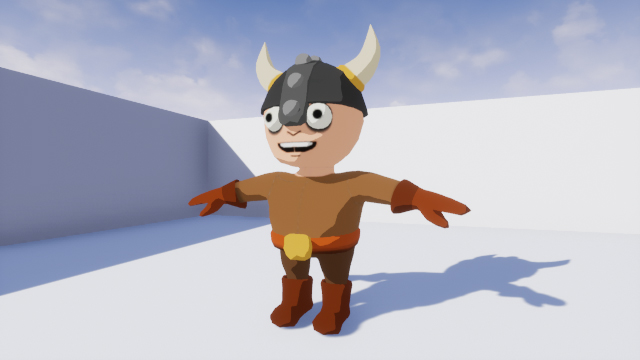
Click Apply and then go back to the main editor. You will see that only the viking has cel shading now.
The cel shader is working great but it’s a bit simple. What if you want to have more than two bands? What if you want to create a softer transition between bands? You can accomplish this by using lookup tables (LUT).
What is a Lookup Table?
When you were young, you learned what multiplication is. However, a young mind might not have been able to perform these calculations. Instead of calculating, you might have used a multiplication table to "look up" the answers.
This is essentially what a LUT is. It is an array of values (usually precomputed) which you can access with inputs. In the case with the multiplication table, the inputs are the multiplier and multiplicand.
In the context of this cel shader, a LUT is a texture with some sort of gradient. Here are four examples of what a LUT could look like:
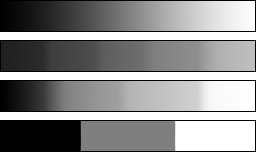
Currently, the way you are calculating the shadow color is by multiplying the diffuse color by 0.5. Instead of multiplying by a constant 0.5, you will use a value from the LUT. By doing this, you can control the number of bands and their transitions. You can get an idea of how the shading would look by the appearance of the LUT.
Before you use a LUT, you need to change some of its texture settings.