Unreal Engine 4 Cel Shading Tutorial
In this Unreal Engine 4 tutorial, you will learn how to use post process materials to create a cel shader. By Tommy Tran.
5 (27) · 1 Review
Developing realistic-looking games is Unreal Engine 4 is easy due to physically based rendering. This model approximates how light interacts with materials, resulting in realistic images. However, if you want to develop a game with a stylized look, you need to explore other techniques.
One of the ways to achieve a stylized look is to use cel shading (also known as toon shading). This technique mimics the shading typically used in cartoons and anime. You can see examples of this in games such as Jet Set Radio, The Legend of Zelda: The Wind Waker and Gravity Rush.
In this tutorial, you will learn how to:
- Create and use a post process material
- Create a cel shader
- Isolate the cel shader to specific meshes
- Control the color bands using lookup tables
- Part 1: Cel Shading (you are here!)
- Part 2: Toon Outline
- Part 3: Custom Shaders Using HLSL
- Part 4: Paint Filter
Getting Started
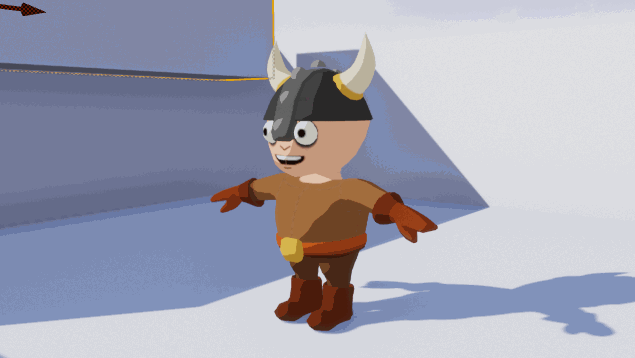
Download the starter project and unzip it. Navigate to the project folder and open CelShader.uproject. You will see the following scene:
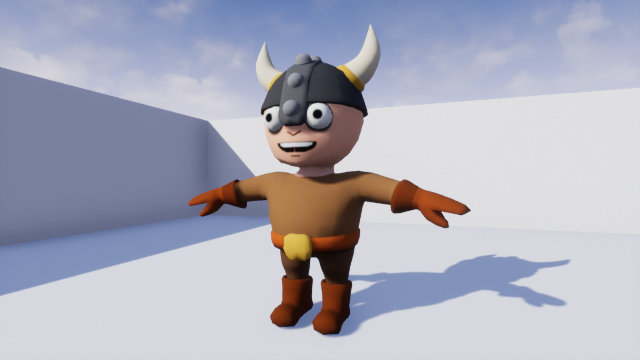
This is the character you will be cel shading. Before you start, you should know what cel shading is.
What is Cel Shading?
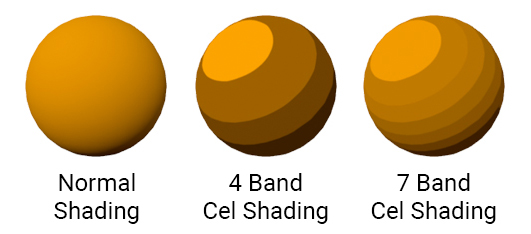
Cel shading is when you render something using multiple bands of color rather than a continuous gradient.
Below is an example of cel shading in The Legend of Zelda: Breath of the Wild. Note that only the character has cel shading while the background does not.

In this image, there are three bands. One for shadows, one for midtones and one for highlights.
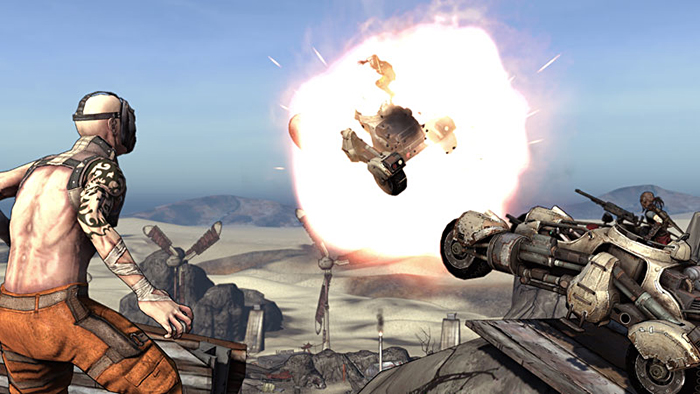
A common misconception is that if something has outlines, it is cel shaded. An example of this is Borderlands. Although this game has a stylized look, it is not cel shaded. You can see this in the image below. Notice that the character’s shading does not utilize bands of color.
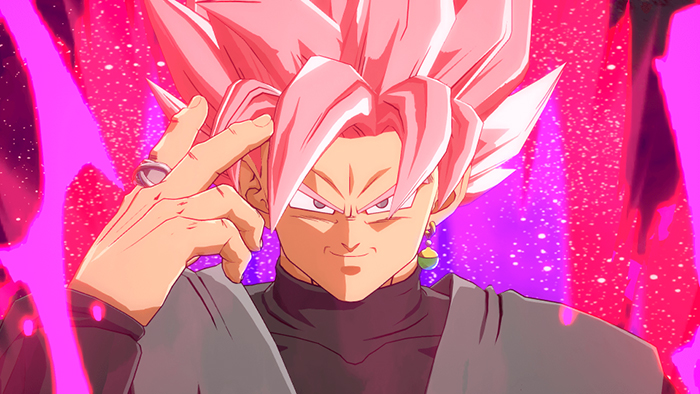
Even though outlines are not cel shading, it is common to combine them together. This helps an image look like it was drawn or inked. You will see this a lot in anime-styled games such as Guilty Gear Xrd and Dragon Ball FighterZ.
In the next section, you will learn how you can implement cel shading.
Cel Shading Method
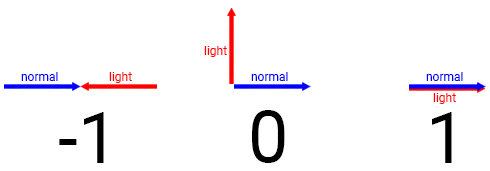
The most common method is to compare the surface direction (known as the normal) and the light direction. By calculating the dot product between the normal and light direction, you will get a value between -1 and 1.
A value of -1 means the surface and light are facing opposite directions. 0 means they are perpendicular to each other. 1 means they are facing the same direction.
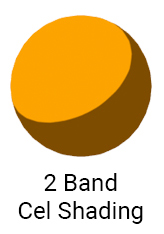
By thresholding the dot product, you can create multiple bands. For example, you can assign a darker color if the dot product is higher than -0.8. If the dot product is lower than -0.8, assign a light color. This will create a two band cel shader.
The limitation with this method is that other lights cannot affect cel shaded objects. Also, objects can not cast shadows on cel shaded objects.
To fix this, you need to use a different method. Instead of calculating the dot product, you calculate how lit a surface is. You can then use this value during thresholding instead of the dot product.
Now that you know what a cel shader is and how it works, it’s time to create one.
Creating the Cel Shader
The cel shading in this tutorial is a post process effect. Post processing allows you to alter the image after the engine has finished rendering it. Common uses for post processing are depth of field, motion blur and bloom.
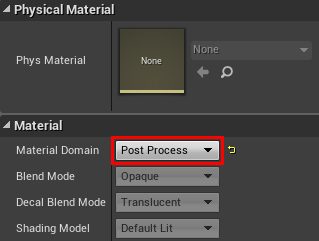
To create your own post process effect, you need to use a post process material. Navigate to the Materials folder and create a new Material. Rename it to PP_CelShader and then open it.
To convert a material to a post process material, you need to change its domain. Go to the Details panel and change Material Domain to Post Process.
The first step in creating the cel shader is to calculate how lit each pixel is. We’ll call this the lighting buffer.
Calculating the Lighting Buffer
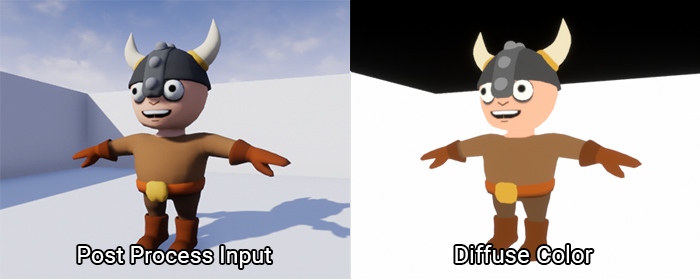
When Unreal renders an image to the screen, it stores passes to buffers. To calculate the lighting buffer, you will need to access two of these buffers:
- Post Process Input: Once Unreal has performed lighting and post processing, it will store the image to this buffer. This is what Unreal will display to the player if you do not perform further post processing.
- Diffuse Color: This is the scene without any lighting and post processing. It will contain the diffuse colors of everything on-screen.
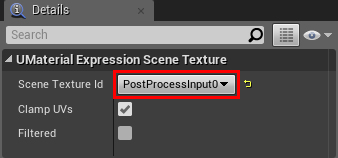
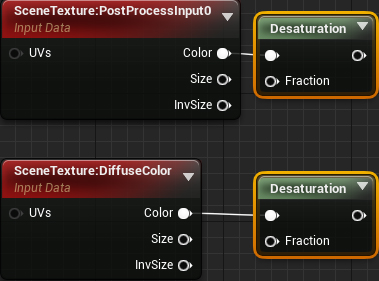
To access these buffers, you need to use the SceneTexture node. Create one and with it selected, go to the Details panel. To access the Post Process Input buffer, change Scene Texture Id to PostProcessInput0.
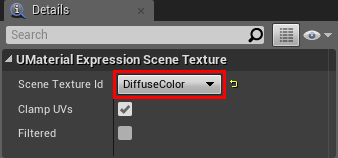
To access Diffuse Color, create another SceneTexture node. Change its Scene Texture Id to DiffuseColor.
The lighting buffer should only contain grayscale values (which describe how lit something is). This means you do not need the color information from both buffers. To discard the color, connect the Color output of both SceneTexture nodes to a Desaturation. This will completely desaturate both buffers.
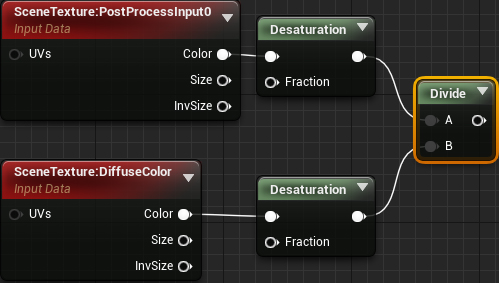
To calculate the lighting buffer, simply divide SceneTexture:PostProcessInput0 by SceneTexture:DiffuseColor. Order is important here!
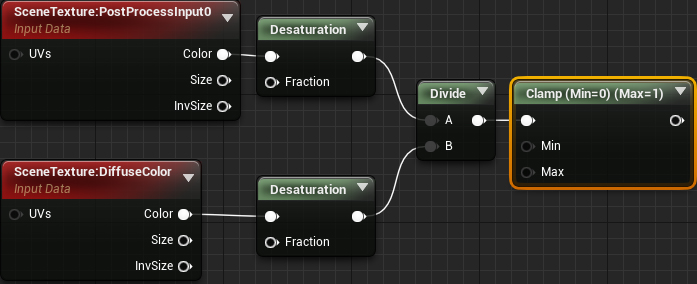
Afterwards, use a Clamp so the values stay within the 0 to 1 range. This makes it easier to perform thresholding since you know your possible values.
Here is a visualization of the lighting buffer:
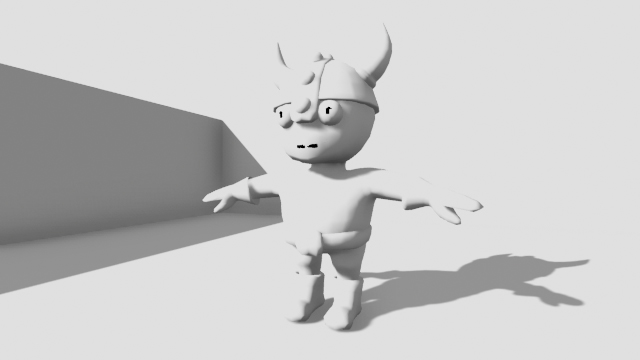
As you can see, the lit areas are closer to white and the unlit areas are closer to black.
Next, you will use the lighting buffer to create a threshold.