Building iOS Apps with Xamarin and Visual Studio
Learn how to make your first iOS app using Xamarin and Visual Studio, by making a simple photo library viewer. By Bill Morefield.
Creating the App
Open Visual Studio and select File\New\Project. Under Visual C# expand iOS, select iPhone and pick the Single View App template. This template creates an app with a single view controller, which is simply a class that manages a view in an iOS app.

For both the Name and the Solution Name, enter ImageLocation. Choose a location on your computer for your app and click OK to create the project.
Visual Studio will prompt you to prepare your Mac to be the Xamarin build host:
- On the Mac, open System Preferences and select Sharing.
- Turn on Remote Login.
- Change Allow access to Only these users and add a user that has access to Xamarin and Xcode on the Mac.

- Dismiss the instructions and return to your Windows computer.
Back in Visual Studio, you will be asked to select the Mac as the build host. Select your Mac and click Connect. Enter the username and password, then click Login.
You can verify you’re connected by checking the toolbar.

Select iPhone Simulator from the Solution Platform dropdown—this will automatically pick a simulator from the build host. You can also change the device simulator by clicking the small arrow next to the current simulator device.

Build and run by pressing the green Debug arrow or the shortcut key F5.

Your app will compile and execute, but you won’t see it running on Windows. Instead, you’ll see it on your Mac build host. This is why it helps to have your two machines nearby :]
At the recent Evolve conference, Xamarin announced iOS Simulator Remoting that will soon allow you to interact with apps running in Apple’s iOS Simulator as though the simulator were running on your Windows PC. For now, however, you’ll need to interact with the simulator on your Mac.
You should see a splash screen appear on the simulator and then an empty view. Congratulations! Your Xamarin setup is working.

Stop the app by pressing the red stop button (shortcut Shift + F5).
Creating the Collection View
The app will display thumbnails of the user’s photos in a Collection View, which is an iOS control for displaying several items in a grid.
To edit the app’s storyboard, which contains the “scenes” for the app, open Main.storyboard from the Solution Explorer.

Open the Toolbox and type collection into the text box to filter the list of items. Under the Data Views section, drag the Collection View object from the toolbox into the middle of the empty view.

Select the collection view; you should see hollow circles on each side of the view. If instead you see T shapes on each side, click it again to switch to the circles.

Click and drag each circle to the edge of the view until blue lines appear. The edge should snap to this location when you release the mouse button.
Now you’ll set up Auto Layout Constraints for the collection view; these tell the app how the view should be resized when the device rotates. In the toolbar at the top of the storyboard, click on the green plus sign next to the CONSTRAINTS label. This will automatically add constraints for the collection view.

The generated constraints are almost correct, but you’ll need to modify some of them. On the Properties window, switch to the Layout tab and scroll down to the Constraints section.
The two constraints defined from the edges are correct, but the height and width constraints are not. Delete the Width and Height constraints by clicking the X next to each.

Notice how the collection view changes to an orange tint. This is an indicator that the constraints need to be fixed.
Click on the collection view to select it. If you see the circles as before, click again to change the icons to green T shapes. Click and drag the T on the top edge of the collection view up to the green rectangle named Top Layout Guide. Release to create a constraint relative to the top of the view.
Lastly, click and drag the T on the left side of the collection view to the left until you see a blue dotted line. Release to create a constraint relative to the left edge of the view.
At this point, your constraints should look like this:

Configuring the Collection View Cell
You may have noticed the outlined square inside the collection view, inside of which is a red circle containing an exclamation point. This is a collection view cell, which represents a single item in the collection view.
To configure this cell’s size, which is done on the collection view, select the collection view and scroll to the top of the Layout tab. Under Cell Size, set the Width and Height to 100.

Next, click the red circle on the collection view cell. A pop-up will inform you that you haven’t set a reuse identifier for the cell, so select the cell and go to the Widget tab. Scroll down to the Collection Reusable View section and enter ImageCellIdentifier for the Identifier. The error indicator should vanish.

Continue scrolling down to the Interaction Section. Set the Background Color by selecting Predefined and blue.

The scene should look like the following:

Scroll to the top of the Widget section and set the Class as PhotoCollectionImageCell.

Visual Studio will automatically create a class with this name, inheriting from UICollectionViewCell, and create PhotoCollectionImageCell.cs for you. Sweet, I wish Xcode did that! :]
Creating the Collection View Data Source
You’ll need to manually create a class to act as the UICollectionViewDataSource, which will provide data for the collection view.
Right-click on ImageLocation in the Solution Explorer. Select Add \ Class, name the class PhotoCollectionDataSource.cs and click Add.
Open the newly added PhotoCollectionDataSource.cs and add the following at the top of the file:
using UIKit;
This gives you access to the iOS UIKit framework.
Change the definition of the class to the following:
public class PhotoCollectionDataSource : UICollectionViewDataSource
{
}
Remember the reuse identifier you defined on the collection view cell earlier? You’ll use that in this class. Add the following right inside the class definition:
private static readonly string photoCellIdentifier = "ImageCellIdentifier";
The UICollectionViewDataSource class contains two abstract members you must implement. Add the following right inside the class:
public override UICollectionViewCell GetCell(UICollectionView collectionView,
    NSIndexPath indexPath)
{
    var imageCell = collectionView.DequeueReusableCell(photoCellIdentifier, indexPath)
       as PhotoCollectionImageCell;

    return imageCell;
}

public override nint GetItemsCount(UICollectionView collectionView, nint section)
{
    return 7;
}
GetCell() is responsible for providing a cell to be displayed within the collection view.
DequeueReusableCell reuses any cells that are no longer needed, for example if they’re offscreen, which you then simply return. If no reusable cell is available, a new one is created automatically.
GetItemsCount tells the collection view to display seven items.
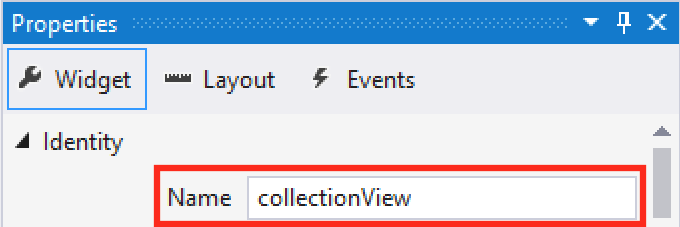
Next you’ll add a reference to the collection view to the ViewController class, which is the view controller that manages the scene containing the collection view. Switch back to Main.storyboard, select the collection view, then select the Widget tab. Enter collectionView for the Name.
Visual Studio will automatically create an instance variable with this name on the ViewController class.
collectionView instance variable automatically generated by Visual Studio.Open ViewController.cs from the Solution Explorer and add the following field right inside the class:
private PhotoCollectionDataSource photoDataSource;
At the end of ViewDidLoad(), add these lines to instantiate the data source and connect it to the collection view.
photoDataSource = new PhotoCollectionDataSource();
collectionView.DataSource = photoDataSource;
This way the photoDataSource will provide the data for the collection view.
Build and run. You should see the collection view with seven blue squares.

Nice – the app is really coming along!
