macOS Controls Tutorial: Part 2/2
Learn how to use common macOS UI controls like NSSlider, NSImageView and more in the final part of this series — updated for Xcode 8.2 and Swift 3! By Ernesto García.
Ticking all the Boxes — Check Box Button
You typically use check boxes in an app to display the state of some boolean value. That state tends to influence the app in some way such as enabling or disabling a feature.
You will likely find check boxes where the user can enable or disable a functionality. You can find them in almost every screen of the Settings app. For instance, in the Energy Saver window you use them to enable or disable the different energy options.

Working with check boxes is relatively easy; most of the time you’ll only be concerned with getting and setting the state of the control. The state of the check box can be one of these: NSOnState (feature on everywhere), NSOffState (feature off everywhere) and NSMixedState (feature on somewhere, but not everywhere).
Here’s how you can use it:
// Set the state to On
myCheckBox.state = NSOnState

// Set the state to Off
myCheckBox.state = NSOffState

// Get the state of a check box
let state = myCheckBox.state
Super simple! Time to add a checkbox to your app.
Check and Double Check – Adding Checkboxes
Open Main.storyboard. Find the Check Box Button in the Object Library and drag it onto the content view. Double-click on it to change its title to Yell!! as in the image below:

Now add an outlet for the check box and name it yellCheck. You are now officially an expert creating outlets!
Now, you’ll make the check box default to the off state when the app launches. To do that, add the following at the end of viewDidLoad():
// set check button state
yellCheck.state = NSOffState
Build and run the application! You should see the check box, and it’s state should be unchecked. Click it to see it in action:

Choices, Choices – NSSegmentedControl
A segmented control, represented by the NSSegmentedControl class , represents an alternative to radio buttons when you need to make a selection from a number of options. You can see it in Xcode’s Attributes Inspector:

It’s very easy to use. You just need to get or set the selected segment to find out the user’s selection.
// Select the first segment
segmentedControl.selectedSegment = 0

// Get the selected segment
let selected = segmentedControl.selectedSegment
Tuning the Voice – Adding Segmented Controls
If you remember, the readSentence() had a parameter to control the voice speed (Normal, Fast, Slow). You’ll use a segmented control to change the speed of the voice.
Open Main.storyboard and add a Label to the content view. Change its title to Voice Speed:. Locate a Segmented Control and drag it onto the content view. You can double click on every segment of the control to set its title. Change the titles to Slow, Normal and Fast respectively.

Create an outlet for that segmented control in ViewController, and name it voiceSegmentedControl. Now, you want to select the Normal segment when the app starts, which is the segment number 1 (segment numbers are zero based). Open ViewController.swift and add the following code to viewDidLoad():
// Set the segmented control initial selection
voiceSegmentedControl.selectedSegment = 1
As easy as it looks. Just set the selectedSegment property to 1. Build and run now and see how the Normal segment is selected.

Okay! You’ve finally added all the controls you need to create your funny mad lib sentences. All you’re missing is a way to collect the value of each control, combine those values into a sentence, and display it on-screen!
Pulling it All Together
You need two more controls to show the results: a label to display the complete sentence, and an image view to display a picture, which should liven up the user interface!
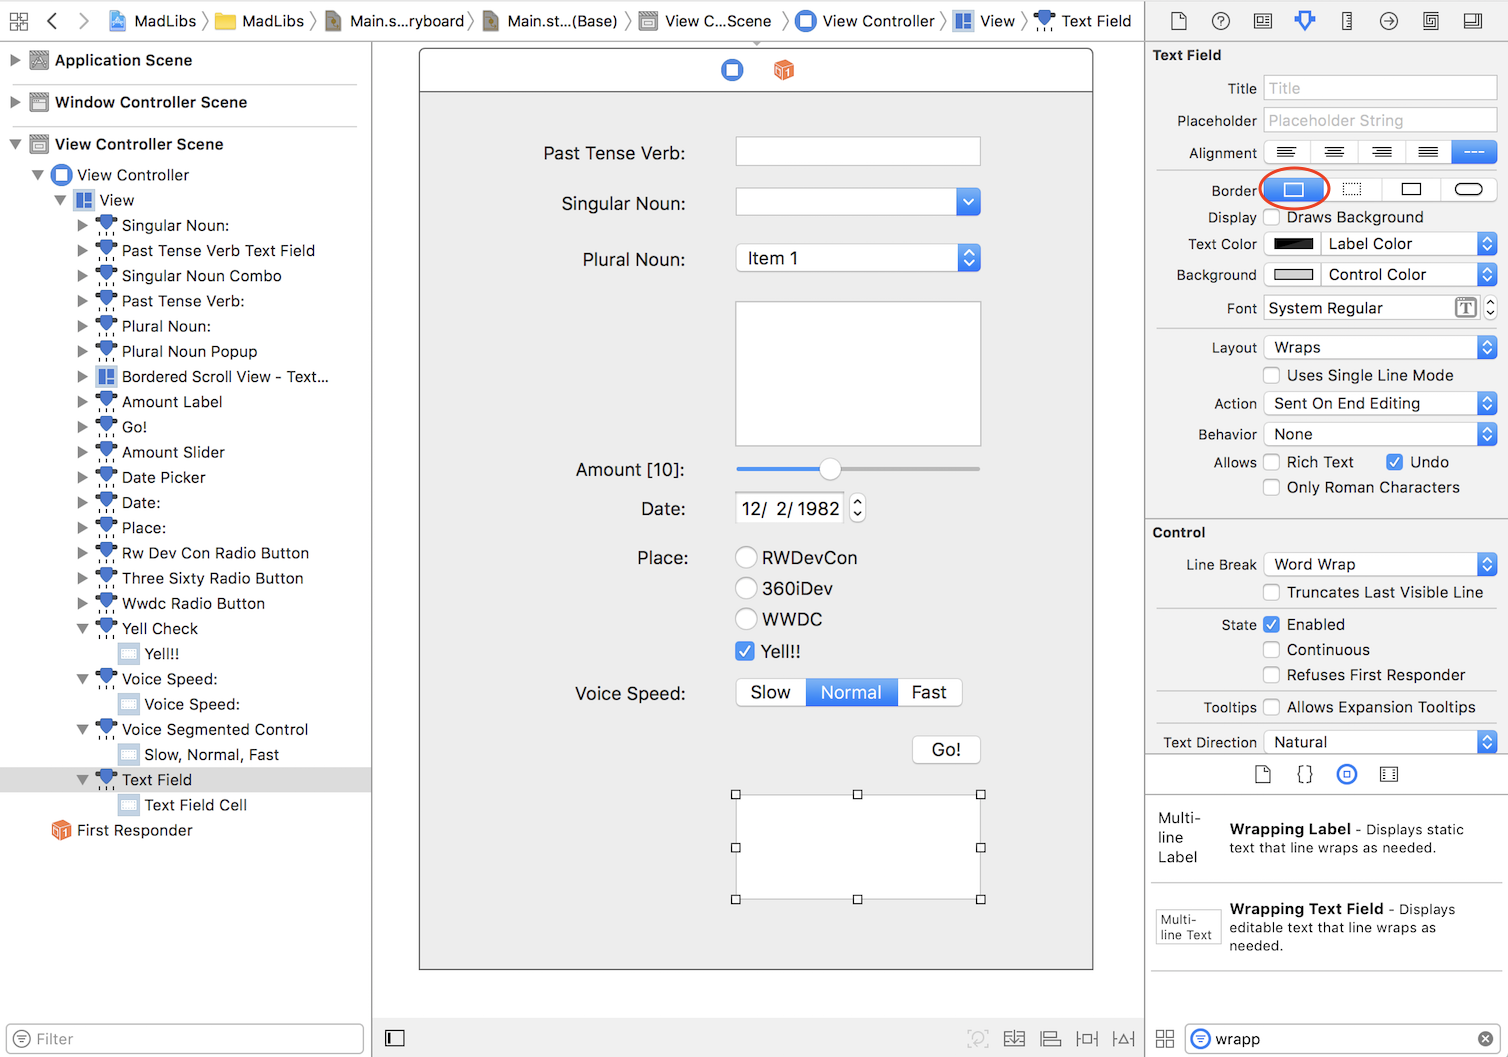
Open Main.storyboard. Find the Wrapping Label in the Object Library palette and drag it onto the window, just below the Go!! button. Make it look a little more attractive by using the Attributes Inspector to change the border of the label to Frame, which is the first of the four buttons.
After that, remove the default text of the label by double-clicking it, selecting the text and deleting it.
Now you have to create an outlet to set the value of this new label to contain your new hilarious sentence! As before, Ctrl-Drag the label to the ViewController.swift file and name the property resultTextField.
Leave this control as it is for now; you’ll write the code that populates it in just a bit.
Room with a View — NSImageView
An Image View is a simple and easy to use control that — surprise! — displays an image. Bet you didn’t expect that! :]

There are very few properties you need to interact with an Image View at runtime:
// Get the image from an image view
let myImage = myImageView.image

// Set the image of an image view
myImageView.image = myImage
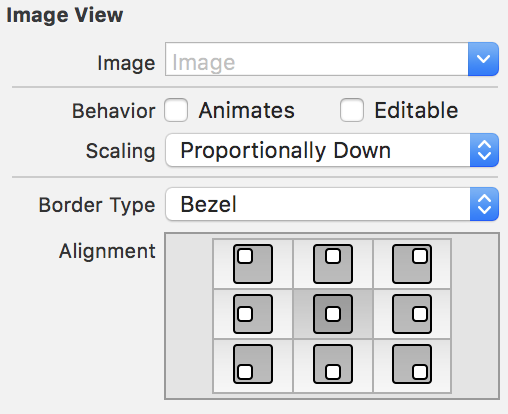
At design time, you can configure the visual aspects: the border, scaling and alignment. Yes, these properties can be set in code as well, but it’s far easier to set them in Interface Builder at design time, as below:
Just a Pretty Face – Populating the Image Well
Time to add an image view to your application! Find the Image Well in the Object Library and drag it onto view, to the left of the wrapping label. Feel free to resize the app window if necessary.

Create a new outlet for the image view in the same way you’ve done for all the previous controls: Ctrl-Drag the image view to the ViewController.swift file, and in the popup window name the property imageView.
Build and run. Your app should now look like this:

Phew! Your user interface is finally finished — the only thing that’s left to do is to create the code that will assemble your hilarious sentence and populate the image view that you added above!
Time To Make It Work
Now you need to construct the sentence based on those inputs.
When the user clicks the Go! button, you’ll collect all the values from the different controls and combine them to construct the full sentence, and then display that sentence in the wrapping label you added previously.
Then, to spice up your all-text interface, you will display a picture in the image view that you added in the last section.
Download the resources file for this project (normally goes into your Download folder). If the downloaded zip file was not unzipped automatically, unzip it to get the face.png image file. Select Assets.xcassets in the Project Navigator, and drag the image file into the assets list.

It’s finally time to add the core of the application — the code which constructs the Mad Lib sentence!
Open ViewController.swift and add the following property inside the class implementation:
fileprivate var selectedPlace: String {
  var place = "home"
  if rwDevConRadioButton.state == NSOnState {
    place = "RWDevCon"
  }
  else if threeSixtyRadioButton.state == NSOnState {
    place = "360iDev"
  }
  else if wwdcRadioButton.state == NSOnState {
    place = "WWDC"
  }
  return place
}
This code adds a computed property that returns the name of the place based on which radio button is selected.
Now, replace all the code inside goButtonClicked() with this:
// 1
let pastTenseVerb = pastTenseVerbTextField.stringValue

// 2
let singularNoun = singularNounCombo.stringValue

// 3
let amount = amountSlider.integerValue

// 4
let pluralNoun = pluralNouns[pluralNounPopup.indexOfSelectedItem]

// 5
let phrase = phraseTextView.string ?? ""

// 6
let dateFormatter = DateFormatter()
dateFormatter.dateStyle = .long
let date = dateFormatter.string(from: datePicker.dateValue)

// 7
var voice = "said"
if yellCheck.state == NSOnState {
  voice = "yelled"
}

// 8
let sentence = "On \(date), at \(selectedPlace) a \(singularNoun) \(pastTenseVerb) \(amount) \(pluralNoun) and \(voice), \(phrase)"

// 9
resultTextField.stringValue = sentence
imageView.image = NSImage(named: "face")

// 10
let selectedSegment = voiceSegmentedControl.selectedSegment
let voiceRate = VoiceRate(rawValue: selectedSegment) ?? .normal
readSentence(sentence, rate: voiceRate)
That may seem like a lot of code, but it’s fairly straightforward when you break it down:
- Here you’re getting the text from
pastTenseVerbTextField - In this section of code, you get the string from the combo box by calling its
stringValueproperty. You might ask why you don’t just look up the selected row, and then retrieve the string associated with that row. Quite simply, it’s because the user can enter their own text into the combo box. So use thestringValueto get the current string, which could have been either selected or typed. - Next, read the slider’s current value using its
integerValuemethod. Remember that if you need more precision with this control, you could also usefloatValueordoubleValue. - Here you get the plural noun, selected from the popup button. How is this done? Look up the appropriate plural noun in your
pluralNounsarray using array subscript syntax and getting theindexOfSelectedItemproperty. - Next up is the phrase the user typed. To acquire it, simply retrieve the string value of our text view by getting its
stringproperty. Again, you’re using nil coalescing since the property is an optional and could benil. - To get the date, call the date picker’s
dateValuemethod. Then, convert the returned date to a human-readable string using an NSDateFormatter. - Should you speak or shout? Simply get the checkbox state: if it’s
NSOnState, assign yelled to the string variable. Otherwise, leave it as the default said. - At this point, you’ve collected all the information you need to construct the mad lib sentence! This is where the magic happens. The results constant uses string interpolation, and the different values read from the controls to build a string, based on the user’s input.
- Now you can display the results of all your hard work! First, display the sentence in the results label by setting its
stringValueproperty. Then, add some pizazz to the app by displaying an image to the user, which is as easy as loading the image and setting the property of the image view control. - And finally, say it out loud! Get the voice speed based on the currently selected segment, and call the method that converts the text to speech
That’s it! You’re done! Build and run the app, so you can construct some hilarious sentences for yourself!

Congratulations — you’ve finished building the Mad Libs application, and have learned a ton about the most common macOS controls along the way.
Feel free to play with the controls, select different values, type funny nouns or verbs and see the results each time you click the Go! button, and see what funny stories you can create! :]