Metal Tutorial with Swift 3 Part 4: Lighting
In this fourth part of our Metal tutorial series, learn how to light 3D objects using the Phong lighting model. By Andrew Kharchyshyn.
Modifying the Shaders to Accept the Light Data
Now that the data is being passed to the GPU, you need to modify your shader to use it. To do this, open Shaders.metal and add a new structure for the light data you pass just below the VertexOut structure:
struct Light{
  packed_float3 color;
  float ambientIntensity;
};
Now modify the Uniforms structure to contain Light, as follows:
struct Uniforms{
  float4x4 modelMatrix;
  float4x4 projectionMatrix;
  Light light;
};
At this point, you can access light data inside of the vertex shader. However, you also need this data in the fragment shader.
To do this, change the fragment shader declaration to match this:
fragment float4 basic_fragment(VertexOut interpolated [[stage_in]],
                               const device Uniforms&  uniforms    [[ buffer(1) ]],
                               texture2d<float>  tex2D     [[ texture(0) ]],
                               sampler           sampler2D [[ sampler(0) ]])
This adds the uniform data as the second parameter.
Open Node.swift. Inside render(_:pipelineState:drawable:parentModelViewMatrix:projectionMatrix:clearColor:), find this line:
renderEncoder.setVertexBuffer(uniformBuffer, offset: 0, at: 1)
…and add this line directly underneath:
renderEncoder.setFragmentBuffer(uniformBuffer, offset: 0, at: 1)
By adding this code, you pass uniform buffer as a parameter not only to the vertex shader, but to the fragment shader as well.
While you’re in this method, you’ll notice an error on this line:
let uniformBuffer = bufferProvider.nextUniformsBuffer(projectionMatrix, modelViewMatrix: nodeModelMatrix)
To fix this error, you need to pass the light data to the buffer provider. To do this, replace the above line with the following:
let uniformBuffer = bufferProvider.nextUniformsBuffer(projectionMatrix: projectionMatrix, modelViewMatrix: nodeModelMatrix, light: light)
Take a step back to make sure you understand what you’ve done so far. At this point, you’ve passed lighting data from the CPU to the GPU, and more specifically, to the fragment shader. This is very similar to how you passed matrices to the GPU in previous parts of this tutorial.
Make sure you understand the flow, because you will pass some more data later in a similar fashion.
Adding the Ambient Light Calculation
Now return to the fragment shader in Shaders.metal. Add these lines to the top of the fragment shader:
// Ambient
Light light = uniforms.light;
float4 ambientColor = float4(light.color * light.ambientIntensity, 1);
This retrieves the light data from the uniforms and uses the values to calculate the ambientColor using the algorithm discussed earlier.
Now that you have calculated ambientColor, replace the last line of the method as follows:
return color * ambientColor;
This multiplies the color of the material by the calculated ambient color.
That’s it! Build and run the app and you’ll see the following:
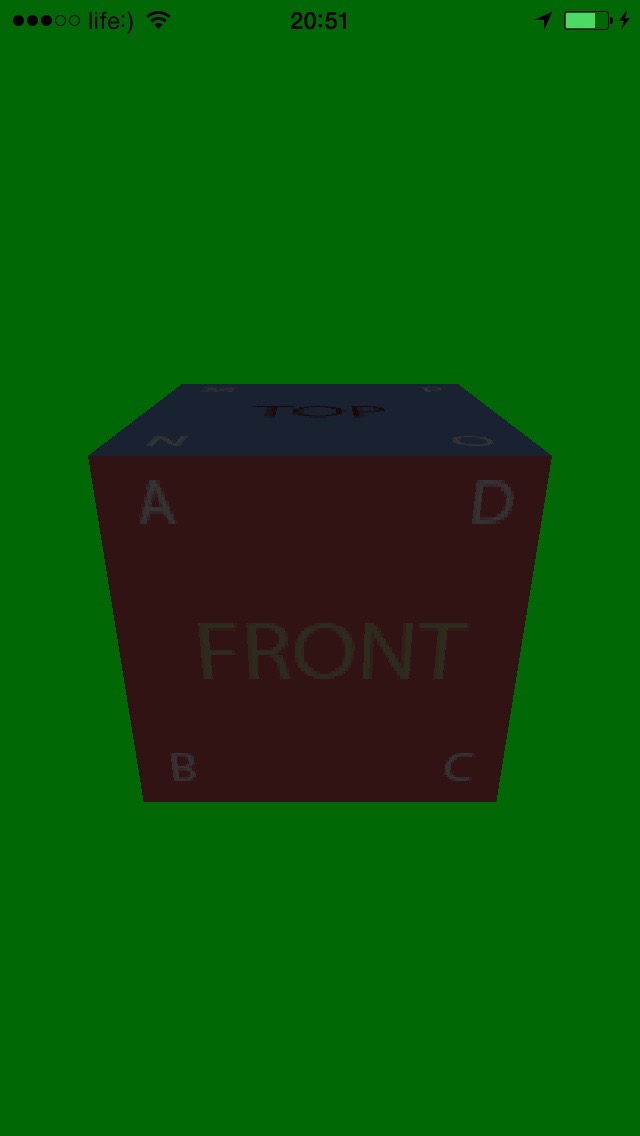
Left in the Dark
Your scene looks terribly dark now. Is this really the way ambient light is supposed to work?

Although it may seem strange, the answer is “Yes”!
Another way of looking at it is that without any light, everything would be pitch black. By adding a small amount of ambient light, you have highlighted your objects slightly, as in the early pre-dawn light.
But why hasn’t the background changed? The answer for that is simple: The vertex shader runs on all scene geometry, but the background is not geometry. In fact, it’s not even a background, it’s just a constant color which the GPU uses for places where nothing is drawn.
The green color, despite being the quintessence of awesomeness, doesn’t quite cut it anymore.
Find the following line in Node.swift inside render(_:pipelineState:drawable:parentModelViewMatrix:projectionMatrix:clearColor:):
renderPassDescriptor.colorAttachments[0].clearColor = MTLClearColor(red: 0.0, green: 104.0/255.0, blue: 5.0/255.0, alpha: 1.0)
…and replace it with the following:
renderPassDescriptor.colorAttachments[0].clearColor = MTLClearColor(red: 0.0, green: 0.0, blue: 0.0, alpha: 1.0)
Build and run, and you’ll see the following:
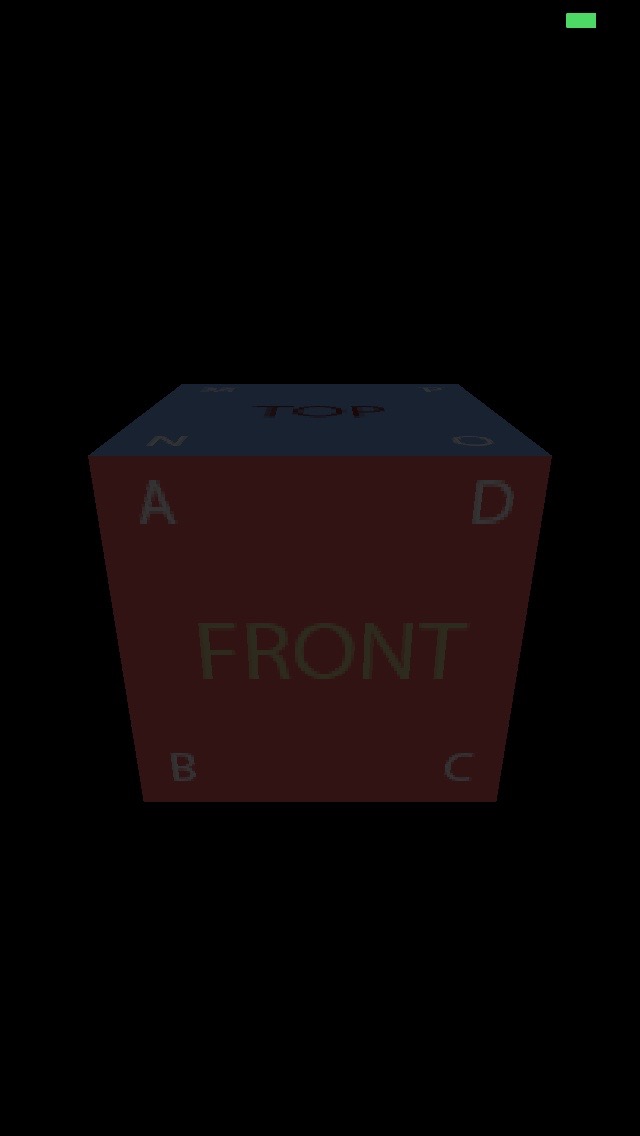
Now it looks a lot less confusing!
Diffuse Lighting Overview
To calculate diffuse lighting, you need to know which direction each vertex faces. You do this by associating a normal with each vertex.
Introducing Normals
So what is a normal? It’s a vector perpendicular to the surface the vertex is a part of.
Take a look at this picture to see what we’re talking about:

You will store the normal of each vertex in the Vertex structure, much like how you store texture coordinates or position values.
Introducing Dot Products
When you’re talking about normals, you can’t escape talking about the dot product of vectors.
The dot product is a mathematical function between two vectors, such that:
- When the vectors are parallel: The dot product is equal to 1.
- When the vectors are opposite directions: The dot product of them is equal to -1.
- When the angle between the vectors is 90°: The dot product is equal to 0.

This will come in handy shortly.
Introducing Diffuse Lighting
Now that you have normals and you understand the dot product, you can turn your attention to implementing diffuse lighting.
Remember that diffuse lighting is brighter if the normal of a vector is facing toward the light, and weaker the more the normal is tilted away from it.
To calculate diffuse lighting, you need two parameters:
- Light color: You need the color of the light, similar to ambient lighting. In this tutorial, you’ll use the same color for all types of light (ambient, diffuse, and specular).
- Diffuse intensity: This is a value similar to ambient intensity; the bigger it is, the stronger the diffuse effect will be.
- Diffuse factor: This is the dot product of the light direction vector and vertex normal. The smaller the angle between those two vectors, the higher this value, and the stronger the diffuse lighting effect should be.
You can calculate the diffuse lighting as follows:
Diffuse Color = Light Color * Diffuse Intensity * Diffuse factor
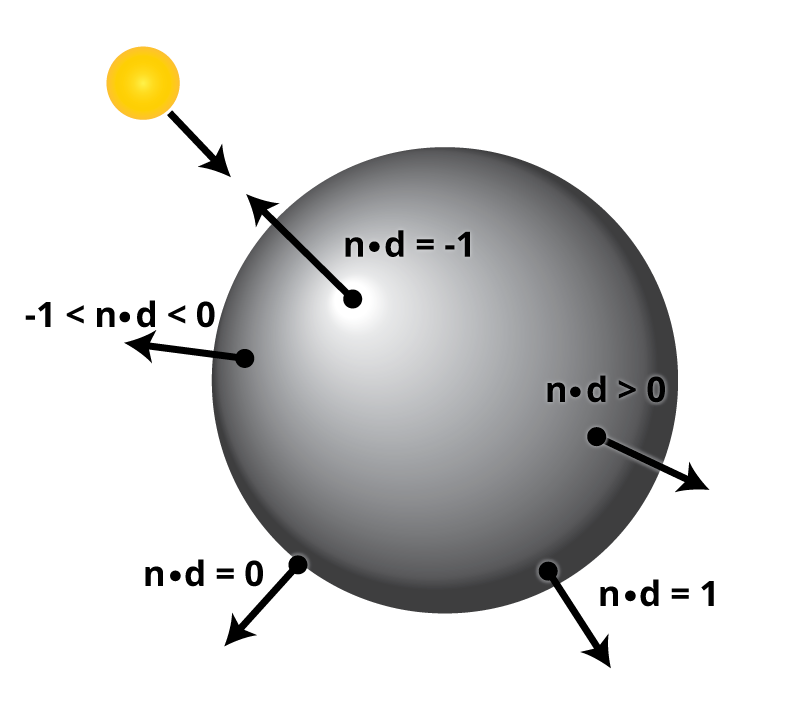
In the image above, you can see the dot products of various points of the object; this represents the diffuse factor. The higher the diffuse factor, the brighter the diffuse light.
With all that theory out of the way, it’s time to dive into the implementation!
Adding Diffuse Lighting
First things first; you need to add the normal data to Vertex.
Adding Normal Data
Open Vertex.swift and find these properties:
var s,t: Float // texture coordinates
Below those properties, add the following properties:
var nX,nY,nZ: Float // normal
Now modify func floatBuffer() to look like this:
func floatBuffer() -> [Float] {
  return [x,y,z,r,g,b,a,s,t,nX,nY,nZ]
}
This adds the new normal properties to the buffer of floats.
Now open Cube.swift and change the vertices to match those:
//Front
let A = Vertex(x: -1.0, y:   1.0, z:   1.0, r:  1.0, g:  0.0, b:  0.0, a:  1.0, s: 0.25, t: 0.25, nX: 0.0, nY: 0.0, nZ: 1.0)
let B = Vertex(x: -1.0, y:  -1.0, z:   1.0, r:  0.0, g:  1.0, b:  0.0, a:  1.0, s: 0.25, t: 0.50, nX: 0.0, nY: 0.0, nZ: 1.0)
let C = Vertex(x:  1.0, y:  -1.0, z:   1.0, r:  0.0, g:  0.0, b:  1.0, a:  1.0, s: 0.50, t: 0.50, nX: 0.0, nY: 0.0, nZ: 1.0)
let D = Vertex(x:  1.0, y:   1.0, z:   1.0, r:  0.1, g:  0.6, b:  0.4, a:  1.0, s: 0.50, t: 0.25, nX: 0.0, nY: 0.0, nZ: 1.0)

//Left
let E = Vertex(x: -1.0, y:   1.0, z:  -1.0, r:  1.0, g:  0.0, b:  0.0, a:  1.0, s: 0.00, t: 0.25, nX: -1.0, nY: 0.0, nZ: 0.0)
let F = Vertex(x: -1.0, y:  -1.0, z:  -1.0, r:  0.0, g:  1.0, b:  0.0, a:  1.0, s: 0.00, t: 0.50, nX: -1.0, nY: 0.0, nZ: 0.0)
let G = Vertex(x: -1.0, y:  -1.0, z:   1.0, r:  0.0, g:  0.0, b:  1.0, a:  1.0, s: 0.25, t: 0.50, nX: -1.0, nY: 0.0, nZ: 0.0)
let H = Vertex(x: -1.0, y:   1.0, z:   1.0, r:  0.1, g:  0.6, b:  0.4, a:  1.0, s: 0.25, t: 0.25, nX: -1.0, nY: 0.0, nZ: 0.0)

//Right
let I = Vertex(x:  1.0, y:   1.0, z:   1.0, r:  1.0, g:  0.0, b:  0.0, a:  1.0, s: 0.50, t: 0.25, nX: 1.0, nY: 0.0, nZ: 0.0)
let J = Vertex(x:  1.0, y:  -1.0, z:   1.0, r:  0.0, g:  1.0, b:  0.0, a:  1.0, s: 0.50, t: 0.50, nX: 1.0, nY: 0.0, nZ: 0.0)
let K = Vertex(x:  1.0, y:  -1.0, z:  -1.0, r:  0.0, g:  0.0, b:  1.0, a:  1.0, s: 0.75, t: 0.50, nX: 1.0, nY: 0.0, nZ: 0.0)
let L = Vertex(x:  1.0, y:   1.0, z:  -1.0, r:  0.1, g:  0.6, b:  0.4, a:  1.0, s: 0.75, t: 0.25, nX: 1.0, nY: 0.0, nZ: 0.0)

//Top
let M = Vertex(x: -1.0, y:   1.0, z:  -1.0, r:  1.0, g:  0.0, b:  0.0, a:  1.0, s: 0.25, t: 0.00, nX: 0.0, nY: 1.0, nZ: 0.0)
let N = Vertex(x: -1.0, y:   1.0, z:   1.0, r:  0.0, g:  1.0, b:  0.0, a:  1.0, s: 0.25, t: 0.25, nX: 0.0, nY: 1.0, nZ: 0.0)
let O = Vertex(x:  1.0, y:   1.0, z:   1.0, r:  0.0, g:  0.0, b:  1.0, a:  1.0, s: 0.50, t: 0.25, nX: 0.0, nY: 1.0, nZ: 0.0)
let P = Vertex(x:  1.0, y:   1.0, z:  -1.0, r:  0.1, g:  0.6, b:  0.4, a:  1.0, s: 0.50, t: 0.00, nX: 0.0, nY: 1.0, nZ: 0.0)

//Bot
let Q = Vertex(x: -1.0, y:  -1.0, z:   1.0, r:  1.0, g:  0.0, b:  0.0, a:  1.0, s: 0.25, t: 0.50, nX: 0.0, nY: -1.0, nZ: 0.0)
let R = Vertex(x: -1.0, y:  -1.0, z:  -1.0, r:  0.0, g:  1.0, b:  0.0, a:  1.0, s: 0.25, t: 0.75, nX: 0.0, nY: -1.0, nZ: 0.0)
let S = Vertex(x:  1.0, y:  -1.0, z:  -1.0, r:  0.0, g:  0.0, b:  1.0, a:  1.0, s: 0.50, t: 0.75, nX: 0.0, nY: -1.0, nZ: 0.0)
let T = Vertex(x:  1.0, y:  -1.0, z:   1.0, r:  0.1, g:  0.6, b:  0.4, a:  1.0, s: 0.50, t: 0.50, nX: 0.0, nY: -1.0, nZ: 0.0)

//Back
let U = Vertex(x:  1.0, y:   1.0, z:  -1.0, r:  1.0, g:  0.0, b:  0.0, a:  1.0, s: 0.75, t: 0.25, nX: 0.0, nY: 0.0, nZ: -1.0)
let V = Vertex(x:  1.0, y:  -1.0, z:  -1.0, r:  0.0, g:  1.0, b:  0.0, a:  1.0, s: 0.75, t: 0.50, nX: 0.0, nY: 0.0, nZ: -1.0)
let W = Vertex(x: -1.0, y:  -1.0, z:  -1.0, r:  0.0, g:  0.0, b:  1.0, a:  1.0, s: 1.00, t: 0.50, nX: 0.0, nY: 0.0, nZ: -1.0)
let X = Vertex(x: -1.0, y:   1.0, z:  -1.0, r:  0.1, g:  0.6, b:  0.4, a:  1.0, s: 1.00, t: 0.25, nX: 0.0, nY: 0.0, nZ: -1.0)
This adds a normal to each vertex.
If you don’t understand those normal values, try sketching a cube on a piece of paper. For each vertex, write its normal vertex value. You will get the same numbers as me!
It makes sense that all vertices on the same face should have the same normal values.
Build and run, and you’ll see the following:

Woooooooooooow! If epic glitches like this aren’t a good reason to learn 3D graphics, then what is? :]
Do you have any idea what went wrong?