How To Use Git Source Control with Xcode 9
In this tutorial, you’ll learn how to use git source control with Xcode 9; whether committing or reverting, branching or merging, this tutorial has you covered. By Richard Critz.
Merging Branches
You learned earlier that Git allows you to work on multiple streams of revisions known as branches. You also learned that it is good practice to do all of your development on a branch other than the master branch. What, then, are you to do when you finish development of a feature and want to release it? Simple! You merge your development branch into your master branch.
Your new map feature is not yet finished but your designer has asked for another label on the main interface. To implement this, you will need to leave your map_feature branch behind for now and create a new branch from the “known good” state that is your master branch.
Switch to the Source Control navigator, right-click on the master branch and select Branch from “master”….

Name the branch new_label and click Create.

Notice that you are still working on the map_feature branch. Right-click on new_label and select Checkout….

Xcode will prompt you to confirm that you want to switch branches. Click Checkout.

You can see that you’re now on the new_label branch by checking the (current) label in the Source Control navigator.

Now, it’s time to add that new label your designer requested.
Switch back to the Standard Editor view, open Main.storyboard, and drag a UILabel on to the main view.
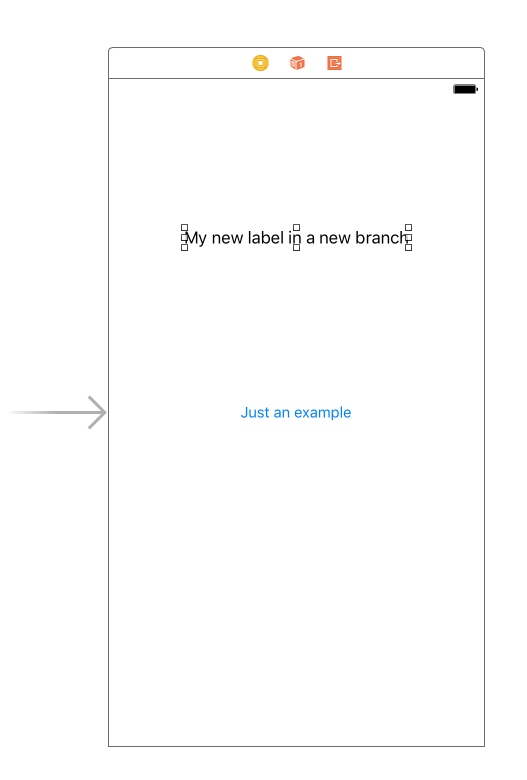
Build and run to make sure that all is OK and then commit your changes to the repository. Be sure to add a commit message.
Now switch to (checkout) the master branch and run the app again. As expected, the new UILabel you added in the branch is not there. The final job is to merge the new branch back to master.
In the Source Control navigator, right-click new_label and select Merge “new_label” into “master”….

Xcode will ask you to confirm the action. Click Merge.

The merge window will appear allowing you to control the merge process. The merge source (the “merge from” branch) will appear on the right. Your current source, as modified by the merge, will appear on the left. Use the buttons at the bottom of the screen to control the direction of the merge. For a simple merge such as this one, Xcode’s default setting will be the correct one.

Finally, click the Merge button to start the process :]
If all goes well, you should see the changes (the UILabel) from the new branch appear in the user interface when you click on Main.storyboard or when you run your application. Now your changes are in the master branch because of the merge! Use one of the methods of viewing your commit history that you learned to verify that this change appears in the history.

Ignoring generated files
Way back at your first commit you saw that, in addition to your source files, Git tracks revisions to files managed by Xcode. This is important because those files are just as necessary to your project as your source files. You need them to rebuild your app or to collaborate with others.
However, as it does its work, Xcode also generates other files that change with each build. It is not important to save these as Xcode can automatically regenerate them. In fact, saving them causes Git to do unnecessary work and makes it harder to find the significant changes in your commit history.
Git provides a mechanism to ignore these files: the aptly-named .gitignore file. The period at the beginning of its name causes macOS to treat it as a hidden file, so it doesn’t normally appear when you look at your project in Xcode or Finder. Never fear, though, because Git will find and use it without a problem.
Rather than working out for yourself everything to put in your .gitignore file, you can download one from toptal.com/developers/gitignore
First, open Terminal and enter the following command. You only need to do this step once, not for every project.
$ git config --global alias.ignore '!gi() { curl -L -s https://www.gitignore.io/api/$@ ;}; gi'
Now, for any project using Git, do the following in a Terminal window:
cd
git ignore swift,macos >.gitignore
git add .gitignore
git commit -m "Add .gitignore file"
This downloads the most current .gitignore configuration for writing Swift code on macOS. Your terminal session should look similar to this:

You added the .gitignore file to your repository for Git to track since the filtering it provides is also an important part of your project.
Xcode and GitHub
All the work you’ve done so far has been using a local repository saved on your computer. The GitHub website allows you to publish your project to a remote repository saved on the GitHub servers. This is great because it allows you to easily share your code with others and work on a project as a group.
If you don’t already have a GitHub account, go to GitHub and sign up for one.
Once that’s done, you need to add your GitHub credentials to Xcode. Open Xcode Preferences and select the Accounts tab. Press the + in the lower left corner and select GitHub as the account type. Xcode will prompt for your GitHub credentials.

If you have two-factor authentication enabled on your GitHub account, Xcode will prompt for your one-time password.

Xcode will show you your completed GitHub account configuration. Feel free to switch to SSH for cloning if you have your SSH keys configured.

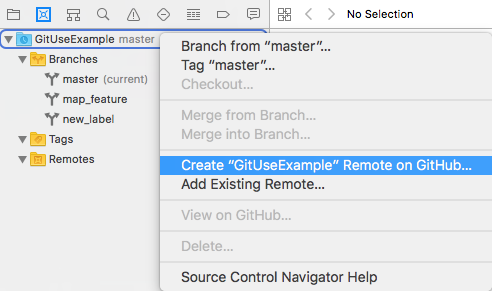
In the Source Control navigator, right-click on the project name (GitUseExample) at the top of the left-hand pane and select Create “GitUseExample” Remote on GitHub….
Xcode will select good defaults. Click Create.

In the Source Control navigator, you will see that Xcode has added a Remote named origin which contains the master branch.

In order to push the map_feature branch, check it out and select Source Control\Push…. Xcode will prompt you for the remote branch name, offering to create origin/map_feature which is just what you want! Click Push.

Repeat these steps to push new_label to GitHub.

Check your GitHub page to verify that your files are there. If you don’t already have GitHub open in your browser, you can right-click any of the objects in the Source Control navigator and select View on GitHub….


Now it’s time to make one final change to your project. Make sure you’re on the master branch and open ViewController.swift. Change the buttonClicked() method as follows:
@IBAction func buttonClicked(_ sender: UIButton) {
  print("You finished!")
}
Select Source Control\Commit… from the menu. Enter a commit message and then check the Push to remote: box in the lower left corner. Again, since you only have one remote configured, the default will be correct.

Click Commit 1 File and Push. After a few seconds, Xcode will complete the commit and the push. Look for your new commit on your GitHub page.

Success! :]