In-App Purchase Tutorial: Getting Started
Learn how to grow app revenue in this in-app purchase tutorial by allowing users to purchase or unlock content or features. By Pietro Rea.
Making a Sandbox Purchase
Build and run the app — but to test out purchases, you’ll have to run it on a device. The sandbox tester created earlier can be used to perform the purchase without getting charged. If only I could have a sandbox tester to do my grocery shopping :] Here’s how to use the tester account:
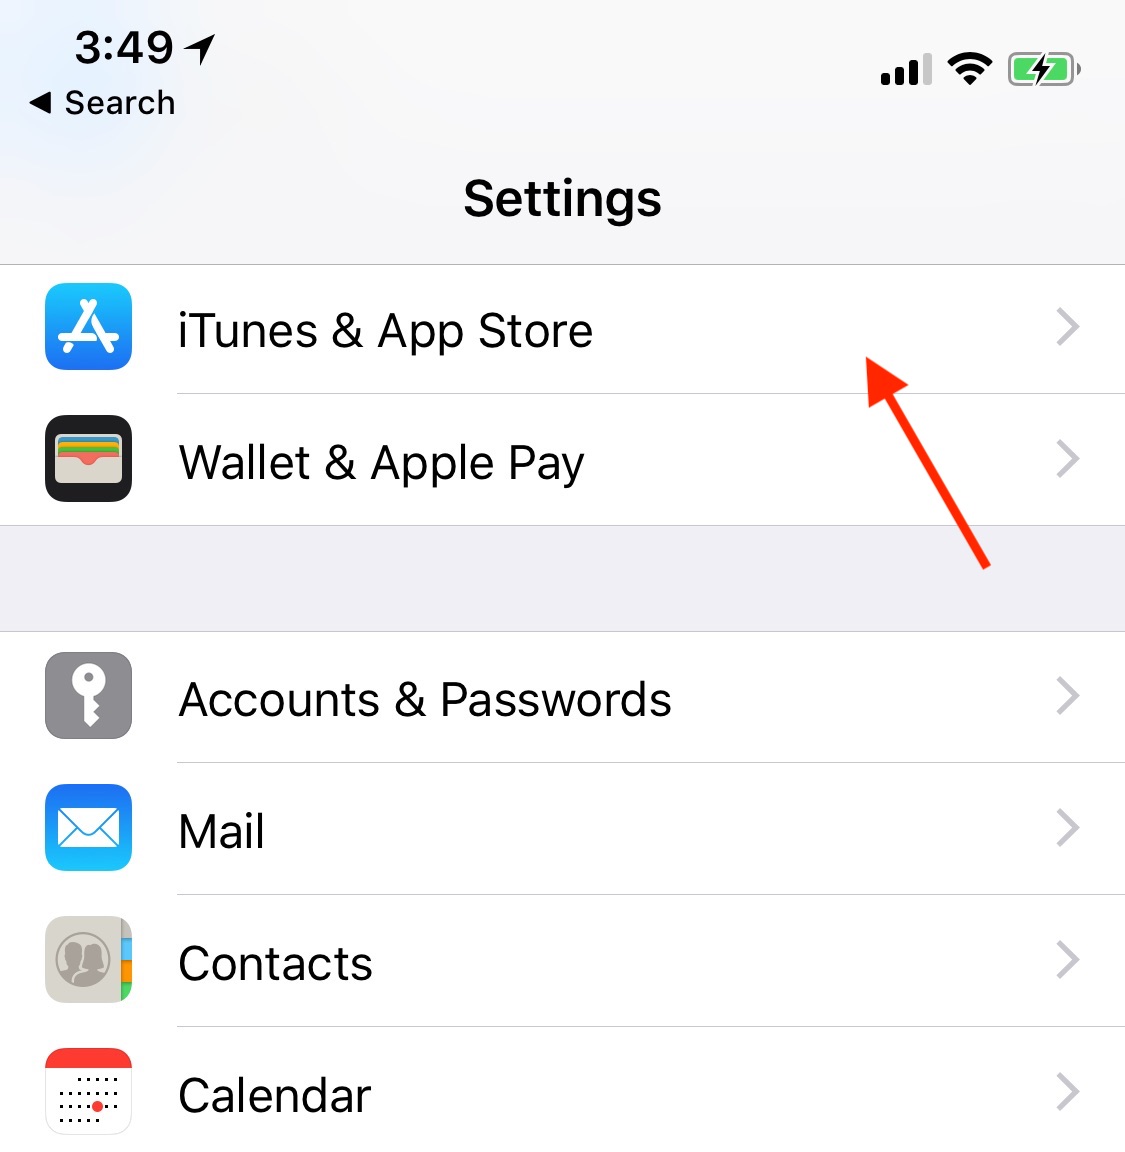
Go to your iPhone and make sure you’re logged out of your normal App Store account. To do this, go to the Settings app and tap iTunes & App Store.
Tap your iCloud account name and then tap Sign Out. At this point don’t actually sign in with the sandbox user. You will be prompted to do this once you attempt to buy the IAP back in the sample app.
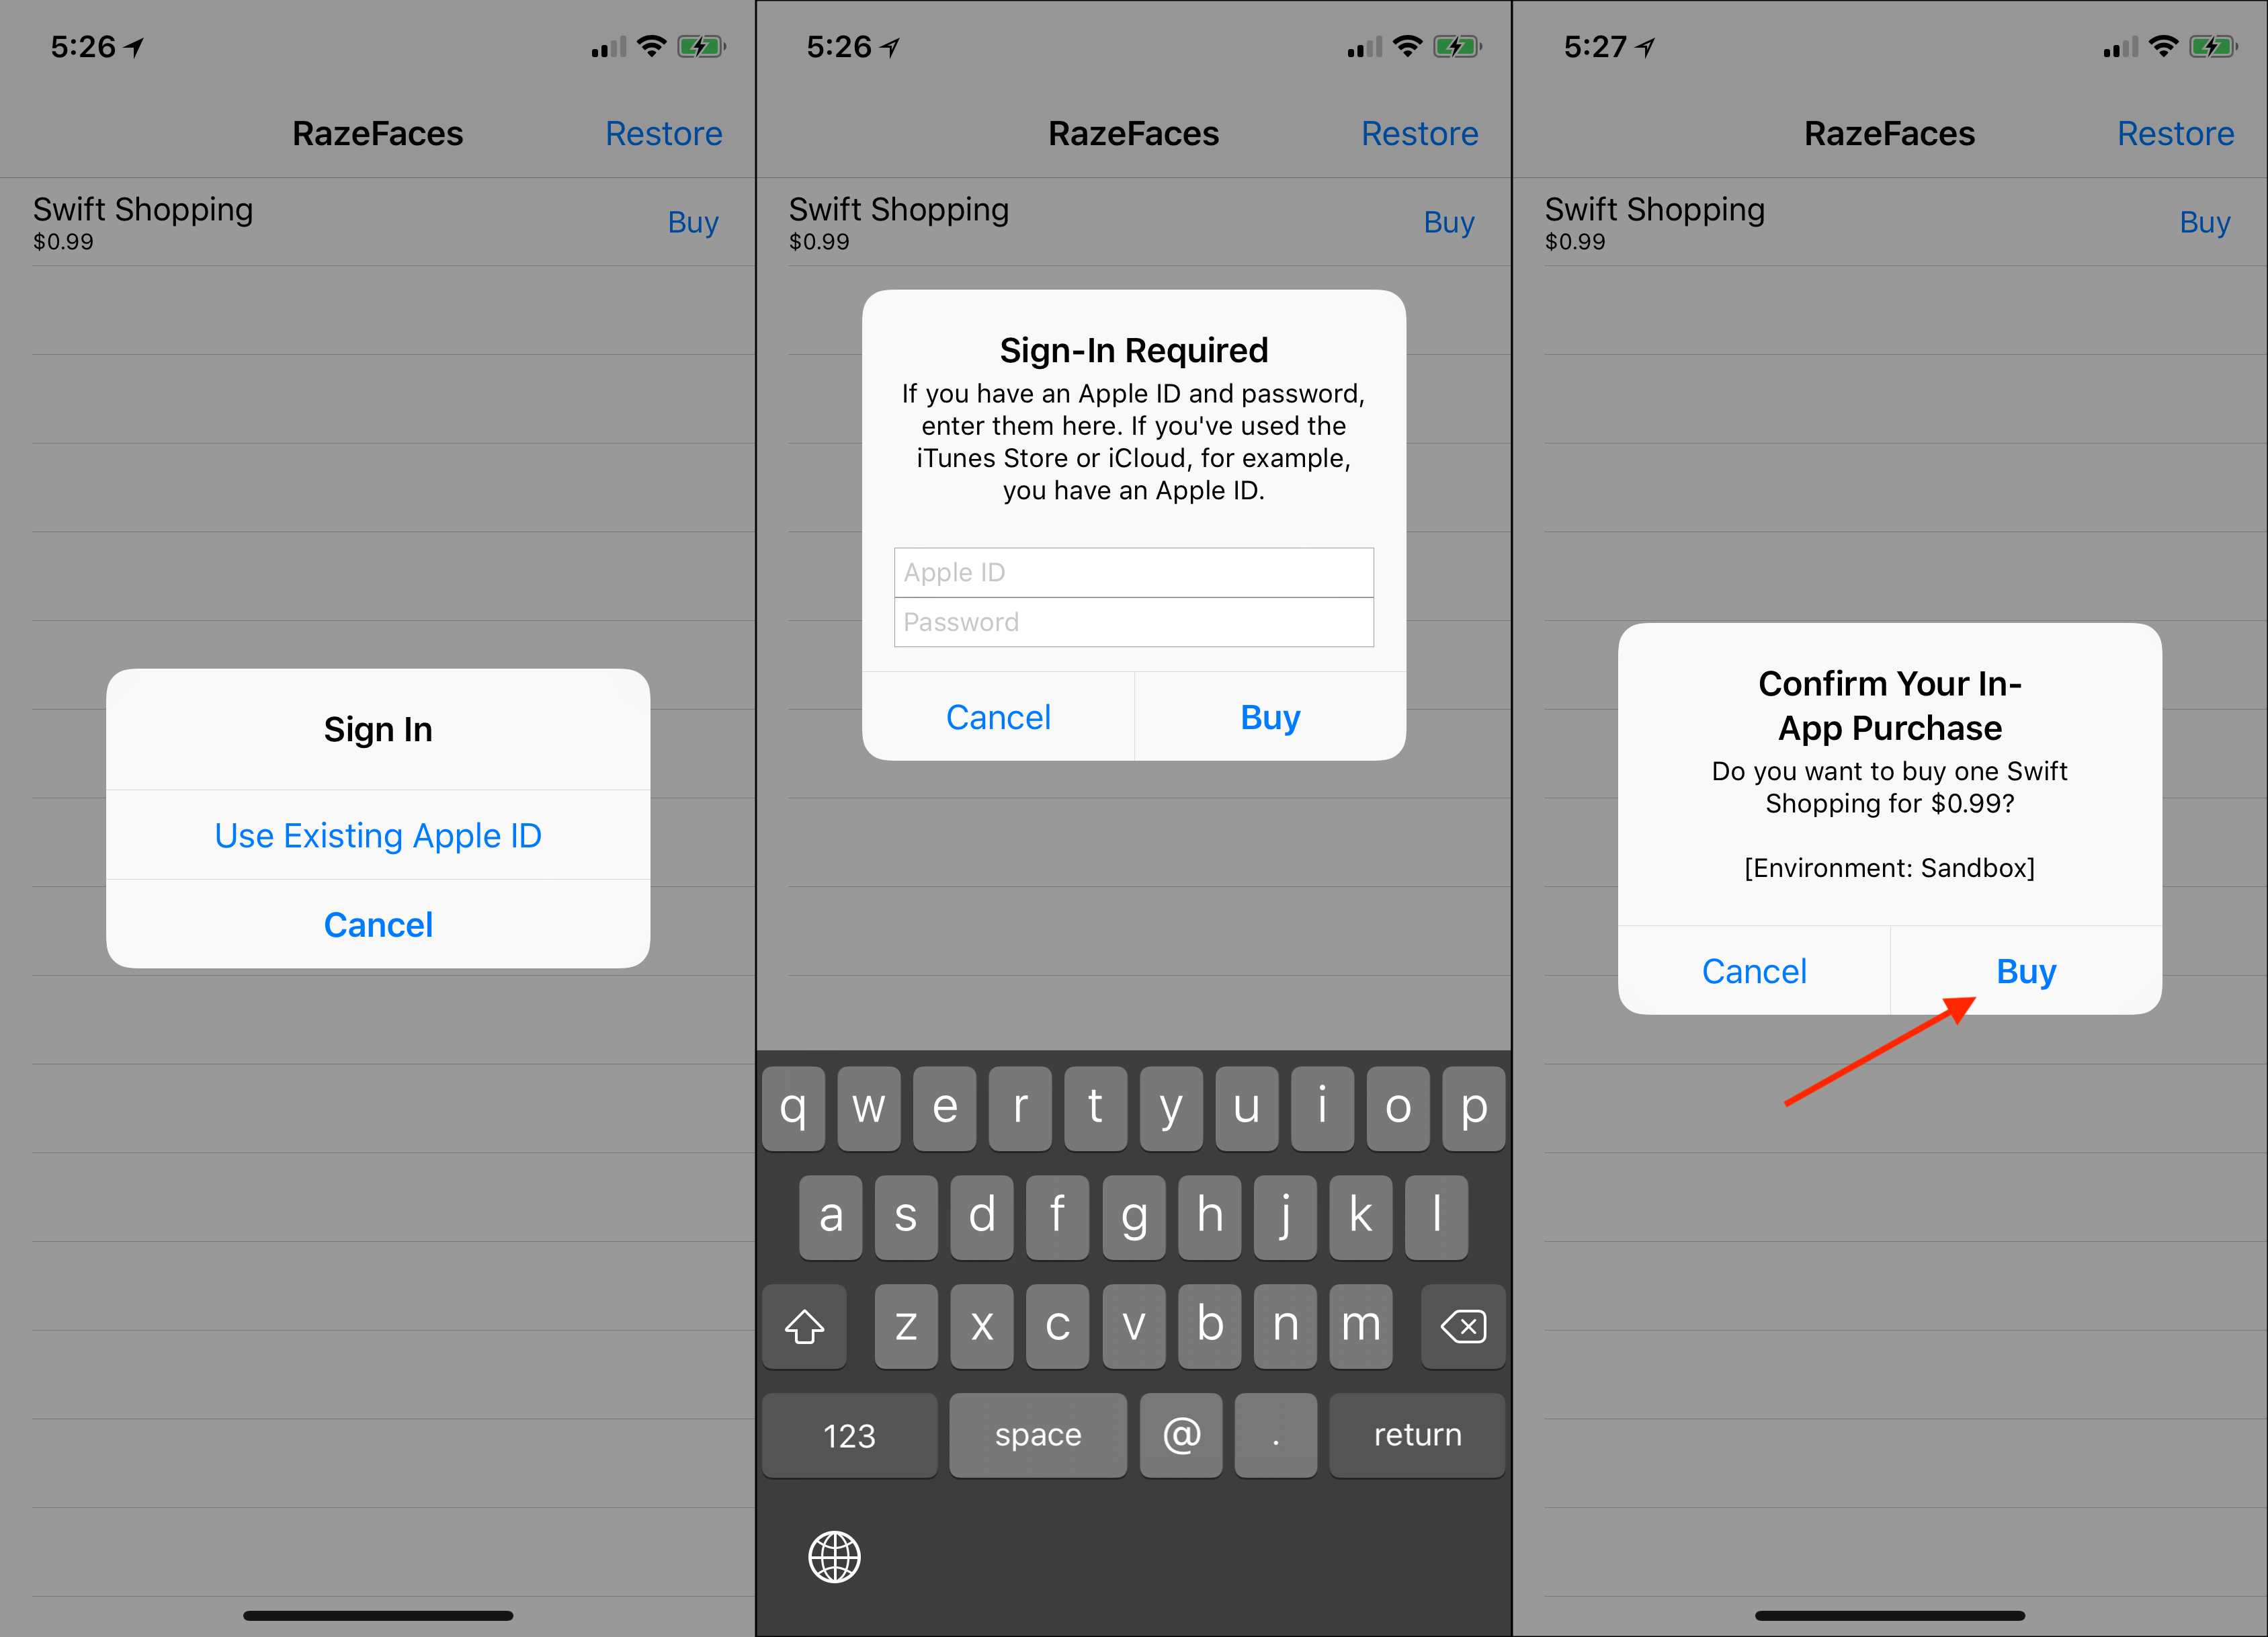
Connect your device, build and run! You’ll see your product listed in the app. To begin the purchase process, tap the Buy button.
An alert will appear prompting you to log in. Tap Use Existing Apple ID, and enter the login details for the sandbox tester account that you created earlier.
Confirm the purchase by tapping Buy. The alert view shows that the purchase is being made in the sandbox as a reminder that you won’t be charged for it.
Finally, an alert view will appear confirming the purchase was successful. Once the purchase process has been completed, a checkmark appears next to the purchased item. Tap on the purchased item to enjoy your new RazeFace.
Finally you get to see this “Swift Shopping” RazeFace that you’ve been hearing so much about!

Restoring Purchases
If the user deletes and re-installs the app or installs it on another device, then they need the ability to access previously purchased items. In fact, Apple may reject an app if it cannot restore non-consumable purchases.
As a purchase transaction observer, IAPHelper is already being notified when purchases have been restored. The next step is to react to this notification by restoring the purchases.
Open IAPHelper.swift and scroll to the bottom of the file. In the StoreKit API extension, replace restorePurchases() with the following:
public func restorePurchases() {
  SKPaymentQueue.default().restoreCompletedTransactions()
}
That was almost too easy! You’ve already set the transaction observer and implemented the method to handle restoring transactions in the previous step.
To test this out, after you’ve made a purchase in the previous step, delete the app from your device. Build and run again, then tap Restore on the top right. You should see a checkmark appear next to the previously purchased product.
Payment Permissions
Some devices and accounts may not permit an in-app purchase. This can happen, for example, if parental controls are set to disallow it. Apple requires this situation to be handled gracefully. Not doing so will likely result in an app rejection.
Open IAPHelper.swift again. In the StoreKit API extension, replace the return statement in canMakePayments() with this line:
return SKPaymentQueue.canMakePayments()
Product cells should behave differently depending on the value returned by canMakePayments(). For example, if canMakePayments() returns false, then the Buy button should not be shown and the price should be replaced by “Not Available”.
To accomplish this, open ProductCell.swift and replace the entire implementation of the product property’s didSet handler with the following:
didSet {
  guard let product = product else { return }

  textLabel?.text = product.localizedTitle

  if RazeFaceProducts.store.isProductPurchased(product.productIdentifier) {
    accessoryType = .checkmark
    accessoryView = nil
    detailTextLabel?.text = ""
  } else if IAPHelper.canMakePayments() {
    ProductCell.priceFormatter.locale = product.priceLocale
    detailTextLabel?.text = ProductCell.priceFormatter.string(from: product.price)

    accessoryType = .none
    accessoryView = self.newBuyButton()
  } else {
    detailTextLabel?.text = "Not available"
  }
}
This implementation will display more appropriate information when payments cannot be made with the device. And there you have it — an app with in-app purchase!
Where To Go From Here?
You can download the completed version of the project using the Download Materials button at the top or bottom of this tutorial. Feel free to re-use the IAP helper class in your own projects!
The In-App Purchase Video Tutorial Series by Sam Davies covers all of the topics introduced here, but goes to the next level in Part 3 where he talks about validating receipts.
One shortcoming of the sample app is that it doesn’t indicate to the user when it is communicating with Apple. A possible improvement would be to display a spinner or HUD control at appropriate times. This UI enhancement, however, is beyond the scope of this tutorial. For more information on HUD controls, check out Section 3 of The iOS Apprentice.
Apple has a great landing page for in-app purchase: In-App Purchase for Developers. It collects together links to all the relevant documentation and WWDC videos.
IAPs can be an important part of your business model. Use them wisely and be sure to follow the guidelines about restoring purchases and failing gracefully, and you’ll be well on your way to success!
If you have any questions or comments about this in-app purchase tutorial, then please join the forum discussion below!