In-App Purchase Tutorial: Getting Started
Learn how to grow app revenue in this in-app purchase tutorial by allowing users to purchase or unlock content or features. By Pietro Rea.
Creating In-App Purchase Products
When offering IAPs you must first add an entry for each individual purchase within App Store Connect. If you’ve ever listed an app for sale in the store, it’s a similar process and includes things like choosing a pricing tier for the purchase. When the user makes a purchase, the App Store handles the complex process of charging the user and reply with data about such operation.
There are a whole bunch of different types of IAP you can add:
- Consumable: These can be bought more than once and can be used up. These are a good fit for extra lives, in-game currency, temporary power-ups, and the like.
- Non-Consumable: Something that you buy once, and expect to have permanently such as extra levels and unlockable content. The RazeFace illustrations from this tutorial fall into this category.
- Non-Renewing Subscription: Content that’s available for a fixed period of time.
- Auto-Renewing Subscription: A repeating subscription such as a monthly raywenderlich.com subscription.
You can only offer In-App Purchases for digital items, and not for physical goods or services. For more information about all of this, check out Apple’s full documentation on Creating In-App Purchase Products.
Now, while viewing your app’s entry in App Store Connect, click on the Features tab and then select In-App Purchases. To add a new IAP product, click the + to the right of In-App Purchases.

You’ll see the following dialog appear:
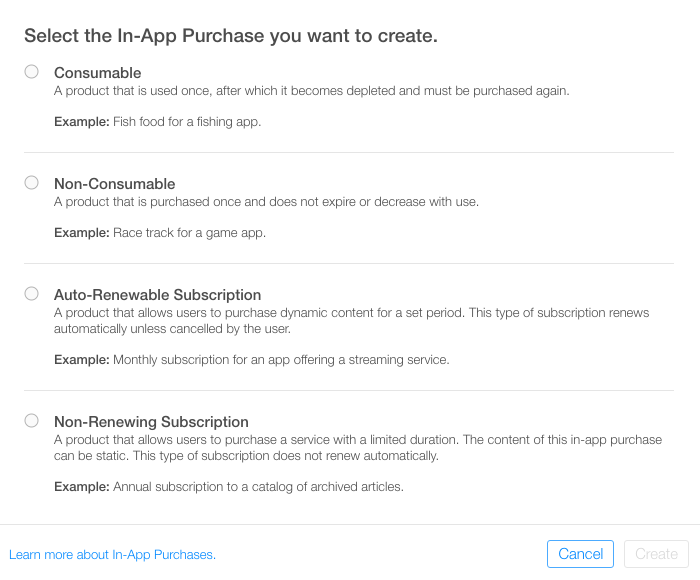
When a user purchases a RazeFace in your app, you’ll want them to always have access to it, so select Non-Consumable, and click Create.
Next, fill out the details for the IAP as follows:
- Reference Name: A nickname identifying the IAP within iTunes Connect. This name does not appear anywhere in the app. The title of the RazeFace you’ll be unlocking with this purchase is Swift Shopping, so enter that here.
- Product ID: This is a unique string identifying the IAP. Usually it’s best to start with the Bundle ID and then append a unique name specific to this purchasable item. For this tutorial, make sure you append swiftshopping, as this will be used later within the app to look up the RazeFace to unlock. For example, you can use: com.theNameYouPickedEarlier.razefaces.swiftshopping.
- Cleared for Sale: Enables or disables the sale of the IAP. You want to enable it!
- Price Tier: The cost of the IAP. Choose Tier 1.
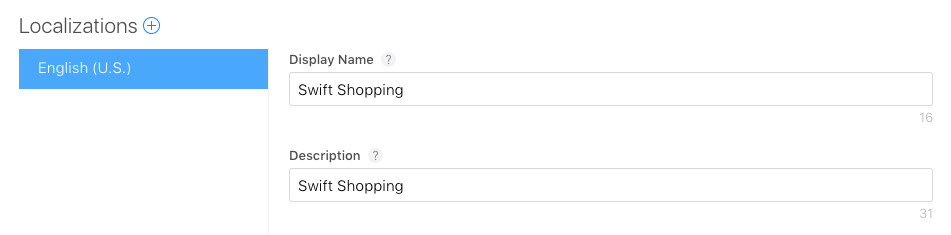
Now scroll down to the Localizations section and note that there is a default entry for English (U.S.). Enter “Swift Shopping” for both the Display Name and the Description. Click Save. Great! You’ve created your first IAP product.
There’s one more step required before you can delve into some code. When testing in-app purchases in a development build of an app, Apple provides a test environment which allows you to “purchase” your IAP products without creating financial transactions.
These special test purchases can only be made by a special “Sandbox Tester” user account in App Store Connect. You’re almost at the code, I promise!
Creating a Sandbox User
In App Store Connect, click App Store Connect in the top left corner of the window to get back to the main menu. Select Users and Roles, then click the Sandbox Testers tab. Click + next to the “Tester” title.

Fill out the information and click Save when you’re done. You can make up a first and last name for your test user, but you must use a real email address as Apple will send a verification email to the address. Once you receive that email, be sure to click the link in it to verify your address.
The email address you enter should also NOT already be associated with an Apple ID account. Hint: if you have a gmail account, you can simply use an address alias instead of having to create a brand new account.
Note: Unfortunately, testing a new purchase of a non-consumable IAP requires a new sandbox tester (and email address) each time. Repeated purchases using the same sandbox tester will be treated as restoring an already purchased item, so any code specific to new purchases will not be exercised.
If multiple test runs through new purchase code are necessary and your email provider does not support qualifiers, then consider setting up a consumable IAP just for testing purposes. Delete the app on your device after each test and the purchase of a consumable IAP will be considered a new purchase.
One strategy you could adopt is testing the failure cases as many times as possible before testing the successful case. That way you’ll need to create fewer sandbox testers. In general, remember the rule that once a user (even a sandbox one) has bought a non-consumable IAP, he can’t buy it again, only restore it.
Great — you now have a test user. You can finally implement IAPs in your app!
Project Configuration
For everything to work correctly, it’s really important that the bundle identifier and product identifiers in the app match the ones you just created in the Developer Center and in App Store Connect.
Head over to the starter project in Xcode. Select the RazeFaces project in the Project navigator, then select it again under Targets. Select the General tab, switch your Team to your correct team, and enter the bundle ID you used earlier.

Next select the Capabilities tab. Scroll down to In-App Purchase and toggle the switch to ON.

Open RazeFaceProducts.swift. Notice that there is a placeholder reference to the IAP product you created: SwiftShopping. Replace this with the full Product ID that you configured in App Store Connect — for example:
public static let SwiftShopping = "com.theNameYouPickedEarlier.razefaces.swiftshopping"