Cocos2D-X Tutorial for iOS and Android: Space Game
In this Cocos2D-X tutorial, you will learn how to build a space game similar to the one was built in the How to Make a Space Shooter iPhone Game. There will be one major difference – this will be written in beautiful cross-platform C++, using Cocos2D-X! By .
Sign up/Sign in
With a free Kodeco account you can download source code, track your progress, bookmark, personalise your learner profile and more!
Create accountAlready a member of Kodeco? Sign in
Sign up/Sign in
With a free Kodeco account you can download source code, track your progress, bookmark, personalise your learner profile and more!
Create accountAlready a member of Kodeco? Sign in
Contents
Cocos2D-X Tutorial for iOS and Android: Space Game
30 mins
- Getting Started
- Adding A Space Ship
- Adding Parallax Scrolling
- Continuous Scrolling
- Adding Stars
- Moving the Ship with Accelerometer
- Adding Asteroids
- Shooting Lasers
- Basic Collision Detection
- Win/Lose Detection
- Gratuitous Music and Sound Effects
- Platform-Specific Bugs and Tweaks
- Developing for Multiple Devices and Resolutions
- Where To Go From Here?
Gratuitous Music and Sound Effects
Android does not support the CAF sound file format, so the first thing you need to do is convert the original sound files to an alternate format that works on Android as well.
Open up a Terminal and issue the following commands (and don’t forget to replace $PROJECT_HOME in the first command with the actual path to the Android project – otherwise the command won’t work):
cd $PROJECT_HOME/Resources
afconvert -f WAVE -d UI8 SpaceGame.caf SpaceGame.wav
afconvert -f WAVE -d UI8 explosion_large.caf explosion_large.wav
afconvert -f WAVE -d UI8 laser_ship.caf laser_ship.wav
As you’ve probably guessed, the above commands will convert the files from CAF format to WAV format.
Once you’re done converting the files, go to your Xcode project and add the WAV converted files to your SharedResources folder (from the Android directory) – similar to how you added in the images and other resources earlier.
The hard part’s done – now to play these sounds! Add the following code to the top of HelloWorldScene.cpp:
#include "SimpleAudioEngine.h"
using namespace CocosDenshion;
Here you include the SimpleAudioEngine header file and say that you want to use symbols in its namespace.
The rest is a simple port of the original code to Cocos2D-X. Start by adding this code to the end of init(), before the return:
SimpleAudioEngine::sharedEngine()->playBackgroundMusic("SpaceGame.wav",true);
SimpleAudioEngine::sharedEngine()->preloadEffect("explosion_large.wav");
SimpleAudioEngine::sharedEngine()->preloadEffect("laser_ship.wav");
Next, add the following code to the Asteroids section in update where the intersectsRect test is made to determine if a laser collided with an asteroid. (You could also add a sound effect when a ship collides with an asteroid, which is tested for in the next intersectsRect test in the same section but since the ship doesn’t explode, you might want to make that a different sound :]):
SimpleAudioEngine::sharedEngine()->playEffect("explosion_large.wav");
Finally, add the following to the beginning of ccTouchesBegan:
SimpleAudioEngine::sharedEngine()->playEffect("laser_ship.wav");
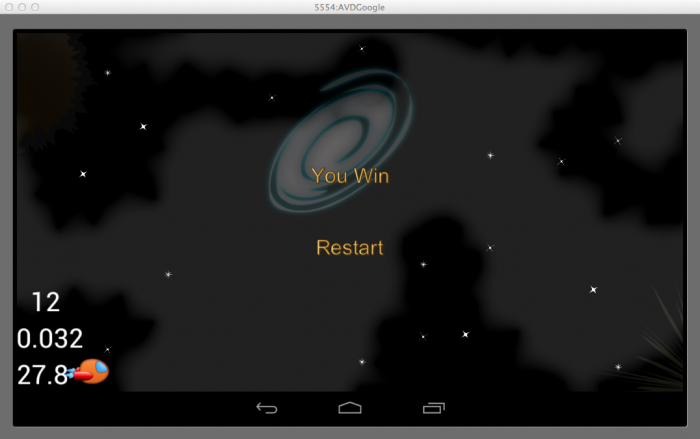
Compile and Run, and enjoy the sound effects! Here is the final project running on an iPhone 4:
And on an Android Nexus 7:
Platform-Specific Bugs and Tweaks
The Cocos2D-X developers do a great job, but nobody’s perfect, especially when it comes to ensuring cross-platform compatibility ;]
If you play around with the app, you’ll see that it works flawlessly on iOS. However, on Android you might find some of the following issues:
- When closing/resuming the game, sprites set by CCParticleSystemQuad are not correctly repainted and you get white squared areas instead. This appears to be an issue with Cocos2D-X on Android.
- Parallax scrolling is slow with visible refreshing sometimes.
Since these issues deal with Cocos2D-X itself, they are beyond the scope of this tutorial (and will likely be fixed in future version of Cocos2D-X).
Also, you might notice that the stars only show up on a limited portion of the screen. This is because when the particle systems were created with Particle Designer, they were set up assuming the iPhone’s screen dimensions.
To make them work properly on Android devices, just open up the particle systems and edit them according to the Android’s screen dimensions. These settings should do the trick for most devices: sourcePositiony 720, sourcePositionVariancey 720, and sourcePositionx 1088. However, depending on your device’s screen size, you might need to adjust those settings a bit.
Developing for Multiple Devices and Resolutions
When you develop for iOS, you have it easy – you just have four screen aspect ratios: iPhone4, iPhone5, . iPad and iPad mini, and normal/retina resolution for each.
However, it gets more complicated for the Android because there are numerous devices from multiple vendors, with varying screen sizes.
If you have a device with a different screen size than the iPhone (or a retina device), the game might not look quite right currently. But you want your game to look OK no matter what screen size the user is using!
The general idea is, you can scale the artwork based on the screen size according to the following formula:
factor = min(targetWidth / DesignWidth, targetHeight / DesignHeight)
You also should try to place artwork, when laying out scenes, based on multiples of the screen size, etc. rather than hardcoded coordinates.
Unfortunately this Cocos2D-X tutorial is long enough already and is only meant to be an intro to Cocos2D-X, so this will be left as an exercise for you guys! :]
Where To Go From Here?
Congratulations, you now have hands-on experience with Cocos2D-X and have created a simple cross-platform game!
Here is the example project from the above Cocos2D-X tutorial.
Note that I have cleaned up the project directory structure a bit so that the same root directory can be shared across iOS and Android projects. If you’re interested in more details on how to set this up, I’d be glad to discuss more in the forums!
If you have any questions on this Cocos2D-X tutorial or Cocos2D-X in general, please join the forum discussion below!

