Unity 4.3 2D Tutorial: Getting Started
Learn how to make a cool 2D zombie game using Unity’s new built-in tools in this Unity 4.3 2D Tutorial! By Chris LaPollo.
Sprites, Made Easily
How easy is it to add a sprite to your scene using Unity’s new features? Try the following experiment to find out.
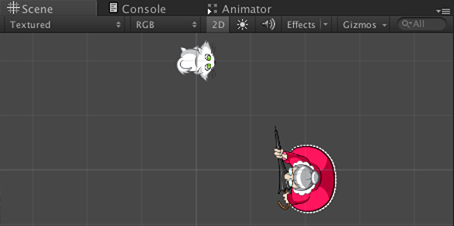
Step 1: Drag cat.png from your Finder window into the Scene view, as demonstrated below:
![]()
Step 2: Use some of the time you save making your game to send a thank you note to the Unity devs.
Phew! That was pretty tricky! If you got lost, don’t feel bad, just re-read those instructions and try again. ;]
Note: Wondering why there are two cat images shown in the animation above? Don’t worry, I’ll explain that later on.
This demonstration was simplified by relying on Unity’s default import settings, which oftentimes won’t be correct for your images. However, this serves to illustrate a point – Unity’s new features make working in 2D amazingly easy! The rest of this tutorial covers everything you’ll need to know to really get started working with 2D graphics in Unity.
Sprite Assets
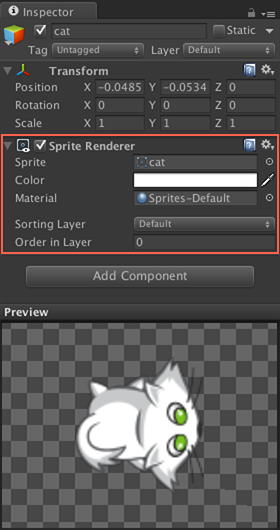
Select cat in the Hierarchy and look in the Inspector. Your Inspector most likely won’t show the same position that you see in the following screenshot, but don’t worry about that right now. What’s important to note here is that, in order to display the cat in the scene, Unity attached a Sprite Renderer component to a GameObject.
It’s not obvious, but Unity created geometry for the object, too. In the free version of Unity, each Sprite gets mapped to a simple rectangle, but Unity Pro creates a mesh for each Sprite that basically fits the non-clear pixels in your image. Notice the blue mesh in the following image of the zombie in Unity Pro:
![]()
By creating a mesh like this rather than applying your sprites as textures on a quad, Unity can improve your scene’s fill rate at render-time, meaning it will process fewer pixels, and it can pack textures more tightly when using Unity Pro’s Sprite Packer, which you’ll read about at the end of this tutorial.
Note: Don’t let the sudden appearance of the zombie startle you. I just showed the zombie because its mesh was more interesting than the one generated for the cat sprite.
You’ll learn about the Sprite Renderer’s properties throughout this tutorial, but for now, look at the field labeled Sprite. This shows the name of the Sprite asset assigned to this renderer. You can only assign one Sprite at a time, but later you’ll learn how to update this field at runtime to create animations.
As you can see in the following image, the cat GameObject has a Sprite named cat assigned to its renderer:
![]()
Be sure the Project browser is visible. Then click inside the Sprite field in the Inspector to locate and highlight the Sprite asset in the Project browser, as shown here:

Note: The highlighted border fades away after a few seconds, so if you don’t notice it, click the Sprite field again. Of course, with only one asset in your project, it’s unlikely you’ll miss it. ;]
As you can see in the previous screenshot, Unity highlighted an item named cat inside the Project browser, which is a child of another object, also named cat. Two cats in the Project browser? Yeah, that could be confusing. Here’s what’s going on:
- The parent cat is the Texture asset. It’s a reference to the original art file you imported, cat.png, and controls the import settings used to create the Sprites from your artwork. As you can see, it shows a nice thumbnail of the file’s contents.
- The child cat is a Sprite asset that Unity created when it imported cat.png. In this case, there is only one child because Unity only created a single Sprite from the file, but later in the section on slicing sprite sheets you’ll see how to create multiple Sprites from a single image.
Note: While I’ve been claiming Unity renders Sprite objects, the Sprite class actually only contains the information needed to access a Texture2D object, which is what stores the real image data. You can create your own Texture2D objects dynamically if you want to generate Sprites at runtime, but that discussion will have to wait for a future tutorial.
As you saw with cat.png, you can add Sprites to your scene by dragging art assets from the Finder directly into the Scene view (or the Hierarchy, if you’d like). But more commonly, you’ll add assets to your project prior to adding objects to your scene.
Add to your project the remaining image files you downloaded: background.png, enemy.png, and zombie.png.
[spoiler title=”Not sure how to add image assets to your project? Find out here.”]Unity gives you the following five options to get assets into your project:
- Drag files from your Finder window into the Project browser.
- Go to Assets\Import New Asset…, select your files and click Import.
- Right-click within the Project browser, choose Assets\Import New Asset…, select your files and click Import.
- Within your OS, add the files directly to your project’s Assets directory, or one of its subdirectories. Unity refreshes your project automatically to keep assets up to date. Warning: Although it’s ok to add assets this way, you should never delete assets directly from your file system. Instead, always delete assets from within Unity, because Unity maintains metadata about your project’s assets and modifying the file system directly could corrupt it.
- Of course, you can also drag files directly into the Hierarchy or the Scene view, but doing so has the additional effect of creating a GameObject in the current scene.
[/spoiler]
Add an enemy to your scene by dragging enemy from the Project browser to the Hierarchy.
Just like with cat, there are two items named enemy in the Project browser, but it doesn’t matter which one you choose. That’s because dragging a Sprite asset (the child) always uses that specific Sprite, whereas dragging a Texture asset (the parent) uses the first child Sprite, which is the same thing in a case like this where there is only one child.
Select enemy in the Hierarchy and set its Transform component’s Position to (2, 0, 0), as shown below:

Before your scene starts getting sloppy, select cat in the Hierarchy and set its Position to (0, 2, 0), like this:

Your scene should now be arranged like the following image:
Finally, drag background from the Project browser to the Hierarchy, and set its Position to (0,0,0), as shown below:

You’ll improve the background’s image quality a bit later, so don’t worry if it doesn’t look quite right. (Hint: Importing background.png is one of those times where Unity’s default settings aren’t correct.) Your Scene view will now look something like this:

Don’t be alarmed by the fact that you can no longer see the cat or the old lady in your Scene view. They’re each just taking a brief dirt nap, but you’ll dig them up soon enough. However, before you do that, you need to slice up a corpse! Err, a corpse’s sprites, that is.