Unity 4.3 2D Tutorial: Physics and Screen Sizes
Learn how to use Unity’s 2D physics engine for collision detection, and deal with different screen sizes and aspect ratios. By Chris LaPollo.
Spawn Points
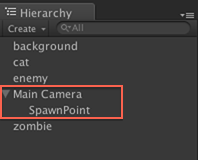
Create a new empty GameObject by going to GameObject\Create Empty in Unity’s menu. Inside the Inspector, name this new object SpawnPoint and then drag it onto Main Camera in the Hierarchy. SpawnPoint should now be a child of the camera, as shown below:
You added SpawnPoint as a child of Main Camera because later you’ll be moving the camera and you want to ensure the spawn point moves with it.
That’s because when you make one object a child of another, the child’s Transform component gets modified to take its parent’s Transform into account.
SpawnPoint exists only to represent a position in your game and as such, you won’t actually see it. However, it’s difficult to keep track of invisible objects while you’re developing. To remedy this, do the following:
Select SpawnPoint in the Hierarchy. Click the icon that looks like a cube in the upper left of the Inspector, shown below:
![]()
After clicking the above icon, a menu of different icons appears. Select the green oval shown below:
![]()
Inside the Scene view, you should now see a green oval labeled SpawnPoint representing the object’s location, shown here:

You’re only using this icon to help yourself keep track of SpawnPoint’s location, so feel free to choose a different one if you’d prefer. Some of them scale their size when you zoom in and out, while others remain a fixed size regardless of the Scene view’s zoom level, so experiment and see what you like the best.
Select SpawnPoint in the Hierarchy. Press Add Component and choose Scripts\Screen Relative Position from the menu that appears.
In the Inspector, set the Screen Relative Position (Script) component’s Screen Edge value to RIGHT and set its XOffset value to 1, as shown below:

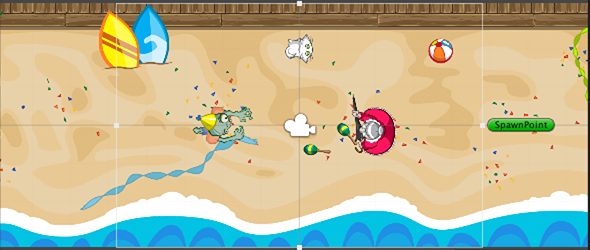
Select SpawnPoint in the Hierarchy and then play the scene. You’ll see in the Scene view that SpawnPoint immediately moves to the right of the scene, just outside of the camera’s viewable area, indicated by the white rectangle in the following image:

With the spawn point in place, it’s time to change EnemyController.cs to move the enemy back to the spawn point whenever she moves off screen.
Open EnemyController.cs in MonoDevelop and add the following instance variable to the script:
private Transform spawnPoint;
You’ll store the spawn point’s Transform here so that the enemy can reference its position whenever she needs to respawn.
Add the following line of code to Start:
spawnPoint = GameObject.Find("SpawnPoint").transform;
This simply finds the object named “SpawnPoint” and gets its Transform component. You could have made spawnPoint a public or serialized field and then assigned the object in the Inspector, but this shows another way to locate objects in your scene.
GetObject.Find is slower at runtime than referencing a value set in the Inspector, so don’t use this technique if you need to find the same object often, such as from within every execution of Update.There are several ways you could handle detecting when an object leaves the view, but the easiest for Zombie Conga is to implement OnBecameInvisible. Unity calls this method whenever an object ceases to be visible to a camera.
Add the following implementation of OnBecameInvisible in EnemyController.cs:
void OnBecameInvisible()
{
  float yMax = Camera.main.orthographicSize - 0.5f;
  transform.position = new Vector3( spawnPoint.position.x,
                                    Random.Range(-yMax, yMax),
                                    transform.position.z );
}
This code calculates a new position for the enemy. It always uses the x value from spawnPoint, but it chooses a y value by picking a random point within the available vertical space. The random vertical position keeps the player guessing.
Notice how the first line subtracts 0.5 when calculating the maximum y value. This ensures the enemy doesn’t spawn too close to the top or bottom of the screen. If you don’t understand why the y value is chosen between negative and positive yMax, remember that the center of the screen is at (0,0), meaning there is Camera.main.orthographicSize vertical space available in each direction.
Save the file (File\Save) and go back to Unity.
This means that if you want this respawning logic to work, you need to make sure you only see Zombie Conga in the Game view while playing the scene. You can still have a Scene tab open, but it has to be behind another tab so that it isn’t rendering.
OnBecameInvisible.
Play the scene inside Unity. After the enemy moves off the left side of the screen, you should see a new one walk in on the right side, as you can see below:

![]()
This seems to occur because the camera gets removed from the scene when you stop playing it and the enemy receives one last notification that it became invisible. I’m not sure if it’s an error that will occur in a real build or if it only happens when testing in the editor, but you can fix it by adding the following line at the beginning of OnBecameInvisible in EnemyController.cs:
This simply aborts the method if the camera is not present.
if (Camera.main == null)
  return;
if (Camera.main == null)
  return;
The above video shows one small problem: the old lady ran off with your cat! You saw a similar problem earlier between the zombie and the enemy. Try to figure it out yourself, and then check the following Spoiler to see if you’re right.
[spoiler title=”Need help keeping a cat away from an old lady?”]The solution to this problem is to make the collider for the cat and/or the enemy into a trigger. Because Zombie Conga doesn’t need any solid objects, you might as well make them both triggers.
Select cat in the Hierarchy and then check Is Trigger in the Circle Collider 2D component in the Inspector.
Select enemy in the Hierarchy and then check Is Trigger in the Polygon Collider 2D component in the Inspector.
[/spoiler]
Now that you know that respawning works, it’s time to point out why you went through all that screen-relative positioning in the first place. Stop the scene and then change the Game view’s aspect ratio by choosing one of the presets in the Aspect drop down menu in the Game view’s control bar, shown below:
![]()
Play the scene again and notice that the enemy spends the same amount of time off screen, no matter which size you chose. Repeat the test with different aspect ratios until you’re satisfied it works.
The following images show the spawn point’s location when running with a few different aspect ratios. The white rectangles indicate the area viewable by the camera:
5:4 Aspect Ratio

3:2 Aspect Ratio
iPhone 5’s Aspect Ratio
