Using Proxyman to Inspect Network Traffic
Learn how to use Proxyman as a man-in-the-middle proxy to inspect network traffic on your iOS device or simulator. By Danijela Vrzan.
Adding Custom Previewer Tabs
When it comes to requests and responses, you’re interested in seeing the correct status code and format of your JSON. The default Previewer Tab in both request and response windows is Header.
The headers in a request or response provide extra information between the client and the server. Since you’re interested in seeing the JSON, you’ll add it to the tab.
In Source List, under Jokester, select the joke.deno.dev domain. Select a network call in the Flow List. In the Response window, click +:

This opens a new Custom Previewer Tab window:

Here, you can select multiple formats you want to add to your previewer list. Under Response, select JSON and Images. Close the window.
You will notice in the Response window there are now two new tabs: JSON and Images. Select JSON:

Magic! You can see the JSON response you received from the server in plain text.
Now, select the i.picsum.photos domain and a network call from the Flow List. In the Response window, select Images preview:

You can see the exact image your response sent you!
Not only can you inspect your network calls in Proxyman, but you can also compose custom requests in the app. You’ll see how in the following section.
Composing Requests
Before you compose a new network request, make sure you pause recording and clear all the network calls with the clear button. This lets you see your composed request without searching for it.
If you don’t do this, you can still find your request under Apps ▸ Proxyman. That’s the app that sent the request after all.
Click the compose button in the top bar:

You can compose any request you choose. But since you’re inspecting your app, copy and paste https://joke.deno.dev into the text field.
Next to the text field is a drop-down menu where you can select the HTTP method of your request. The default is GET, and that’s what you want here, so leave that selected. When composing your request, Body, Header and Query are optional. If not defined, it uses the default configuration.
At the bottom-left, check Close window after send and click Send.

In the Flow List, you can now see your composed request:

Click it and inspect the response using the JSON tab. You’ll see the joke that the API randomly selected for you!
Next, you’ll learn how to use the Map Local tool to edit networking responses that your app is receiving.
Using the Map Local Tool
The Map Local tool allows you to intercept a response and alter it.
In Proxyman, make sure you’re recording network traffic on your simulator. In the Jokester app on your simulator, request a new joke.
Then, in Proxyman, select a network call from the joke.deno.dev domain. Right-click and go to Tools ▸ Map Local…:

You’ll see a new Map Local Editor window:
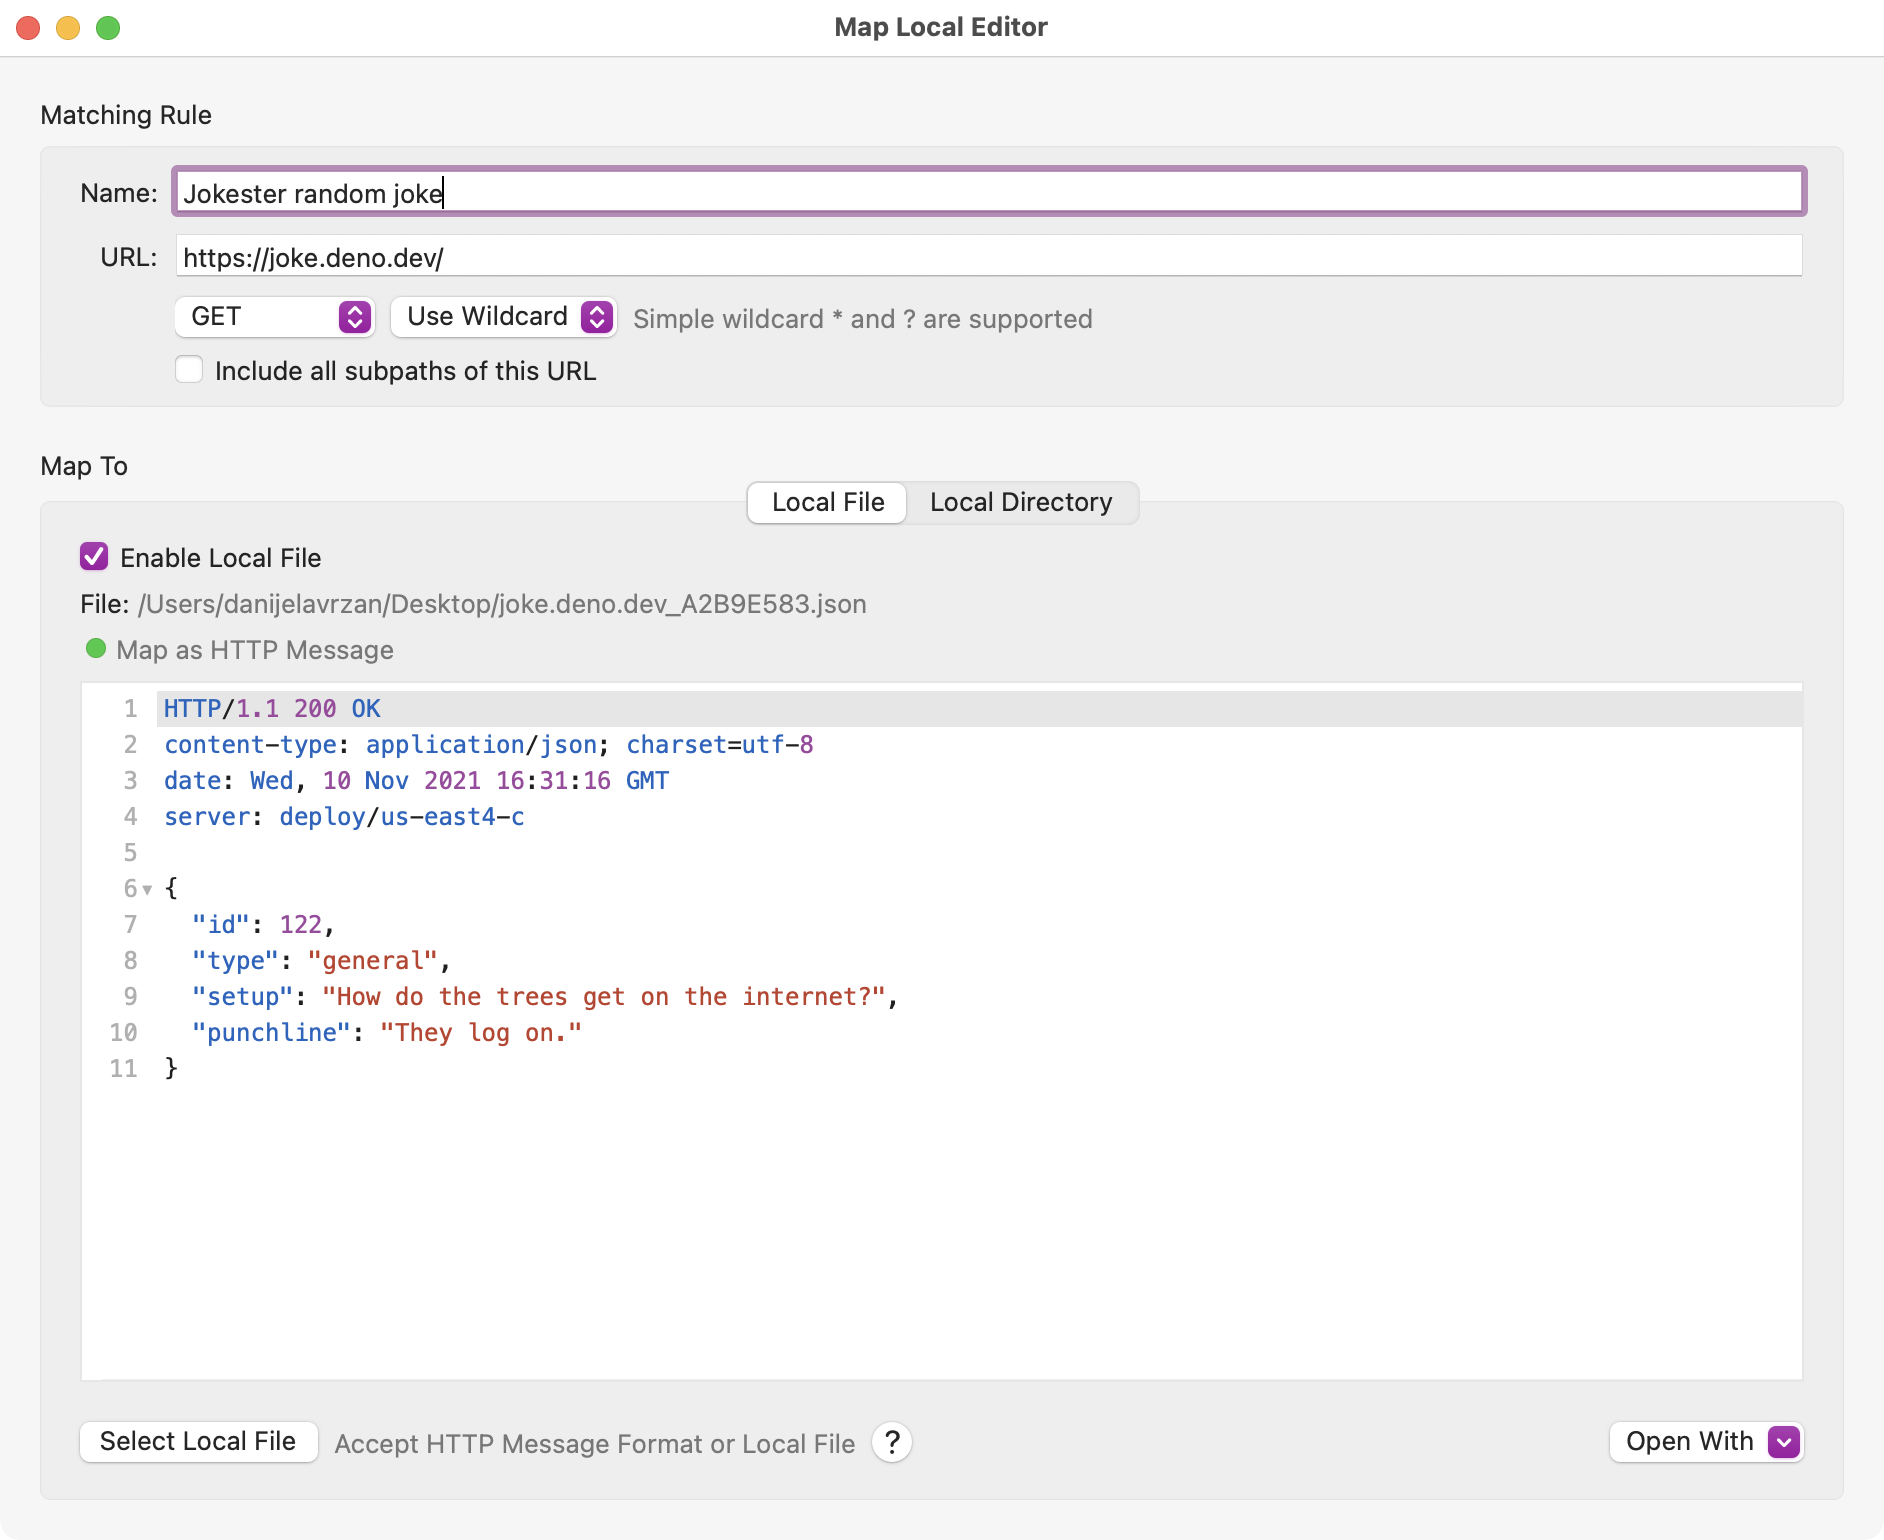
Edit the JSON body and replace setup with question:
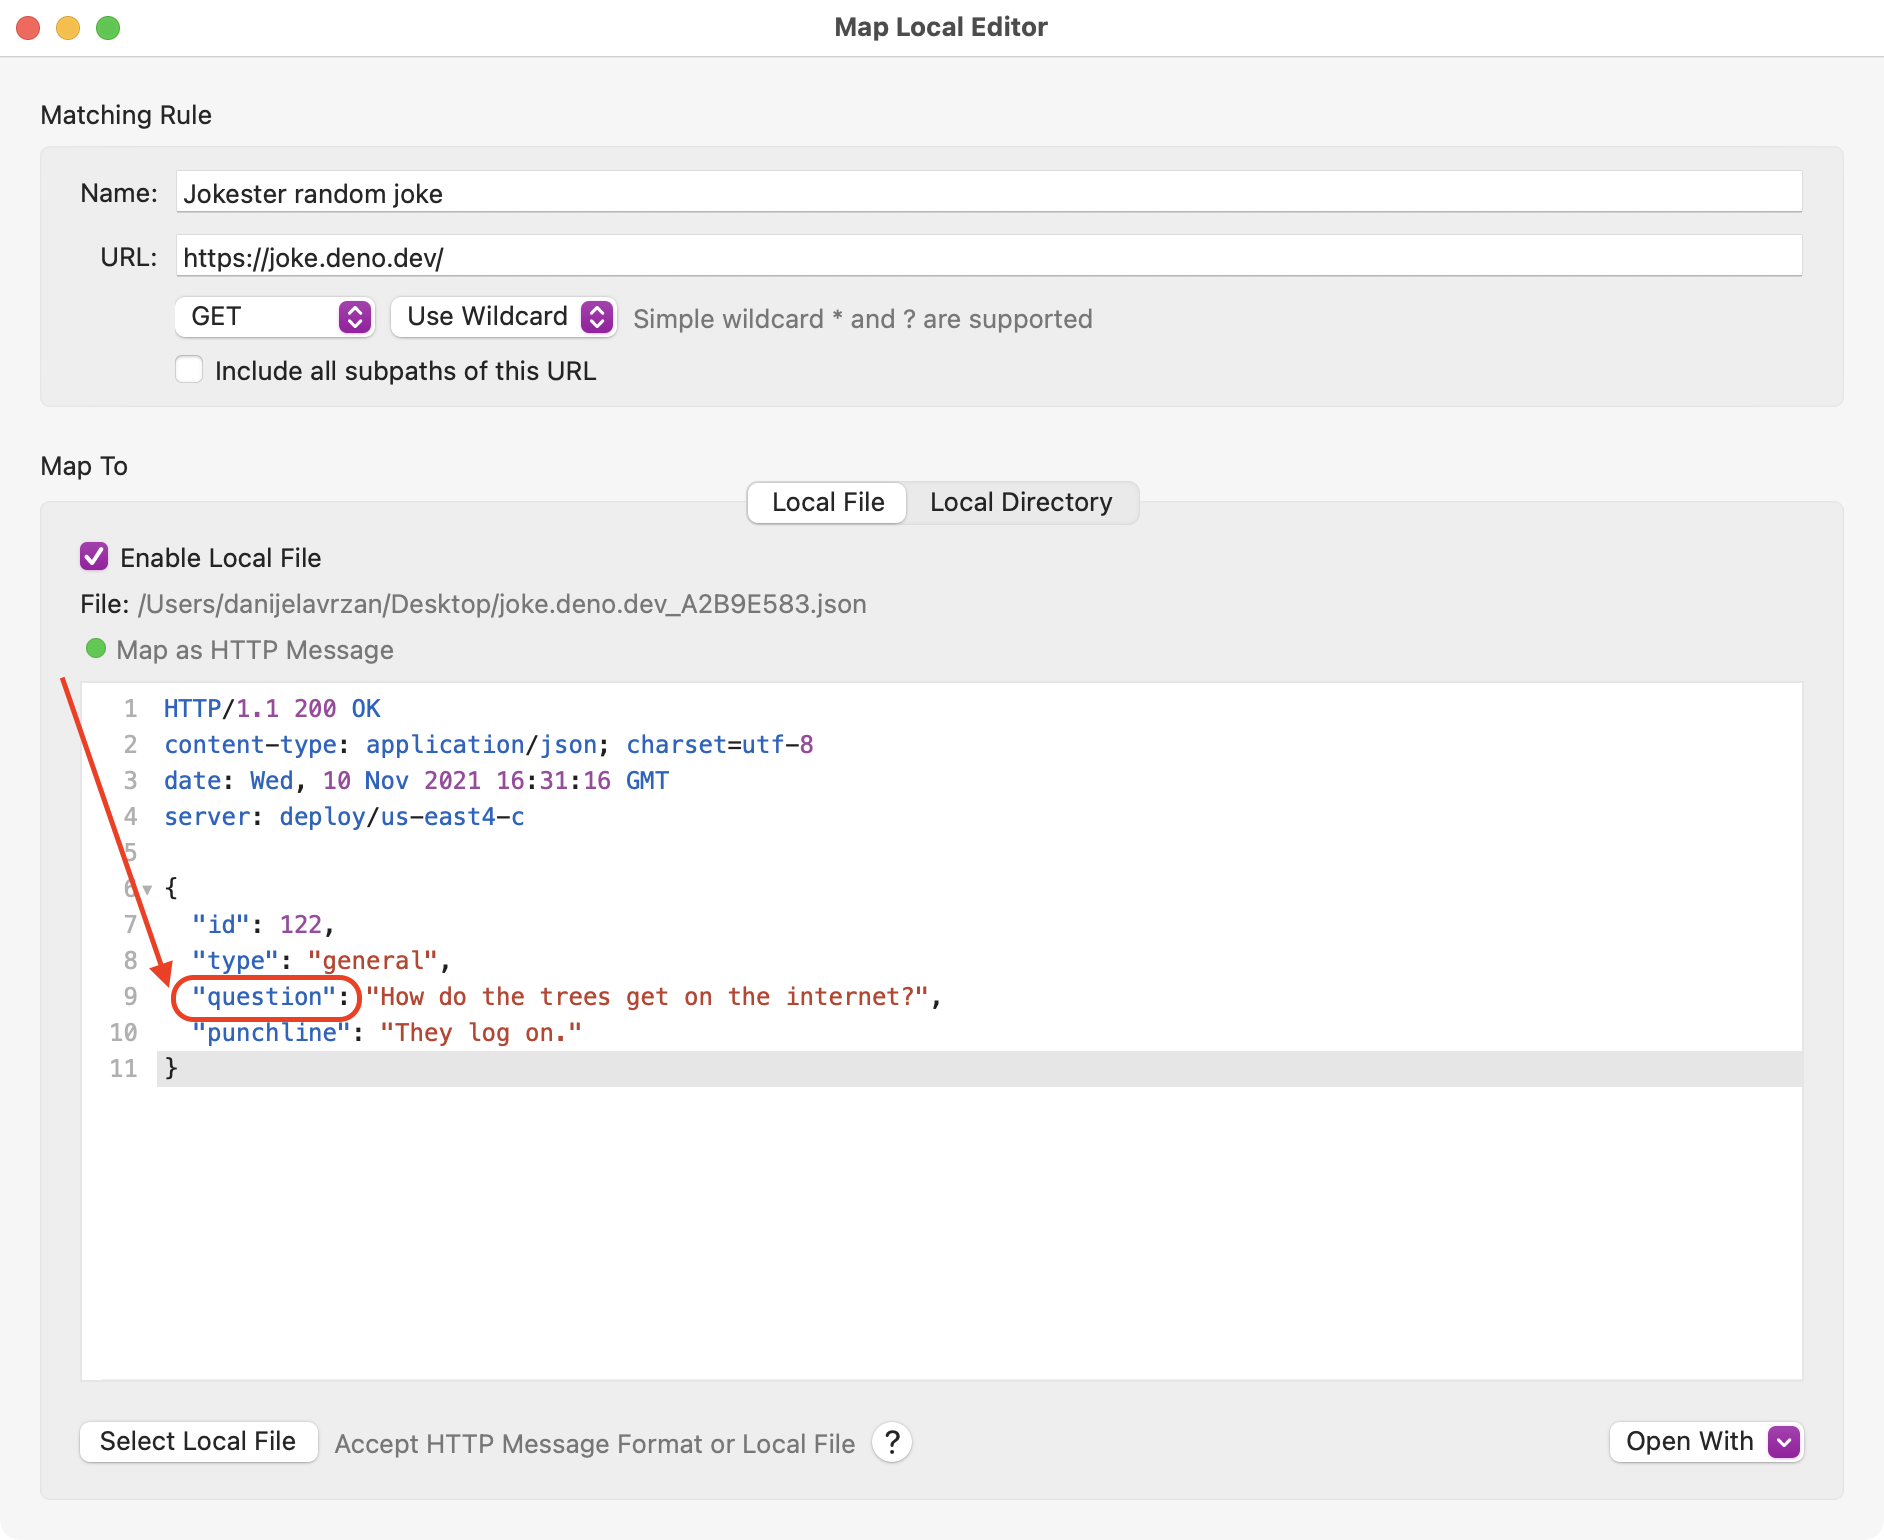
Now close both windows and tap the card in the Jokester app to generate a new random joke. What happens to the UI?

The title of the joke says Ready? and the punchline stays the same no matter how many times you tap the card; only the image changes.
You changed the property name of a JSON object and now your code can’t decode it. So it’s defaulting to a string defined in the app’s code.
Changing responses is one of the most useful features when proxying network calls. You can use it to simulate response errors and see how your app responds.
You’ve seen how to set up your own device for proxying manually. Now, you’ll learn how to set it up in a much simpler way, using the Atlantis framework.
Using the Atlantis Framework
Atlantis makes proxying your app’s network calls simpler than setting it up manually. You only need to import the framework and add a few lines of code.
You’ll use Swift Package Manager to add Atlantis to your app.
Installing Atlantis With SwiftPM
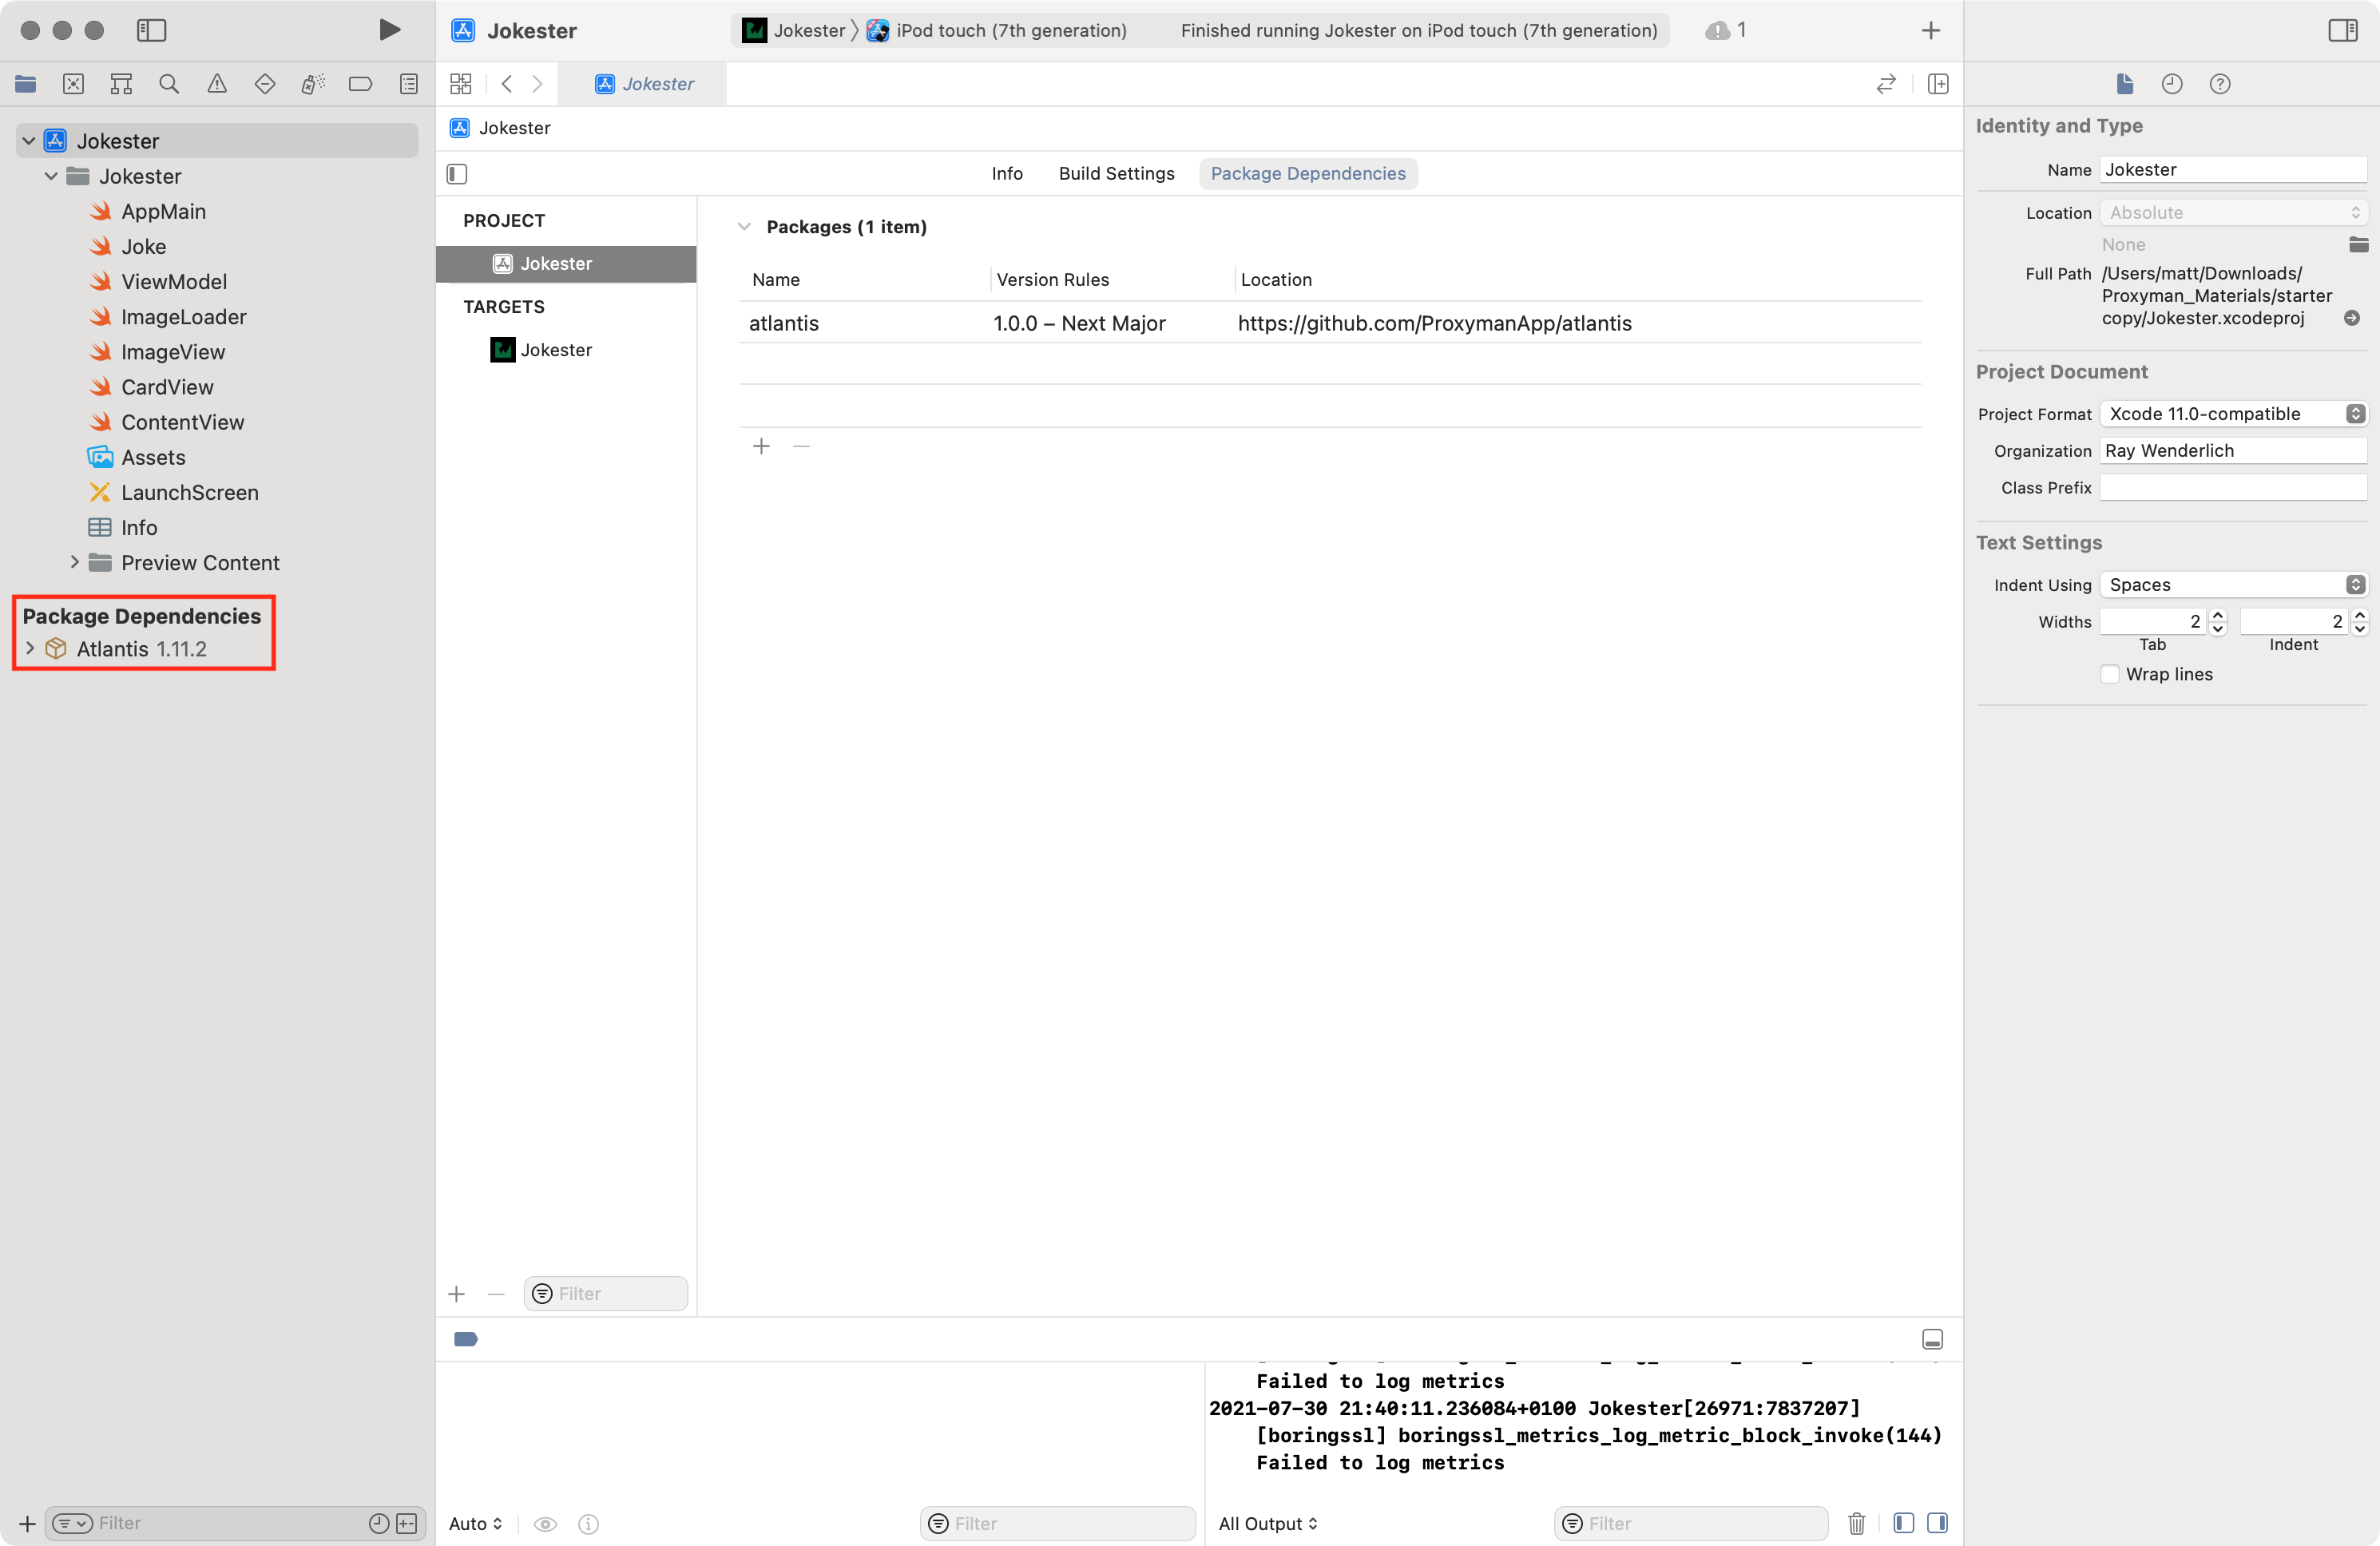
Open Jokester.xcodeproj, if you haven’t already. In the Project navigator, select the Jokester root project. Then select Project ▸ Jokester ▸ Package Dependencies and finally click the + underneath the Packages list.
A new window will open. Copy and paste https://github.com/ProxymanApp/atlantis into the search field at the top right:

Keep all the options at the default and then click Add Package. Xcode will perform a fetch of the repository and set up the dependency. When it has finished, click Add Package again.
You’ll see Atlantis added under Package Dependencies:
Now you need to add Atlantis to the app. The first step is to initialize Atlantis when your app launches.
Initializing Atlantis Upon App Launch
In Xcode, open AppMain.swift and add the following line below import SwiftUI:
import Atlantis
Then add the following at the beginning of AppMain before body:
init() {
  Atlantis.start()
}
With a few lines of code, you tell your app to start using Atlantis when your app finishes launching.
Build and run. You’ll see the following lines in Xcode console:
--------------------------------------------------------------------------------
--------- [Atlantis] MISSING REQUIRED CONFIG from Info.plist for iOS 14+ -------
--------------------------------------------------------------------------------
Read more at: https://docs.proxyman.io/atlantis/atlantis-for-ios
Please add the following config to your MainApp's Info.plist
Now that Atlantis is up and running, a step is required for Atlantis to work on iOS 14 or later. Don’t skip this step, or Atlantis may not work.
Adding Required Configuration for iOS 14 and Above
In Xcode, find your Info.plist file in Document Outline. Right-click the file then Open As ▸ Source Code:

Add a new line below dict on line 4, then copy and paste the following:
<key>NSLocalNetworkUsageDescription</key>
<string>Atlantis would use Bonjour Service to discover Proxyman app from your local network.</string>
<key>NSBonjourServices</key>
<array>
    <string>_Proxyman._tcp</string>
</array>
Your Info.plist file will look like this:

Run the Jokester app again, and you’ll see this in your Xcode console:
--------------------------------------------------------------------------------
----------  Atlantis is running (version 1.0)
---------- Github: https://github.com/ProxymanApp/atlantis
--------------------------------------------------------------------------------
[Atlantis] Looking for Proxyman app in the network...
You’re done with the setup. Now, you can inspect your app’s network calls on your device.