React Native Tutorial: Integrating in an Existing App
In this React Native tutorial, you’ll learn how to integrate React Native into an existing app, demonstrating one approach to adoption of the framework. By Christine Abernathy.
Setting Up the View with an Existing Bridge
Your JavaScript and native code communicate back and forth in React Native via a brige created using the JavaScriptCore Framework.

The bridge communication is batched and asynchronous so it remains performant and that message calls are serialized across the bridge. To see how this plays out, take a look at how you display the initial React Native view:
-
- Native: initializes the bridge.
- Sends a message through the bridge to the JavaScript code to run the application.
-
-
JavaScript: runs the initial
AddRatingAppcomponent that was registered. - Calls
renderfor the component which displays aViewandTextnode. - Batches and sends a message through the bridge to the Native code responsible for creating and displaying the views.
-
JavaScript: runs the initial
- Native: initializes the bridge.
- Sends a message through the bridge to the JavaScript code to run the application.
-
JavaScript: runs the initial
AddRatingAppcomponent that was registered. - Calls
renderfor the component which displays aViewandTextnode. - Batches and sends a message through the bridge to the Native code responsible for creating and displaying the views.

The view layout is first computed using css-layout, then displayed using UIKit that translates View into UIView and Text into UILabel.
The following threads and queues manage the code execution to ensure responsiveness:
- Main Thread: This thread handles the display of native views through UIKit.
- Shadow Queue: This GCD queue computes the native view layout.
- JavaScript Queue: This queue manages the execution of the JavaScript code.
- Modules Queue: By default, each custom native module gets its own GCD queue. You’ll learn about native modules shortly.
In the previous section, you created a view by calling RCTRootView(_:moduleName:initialProperties:launchOptions). This is fine if you’re only going to have one RCTRootView in your app. But when working with multiple React Native views, it’s best to first create an RCTBridge instance that you can reuse to set up additional views.
Create an empty Swift file named MixerReactModule.swift and populate it with the following:
import Foundation
import React

class MixerReactModule: NSObject {
  static let sharedInstance = MixerReactModule()
}
This uses the singleton pattern to lazily create a MixerReactModule instance when first accessed.
Add the following variable to the class:
var bridge: RCTBridge?
Then, add the required RCTBridgeDelegate delegate method sourceURL(for:) as an extension to the end of the file:
extension MixerReactModule: RCTBridgeDelegate {
  func sourceURL(for bridge: RCTBridge!) -> URL! {
    return URL(string: "http://localhost:8081/index.ios.bundle?platform=ios")
  }
}
Now, add the following methods to the class:
func createBridgeIfNeeded() -> RCTBridge {
  if bridge == nil {
    bridge = RCTBridge.init(delegate: self, launchOptions: nil)
  }
  return bridge!
}

func viewForModule(_ moduleName: String, initialProperties: [String : Any]?) -> RCTRootView {
  let viewBridge = createBridgeIfNeeded()
  let rootView: RCTRootView = RCTRootView(
    bridge: viewBridge,
    moduleName: moduleName,
    initialProperties: initialProperties)
  return rootView
}
viewForModule(_:initialProperties) calls createBridgeIfNeeded() to create an RCTBridge instance if one doesn’t exist. It then calls RCTRootView(_:moduleName:initialProperties) to create an RCTRootView instance with this bridge. Creating additional root views will reuse the existing bridge.
Now, open AddRatingViewController.swift and replace the addRatingView assignment in viewDidLoad() with the following:
addRatingView = MixerReactModule.sharedInstance.viewForModule(
  "AddRatingApp",
  initialProperties: nil)
Run your app; you should see no changes, but at this point you’ve set things up to let you easily add additional React Native views.

Adding a Navigator to your View
If you hadn’t noticed, your new view is a little green and in desperate need of some navigation.
Create a new file named AddRatingApp.js in your js directory. Add the following code to it:
'use strict';

import React from 'react';
import ReactNative, {
  StyleSheet,
  Text,
  View,
} from 'react-native';

const styles = StyleSheet.create({
  container: {
    flex: 1,
    justifyContent: 'center',
    alignItems: 'center',
    backgroundColor: 'green',
  },
  welcome: {
    fontSize: 20,
    color: 'white',
  },
});

class AddRatingApp extends React.Component {
  render() {
    return (
      <View style={styles.container}>
        <Text style={styles.welcome}>We're live from React Native!!!</Text>
      </View>
    )
  }
}

module.exports = AddRatingApp;
If you’re astute, you’ll notice that this looks suspiciously like the content in index.ios.js. Moving things around simply makes it easier to add the navigation.
Open index.ios.js and replace its content with the following:
'use strict';

import {AppRegistry} from 'react-native';

const AddRatingApp = require('./AddRatingApp');

AppRegistry.registerComponent('AddRatingApp', () => AddRatingApp);
The modified code now requires the AddRatingApp component to set up the initial view.
Hit Cmd+R in your simulator to reload the app. There should be no changes.
You’ll be using the Navigator component to set up your navigation bar. To set it up, you provide it with a renderScene function that renders your scene. You can set up your own navigation bar by passing in a navigationBar prop that consists
of a Navigator.NavigationBar component.
To customize Navigator.NavigationBar, you pass in a routeMapper prop that defines the left button, title, and right button.
Open AddRatingApp.js and add the following imports for Navigator and TouchableOpacity:
  ...
  Navigator,
  TouchableOpacity,
} from 'react-native';
You’ll use TouchableOpacity to implement touch handlers for the navigation item buttons.
Replace styles with the following:
const styles = StyleSheet.create({
  container: {
    flex: 1,
  },
  content: {
    flex: 1,
    justifyContent: 'center',
    alignItems: 'center',
    backgroundColor: 'green',
  },
  welcome: {
    fontSize: 20,
    color: 'white',
  },
  navBar: {
    backgroundColor: '#25507b',
  },
  navBarText: {
    fontSize: 16,
    marginVertical: 10,
  },
  navBarTitleText: {
    color: 'white',
    fontWeight: '500',
    marginVertical: 9,
  },
  navBarLeftButton: {
    paddingLeft: 10,
  },
  navBarRightButton: {
    paddingRight: 10,
  },
  navBarButtonText: {
    color: 'white',
  },
});
In just a moment, you’ll add private methods inside the AddRatingApp class to render the navigation items. But first, add the following method to render the navigation content:
_renderScene(route, navigator) {
  return (
    <View style={styles.content}>
      <Text style={styles.welcome}>We're live from React Native!!!</Text>
    </View>
  );
}
This displays the welcome text you know and love. Next, add the render method for the navigation bar’s title:
_renderNavTitle(route, navigator, index, navState) {
  return <Text style={styles.navBarTitleText}>{route.title}</Text>;
}
This simply returns the title property the route passed in.
Next, add the render method for the navigation bar’s left item:
_renderNavLeftItem(route, navigator, index, navState) {
  return (
    <TouchableOpacity
      onPress={() => console.log('Cancel button pressed')}
      style={styles.navBarLeftButton}>
      <Text style={[styles.navBarText, styles.navBarButtonText]}>
        Cancel
      </Text>
    </TouchableOpacity>
  );
}
This wraps a Text component inside a TouchableOpacity component so it can handle touch events. onPress of the touch handler logs the fact that the button was pressed.
Do the same for the navigation bar’s right item:
_renderNavRightItem(route, navigator, index, navState) {
  return (
    <TouchableOpacity
      onPress={() => console.log('Save button pressed')}
      style={styles.navBarRightButton}>
      <Text style={[styles.navBarText, styles.navBarButtonText]}>
        Save
      </Text>
    </TouchableOpacity>
  );
}
Finally, modify render as shown below to return a Navigator component:
render() {
  return (
    <Navigator
      debugOverlay={false}
      style={styles.container}
      initialRoute={{title: 'Add Rating'}}
      renderScene={this._renderScene.bind(this)}
      navigationBar={
        <Navigator.NavigationBar
          routeMapper={{
            LeftButton: this._renderNavLeftItem.bind(this),
            RightButton: this._renderNavRightItem.bind(this),
            Title: this._renderNavTitle.bind(this),
          }}
          style={styles.navBar}
        />
      }
    />
  );
}
The initialRoute prop sets up the properties for the initial scene – specifically, the title that’s used in _renderNavTitle.
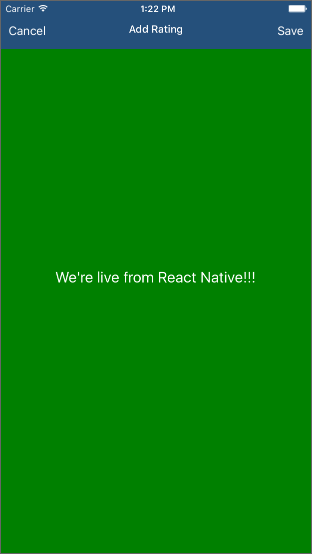
Reload the app from the simulator. You should now see the navigator bar on top of the view:
Now to test the navigation buttons. Tap the left one and Xcode should log something like the following:
2016-09-21 17:20:13.085 [info][tid:com.facebook.react.JavaScript] Cancel button pressed
Tapping the right one should log something like this:
2016-09-21 17:20:27.838 [info][tid:com.facebook.react.JavaScript] Save button pressed
Note: You can also view app logs by running the following command in Terminal: react-native log-ios.