macOS Development for Beginners: Part 1
In this macOS development tutorial for beginners, learn how to create your first “Hello, World” app with Swift and take a tour of Xcode. By Roberto Machorro.
Images
In addition to code and user interfaces, your app will also need some artwork. Due to the different screen types (Retina and non-Retina), you often need to provide multiple versions of each asset. To simplify this process, Xcode uses Asset Libraries to store and organize the assets that accompany the app.
In the Project Navigator, click on Assets.xcassets. AppIcon will contain the various images needed to display the app icon in all the required resolutions. Click on AppIcon – you can see that it wants many different images to cover all the possibilities, but if you supply any one of these, Xcode will use it as best it can. This is not good practice, as you should supply all the required icon sizes, but for this tutorial one icon will be sufficient.
Download the sample icon which is a 512 x 512 pixel image. Drag it into the Mac 512pt 1x box.
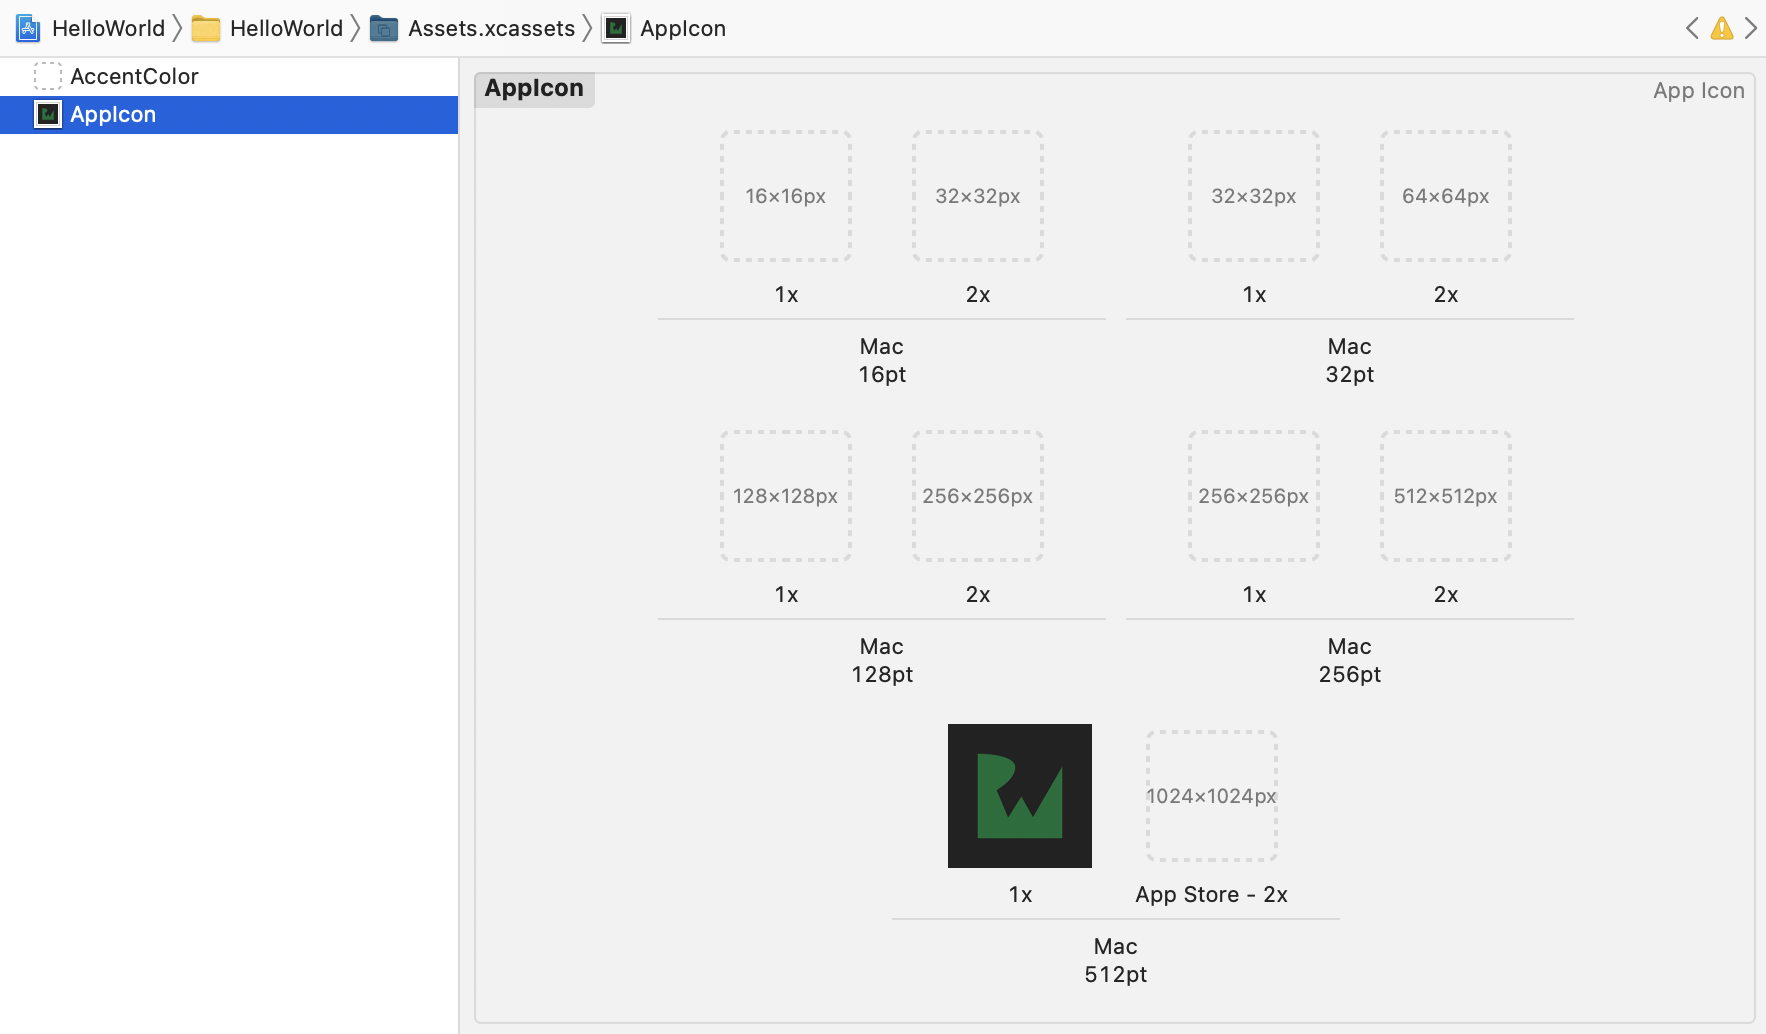
Build and run the app to see the icon in the Dock menu. If you still see the default app icon, quit the HelloWorld app, go back to Xcode and choose Clean Build Folder from the Product menu, then run the app again.

Getting Help
As well as being an editor, Xcode also contains all the documentation you will need for writing macOS apps.
Go to the Help menu and choose Developer Documentation. Search for NSButton. Make sure Swift is the selected language, then click the top search result so that you can read all the details about buttons and button properties.


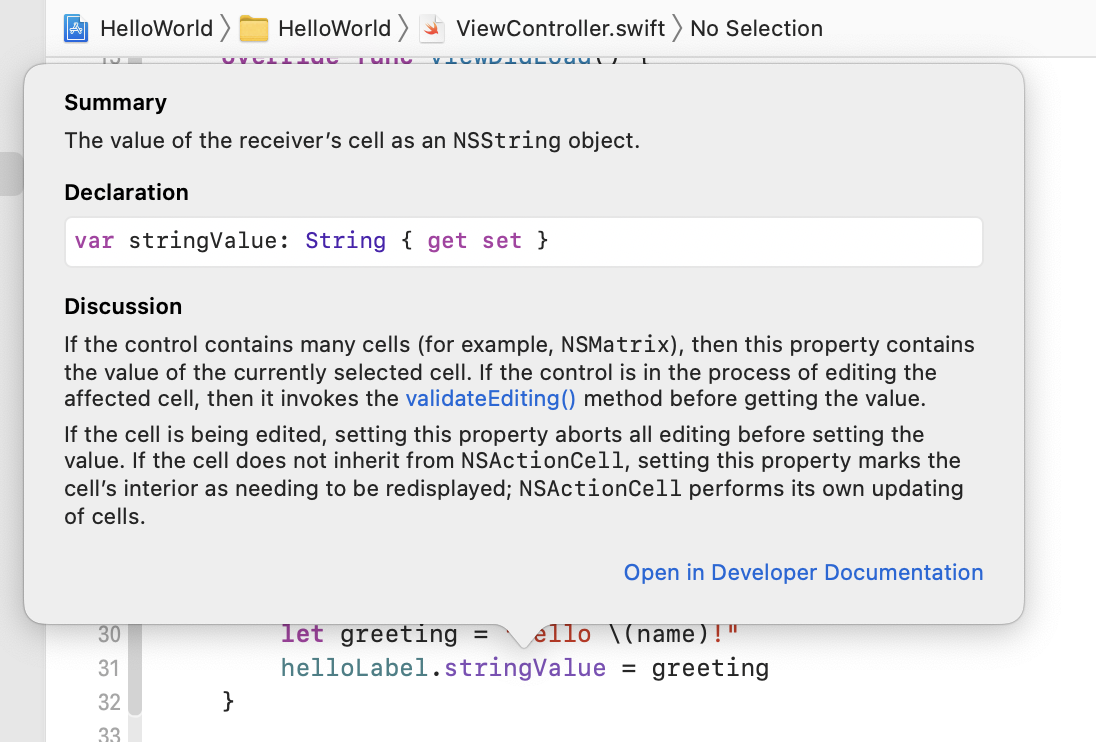
There is also a way to get to relevant documentation directly from your code. Go back to ViewController.swift and find the first line in sayButtonClicked. Option-click on the word stringValue. A popup appears with a short description. At the bottom of the popup is a link to Property Reference. Click this link and the documentation will open to show more information.
Option-clicking is often a really good way to learn, and you can even add documentation to your own functions so that it shows up in the same way.
The Help menu also includes Xcode Help for specific information about the Xcode environment.
Where to Go From Here?
In the next part of this tutorial series, you will start to create a more complicated app. Hope to see you there!
If you have any questions or comments on this tutorial series, please join the discussion below!