macOS Development for Beginners: Part 1
In this macOS development tutorial for beginners, learn how to create your first “Hello, World” app with Swift and take a tour of Xcode. By Roberto Machorro.
Adding the UI
You design the user interface using a Storyboard. Your app already has a storyboard, so go to the Project Navigator and click on Main.storyboard to show it in the Editor panel.
Your display has just changed dramatically! In the Editor panel, you can now see the Document Outline and the visual editor for the UI.
Have a look at the things you can see in the visual editor. There are three main areas, each of which also has a textual representation in the Document Outline:
- Application Scene: The menu bar and items.
- Window Controller Scene: Configures how the window will behave.
- View Controller Scene: Where your UI elements will go.
In the Utilities panel, you see a top section with 9 tabs.
Right now you want to insert UI elements, so select the Object library which is the plus-sign button.
In the filter at the bottom, type “text” to reduce the number of choices, and drag a Text Field into your View Controller Scene.

Now filter for “button” and drag a Push Button into the View Controller Scene. Finally, add a Label.
Now, build and run the app using the Play button or Command-R. You will see these 3 UI elements. Try typing in the text field – it already supports all the standard editing shortcuts: copy, paste, cut, select all, undo, redo and so on. But the button does nothing, and the label just shows “Label”, so it is time to make things more interactive.

Configuring the UI
Go back to Main.storyboard and click on the button to select it. In the Utilities panel on the right, make sure the Attributes Inspector is showing – the 5th button across the top. Change the title of the button to “Say Hello”.

Now click in the text field to select it. For this app, the user is going to type their name in here, and when they click the button, the app will show “Hello name-goes-here!” in the label. To help the users, add some placeholder text to the text field using the Attributes Inspector.
Stretch the text field out a bit to allow for long names and position the button to the right of it. When dragging objects around in the View Controller Scene, blue lines will appear to help you align and position the objects based on Apple’s Human Interface Guidelines.

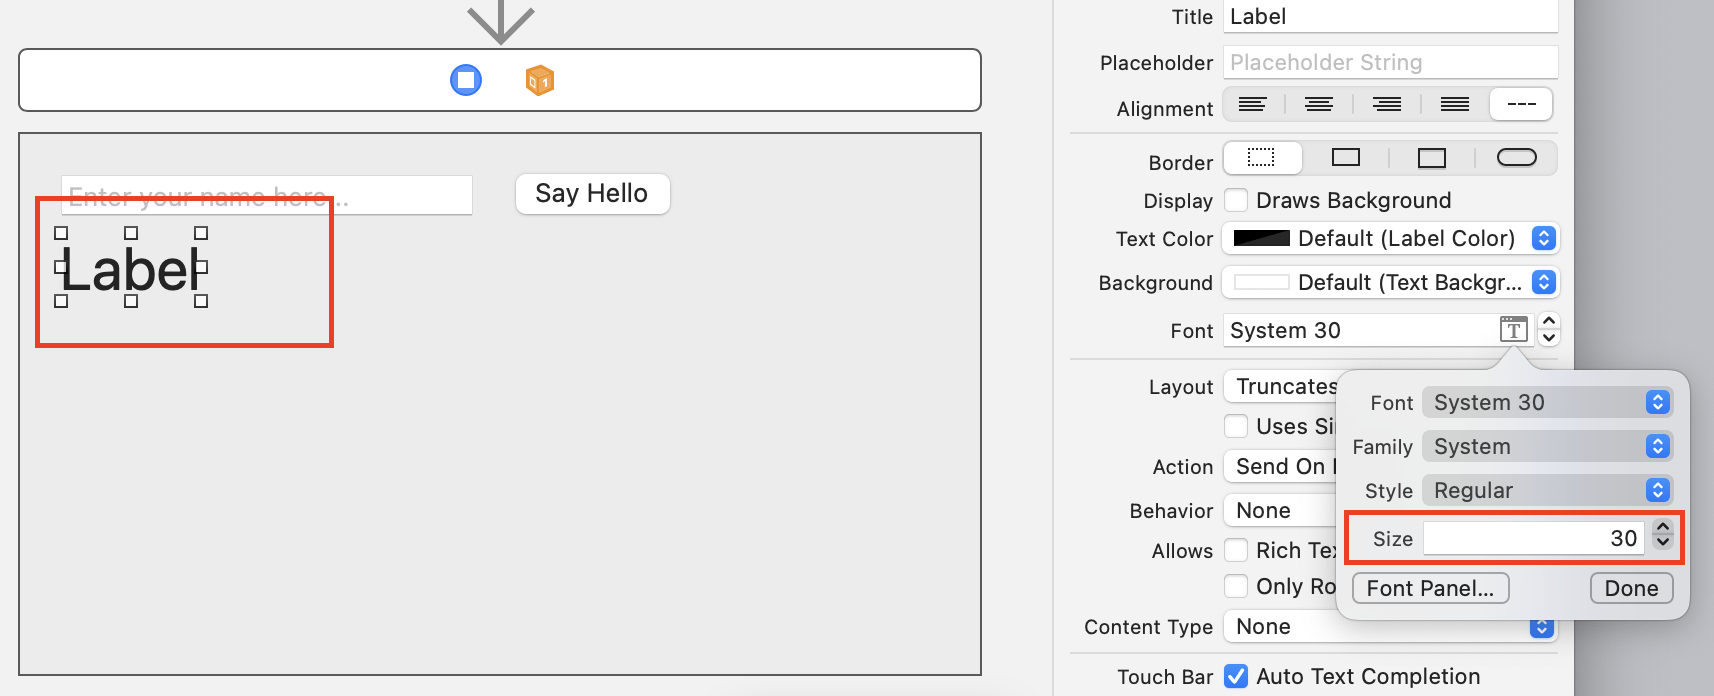
Position the label below the text field and button. Since the label is going to be important, make it use a larger font. Select the label and in the Attributes Inspector, change the font to System Regular 30.
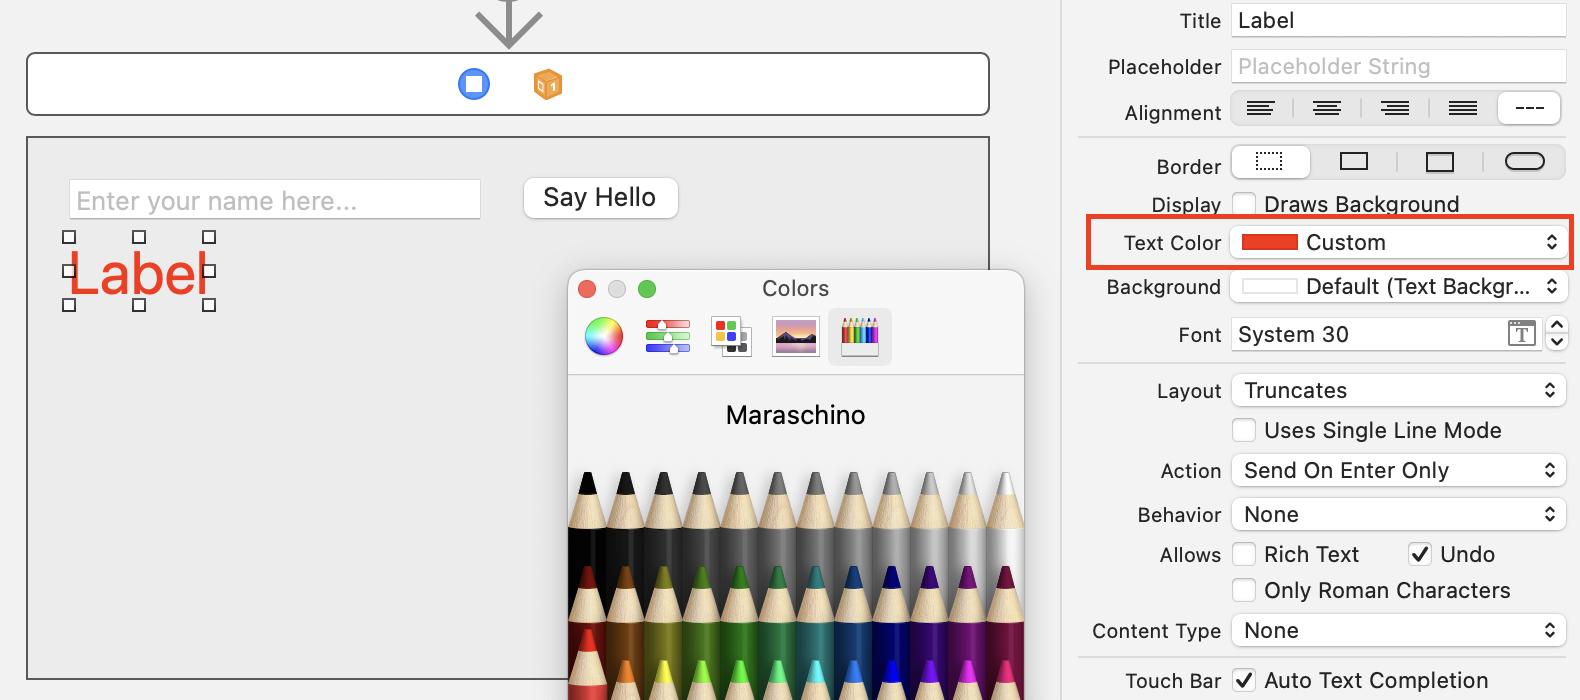
How about making the text red to add even more excitement?
You can’t tell how long a name a user might enter, so resize the field to fit the height of that font and to almost fill the width of the window.
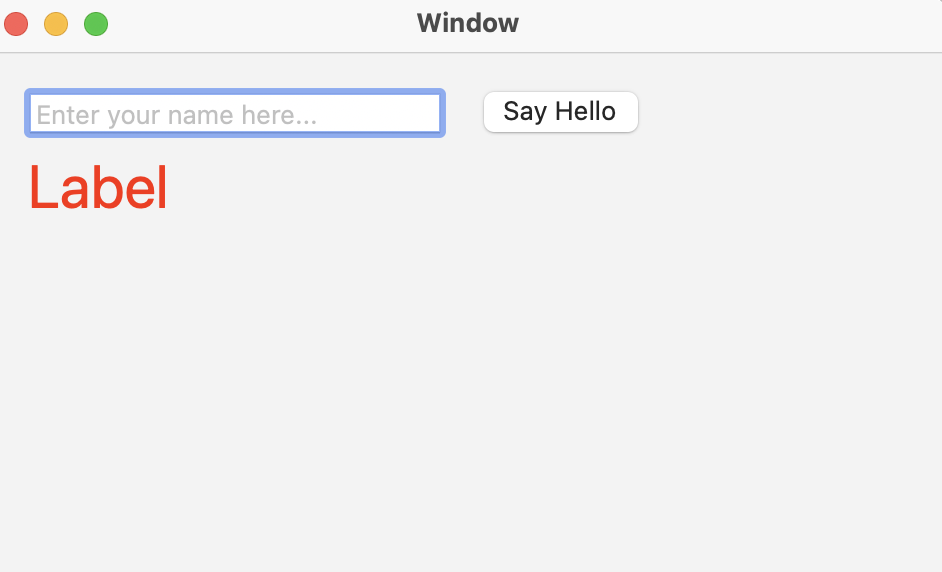
Build & run the app to check that your UI changes have taken effect. Once you are happy with the look of the text in the label, delete the label’s Title so that the label starts off empty.
Connecting the UI to the code
Your app still doesn’t do what you want, but in order for that to work, you need to start adding code and that code has to be able to communicate with the UI. To make those linkages, you are going to use Xcode’s Assistant Editor. With the Main.storyboard visible, option-click on ViewController.swift in the Project Navigator. This will create a second editor panel containing the ViewController code.
Depending on the size of your monitor, things may be looking a bit cramped now, so use the rightmost button in the Toolbar to hide the Utilities. If you need even more space, hide the Navigator.
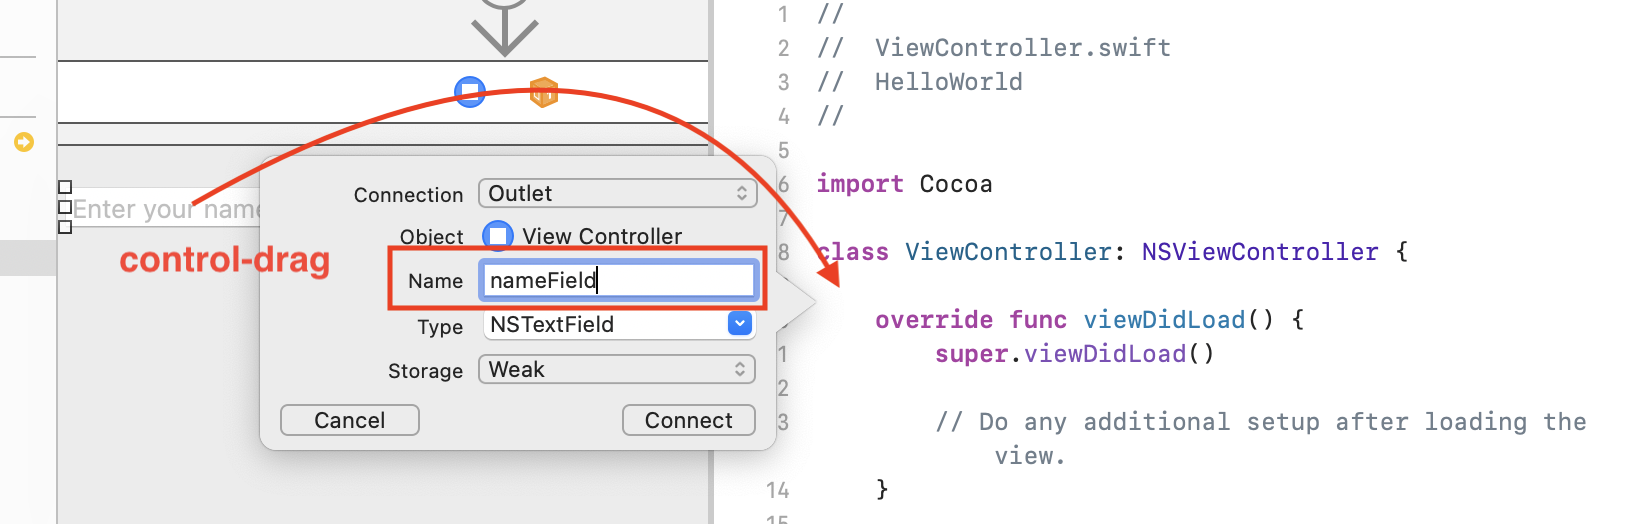
Select the text field. Hold down the Control key and drag from the text field into the top of the ViewController class definition. Let go and enter nameField in the name box of the popup, then click Connect.
Do the same with the label, naming it helloLabel.
Looking at the code that Xcode has generated, you see that these are both marked with @IBOutlet. This is short for Interface Builder Outlet and is how you tell the storyboard editor that these object names are available for linking to a visual object.
For the button, the code does not need to have a name for it, but it does need to know when a user clicks the button. This calls for an @IBAction instead of an @IBOutlet.
Select the button and Control-Drag into ViewController.swift as before. This time, change the Connection popup to Action and set the name to sayButtonClicked. This creates the function that will be called when the button is clicked.

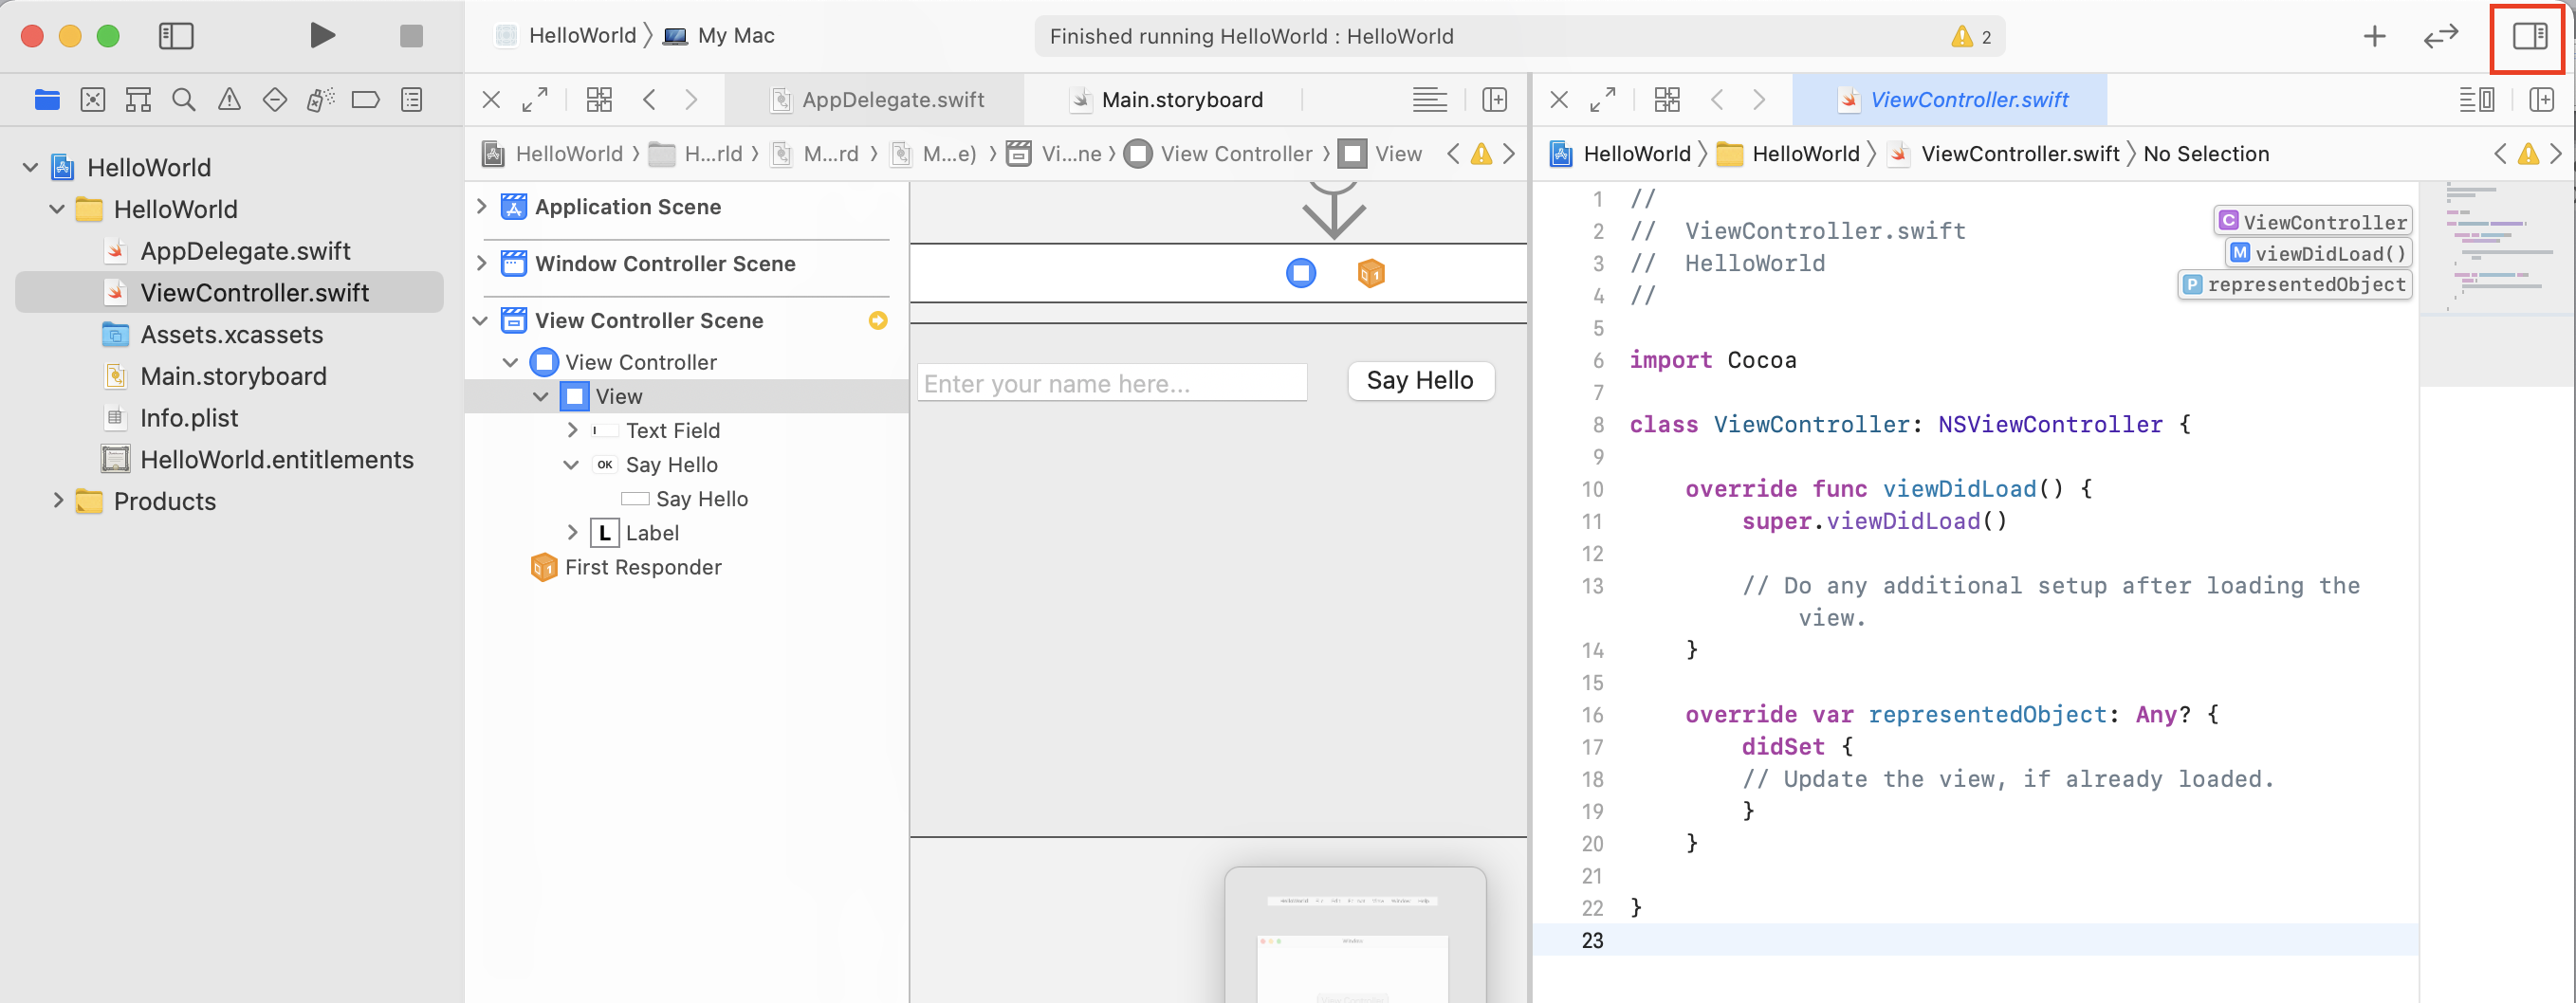
Everything is now in place to edit the code. Close the Assistant Editor using the X in the top left corner and switch to ViewController.swift. If you had hidden the Navigator, click the toggle button in the top right, or press Command-1 to jump directly to the Project Navigator.
Enter the following code into sayButtonClicked.
var name = nameField.stringValue
if name.isEmpty {
  name = "World"
}
let greeting = "Hello \(name)!"
helloLabel.stringValue = greeting
The complete code in ViewController.swift now looks like this. The blobs beside the line numbers indicate a connection to the interface in the storyboard.

Build and run the app.
Click the Say Hello button without entering anything and you will see “Hello World!”. Now type in your name and click the button again to see your own personal greeting.

Debugging
Sometimes, we programmers make mistakes – hard to believe I know, but trust me, it happens. And when it does, we need to be able to debug our code. Xcode allows us to stop the code at any point and step through line by line, checking the values of the variables at each point so that we can find the error.
Go to sayButtonClicked in ViewController.swift and click on the line number beside the var name = line. A blue pointed rectangle will appear. This is an active breakpoint and when you click the button, the debugger will stop here. Click it again and it will turn pale blue. It is now an inactive breakpoint and will not stop the code and start the debugger. To remove the breakpoint completely, drag it out of the line numbers gutter.

Add the breakpoint again and run the app. Click the Say Hello button. Xcode will come to the front with the breakpoint line of code highlighted. In the bottom of the Editor panel, there will now be two new sections: Variables and Console. The Variables section shows the variables used in this function as well as self – the View Controller, and sender – the button.

Above the Variables display is a set of buttons for controlling the debugger. Mouse over each one and read the tooltip to see what it does. Click the Step Over button to move to the next line.
In the Variables display, you can check that name is an empty string, so click Step Over twice more. The debugger will move into and through the if statement and set the name variable to “World”.
Select the name variable in the Variables display and click the Quick Look button below to see the contents. Now click the Print Description button to see the information printed in the Console. If the “World” value had not been set correctly, you would have been able to see that here and work out how to fix your code.

When you have checked the contents of the name variable, click the Continue program execution button to stop debugging and let the program move on. Use the button in the top right to hide the Debug area.