Test-Driven Development Tutorial for Android: Getting Started
Learn the basics of test-driven development, or TDD, and discover how to use TDD effectively when developing your Android apps! By Victoria Gonda.
Making the Tests Pass
In the failing tests, you have specified what the code should do, so now you can go on to step three to write the code to implement the feature and make the test pass. Locate the incrementVictoryCount() method in VictoryViewModel. Add the following code to that method:
val newCount = repository.getVictoryCount() + 1
repository.setVictoryCount(newCount)
viewState.value = VictoryUiModel.CountUpdated(newCount)
These three lines correspond to the three tests you wrote: one to get the count from the repository, one to save the new count, and one to notify the view.
Running the Tests and Watching Them Pass
You can run the same tests by clicking the green triangle next to the Run Configuration dropdown.

When you run the tests now, they should be green! You now know that your implementation matches the specifications.

You can experiment with commenting out or removing one line at a time to see what tests pass and what test fails as a result. Just make sure that you put all the code back when you’re done.
Refactoring
Now that you have written the tests and gotten them passing, this is where you would do any refactoring to make your code as nice as possible while keeping your tests green. This tutorial doesn’t have a specific refactor for you for this method, as it is a simple example, but if you are feeling creative you’re welcome to refactor this method the way you want as long as your tests are still passing!
Writing a UI Test
UI tests test what the user sees on the screen. They are dependent on the Android framework and need to run on a device or emulator. Like instrumentation tests, they also go in the androidTest/ directory.
UI Tests are the slowest to run out of all three of these categories of tests, so you want to be selective about what you test with these. You want to test as much of your logic as you can in unit and instrumentation tests, as they run faster.
On Android, UI tests usually use the Espresso library to interface with and test the view. Mockito is also sometimes used here.
Something to note when you’re adding test library dependencies to your project: In your app module build.gradle file, you specify whether the dependency is for an Android test or unit test. If you take a look at the app/build.gradle file in this project, you’ll see that some dependencies such as JUnit use testImplementation, and others, such as Espresso, use androidTestImplementation. This matches up with whether the test file is in the test/ or androidTest/ folders.
testImplementation 'junit:junit:4.12'
// ...
androidTestImplementation 'com.android.support.test.espresso:espresso-core:3.0.2'
Writing a Failing UI Test
You have the logic set up for incrementing the victory count. It’s time to hook it up so that there is feedback for the user on the view so they can see the incremented count. Just as before, you start by writing a test.
Take a look at MainActivityTest:
@LargeTest
class MainActivityTest {

  @Rule
  @JvmField
  var rule = ActivityTestRule(MainActivity::class.java)
As for the instrumentation tests from before, you’ll also see some existing tests for the victory title in MainActivityTest.
Add a test to MainActivityTest to verify that the count updates on the screen when someone clicks the button:
-
@LargeTestmeans that the tests in this file could have more than 2 seconds of execution time, and is used for tests that make use of all platform resources, including external communications. -
ActivityTestRuleis used to launch MainActivity before any test is executed.
@Test
fun incrementingVictoryCountUpdatesCountView() {
  // 1
  val previousCountString = rule.activity
      .findViewById<TextView>(R.id.textVictoryCount).text.toString()
  val previousCount =
      if (previousCountString.isBlank()) {
        0
      } else {
        previousCountString.toInt()
      }

  // 2
  onView(withId(R.id.fab))
      .perform(click())

  // 3
  onView(allOf(withId(R.id.textVictoryCount),
      withText((previousCount + 1).toString())))
      .check(matches(isDisplayed()))
}
You’ll likely need to use Alt+Enter (on PC) or Option+Return (on Mac) to add the imports for some of these things.
The new UI test follows the same Arrange-Act-Assert pattern as before. There’s some set up, the action you’re testing being performed, and the verification:
-
Get the previous count from the view. Because you’re not stubbing the repository here, you’re getting the previous count directly from the view. You start by using the activity to find the
TextViewto get the string value from. Then, the value is converted to an integer. - Click on the Increment Victories (FAB) button. By using Espresso, you can look up the view by the ID, and then perform a click on it.
-
Verify that the
TextViewdisplaying the count updates. With Espresso, you can look for a view by multiple attributes. Here, you’re looking for a view with the ID of the counter view and the text of the count you are expecting. Then you use a match to see that it exists and is displayed.
findViewById, you could directly use the name of the view, thanks to the Kotlin Android Extensions. So, in this example, you could use:val previousCountString = rule.activity.textVictoryCount.text.toString()You will need to import
kotlinx.android.synthetic.main.content_main.* if you try this.
Running the Tests
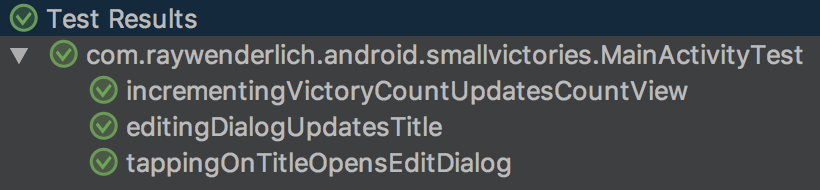
Run the MainActivityTest the same way as you ran the VictoryViewModelTest. The new test that you just wrote should fail.

Making the Tests Pass
Since you put all the logic into VictoryViewModel, there’s not much to do in MainActivity to get this test passing. You just have to update the view!
The code is already set up in MainActivity to observe the changes to the LiveData in the VictoryViewModel and call render() with the changes. Look for the render() method in the MainActivity.
In the VictoryUiModel.CountUpdated branch of the when statement, add the following code:
textVictoryCount.text = uiModel.count.toString()
Here, with a VictoryUiModel.CountUpdated instance named uiModel, you update the text of the victory count view with the new count.
Running the Tests
Run the tests again. This time you should see them pass!
Build and run the app. Now, when you click the increment button, you will see the count update as well.

Just like for the earlier instrumentation test, this is the point at which you would revisit the new code you’ve added and make any refactoring changes.