iOS Accessibility: Getting Started
In this iOS accessibility tutorial, learn how to make apps more accessible using VoiceOver and the Accessibility inspector. By Fayyazuddin Syed.
Trying VoiceOver With the Recipe App
Build and run on a physical device and triple click the home button to turn on VoiceOver. Swipe left and right to navigate through the recipe list. VoiceOver reads the elements from top-left to bottom-right. It starts with the header name followed by each recipe’s name and the name of the associated image.
But there are a few problems with the VoiceOver experience:
- Image is not a helpful description of the image views in each cell. You know an image is there, but not what it is.
- VoiceOver says nothing about the difficulty level of each recipe, rendering this feature useless for people with visual disabilities.
Now you’ve identified problem areas, you might want to dive right into fixing them. But before you do, you need to know a bit about how accessibility features work.
Accessibility Attributes
Accessibility attributes are the core components you must implement to support accessibility. These attributes supply VoiceOver with information about elements in your app so VoiceOver can read that information out loud to your users. If they aren’t properly configured, VoiceOver won’t be able to supply the necessary details about your app.
An accessibility attribute has five properties:
- Label: A concise way to identify the control or view. Some examples are Back button and recipe image.
- Traits: These describe the element’s state, behavior or usage. A button trait might be is selected, for example.
- Hint: Describes the action an element completes. For example: Displays the recipe detail.
-
Frame: The frame of the element within the screen, in the format of a
CGRect. VoiceOver speaks the contents of theCGRect. - Value: The value of an element. For example, with a progress bar or a slider, the current value might read: 5 out of 100.
Most UIKit components preset these attributes for you; you simply need to supply the details to improve the user experience. If you create custom controls, you’ll have to supply most of the attributes yourself.
So now you know where VoiceOver gets the information it provides to users, it’s time to get to know a new tool that will help you find and fix accessibility weaknesses in your app: the Accessibility Inspector.
Using the Accessibility Inspector
If you’re retrofitting an app to be more accessible, finding weaknesses is time-consuming and error-prone. Fortunately, there’s a tool to help named Accessibility Inspector, which does the following:
- Runs through your app and finds common accessibility issues.
- Lets you check the accessibility attributes of UI elements in Inspection Mode.
- Provides live previews of accessibility elements without leaving your app.
- Supports all platforms including macOS, iOS, watchOS and tvOS.
Before you use the Accessibility Inspector on Recipes, take a look at the tool. First, open it in the Xcode menu by navigating to Xcode ▸ Open Developer Tool ▸ Accessibility Inspector.

The inspector should look something like this:
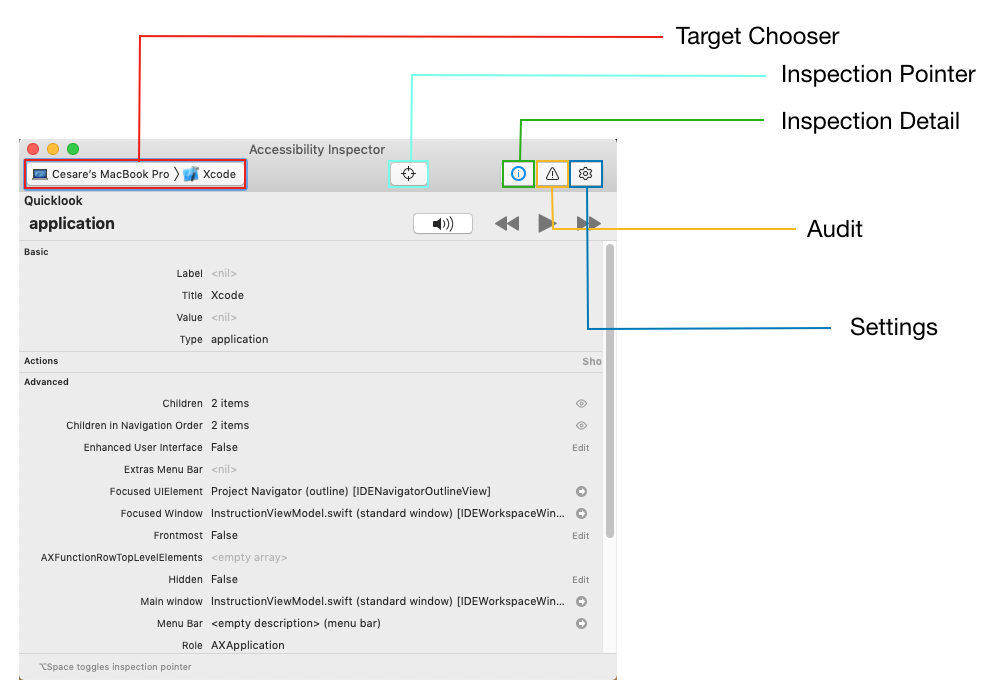
The target chooser lets you pick which device you’d like to inspect. This could be your MacBook Pro, an iOS device or your simulator.
Live previews of accessibility elements let you test right in the simulator. Since live previews are faster than listening to VoiceOver, this is where you’ll do the bulk of your work during this iOS accessibility tutorial.
Build and run in a simulator, and change the Accessibility Inspector target to your simulator:

Now that you have the tool open, you can look at some of its most helpful features.
Using the Inspection Pointer
Selecting Inspection Pointer, which looks like a reticle sight in the inspector UI, is similar to enabling VoiceOver on your device. When you activate the pointer, you can hover over any UI element to check its attributes. Interacting with the simulator directly via button presses will deactivate the Inspection Pointer.
Inspection Detail pane has everything you need to review and interact with the accessibility attributes in your app:
- Basic: Displays the attribute properties for the currently-highlighted element.
- Actions: Lets you perform actions like tapping a button or scrolling the view. Pressing the Perform button in this pane will perform the action on your target.
- Element: Displays the class, address and controller of the current item. As of this writing, it doesn’t work consistently.
- Hierarchy: Shows the view hierarchy for the element, making it easier to understand complex views.
Using Quicklook to Check Audio in Xcode
Xcode 11 has a new feature in the Inspection Detail pane, within the Quicklook section at the top, that allows you to simulate in Xcode the audio you’d hear on your device. This means you can check what your users hear when using your app without requiring an actual device.
Press the Play button while the app is running in a simulator, let the Accessibility Inspector cycle through the app and listen as it describes each element out loud.
If you prefer to manually step through each element, you can either press the Pause button or press the Audio button inside the Quicklook section. Press the Forward or Back buttons to step through each component at your own pace.
Using this feature is faster than running your app on a device and using VoiceOver, particularly during development. As always, you want to also test your app, along with all its accessibility features, on real devices.
Highlighting Problems With the Inspector Audit
One of the most useful features of the Inspector Audit is its audit capability, which gives you warnings about accessibility problems within your app. To try out this feature, make sure the simulator is still running and you’re on the recipe list. In the inspector, click the Audit icon and then Run audit.
You’ll see the inspector gives several warnings, including that some of your elements lack description.
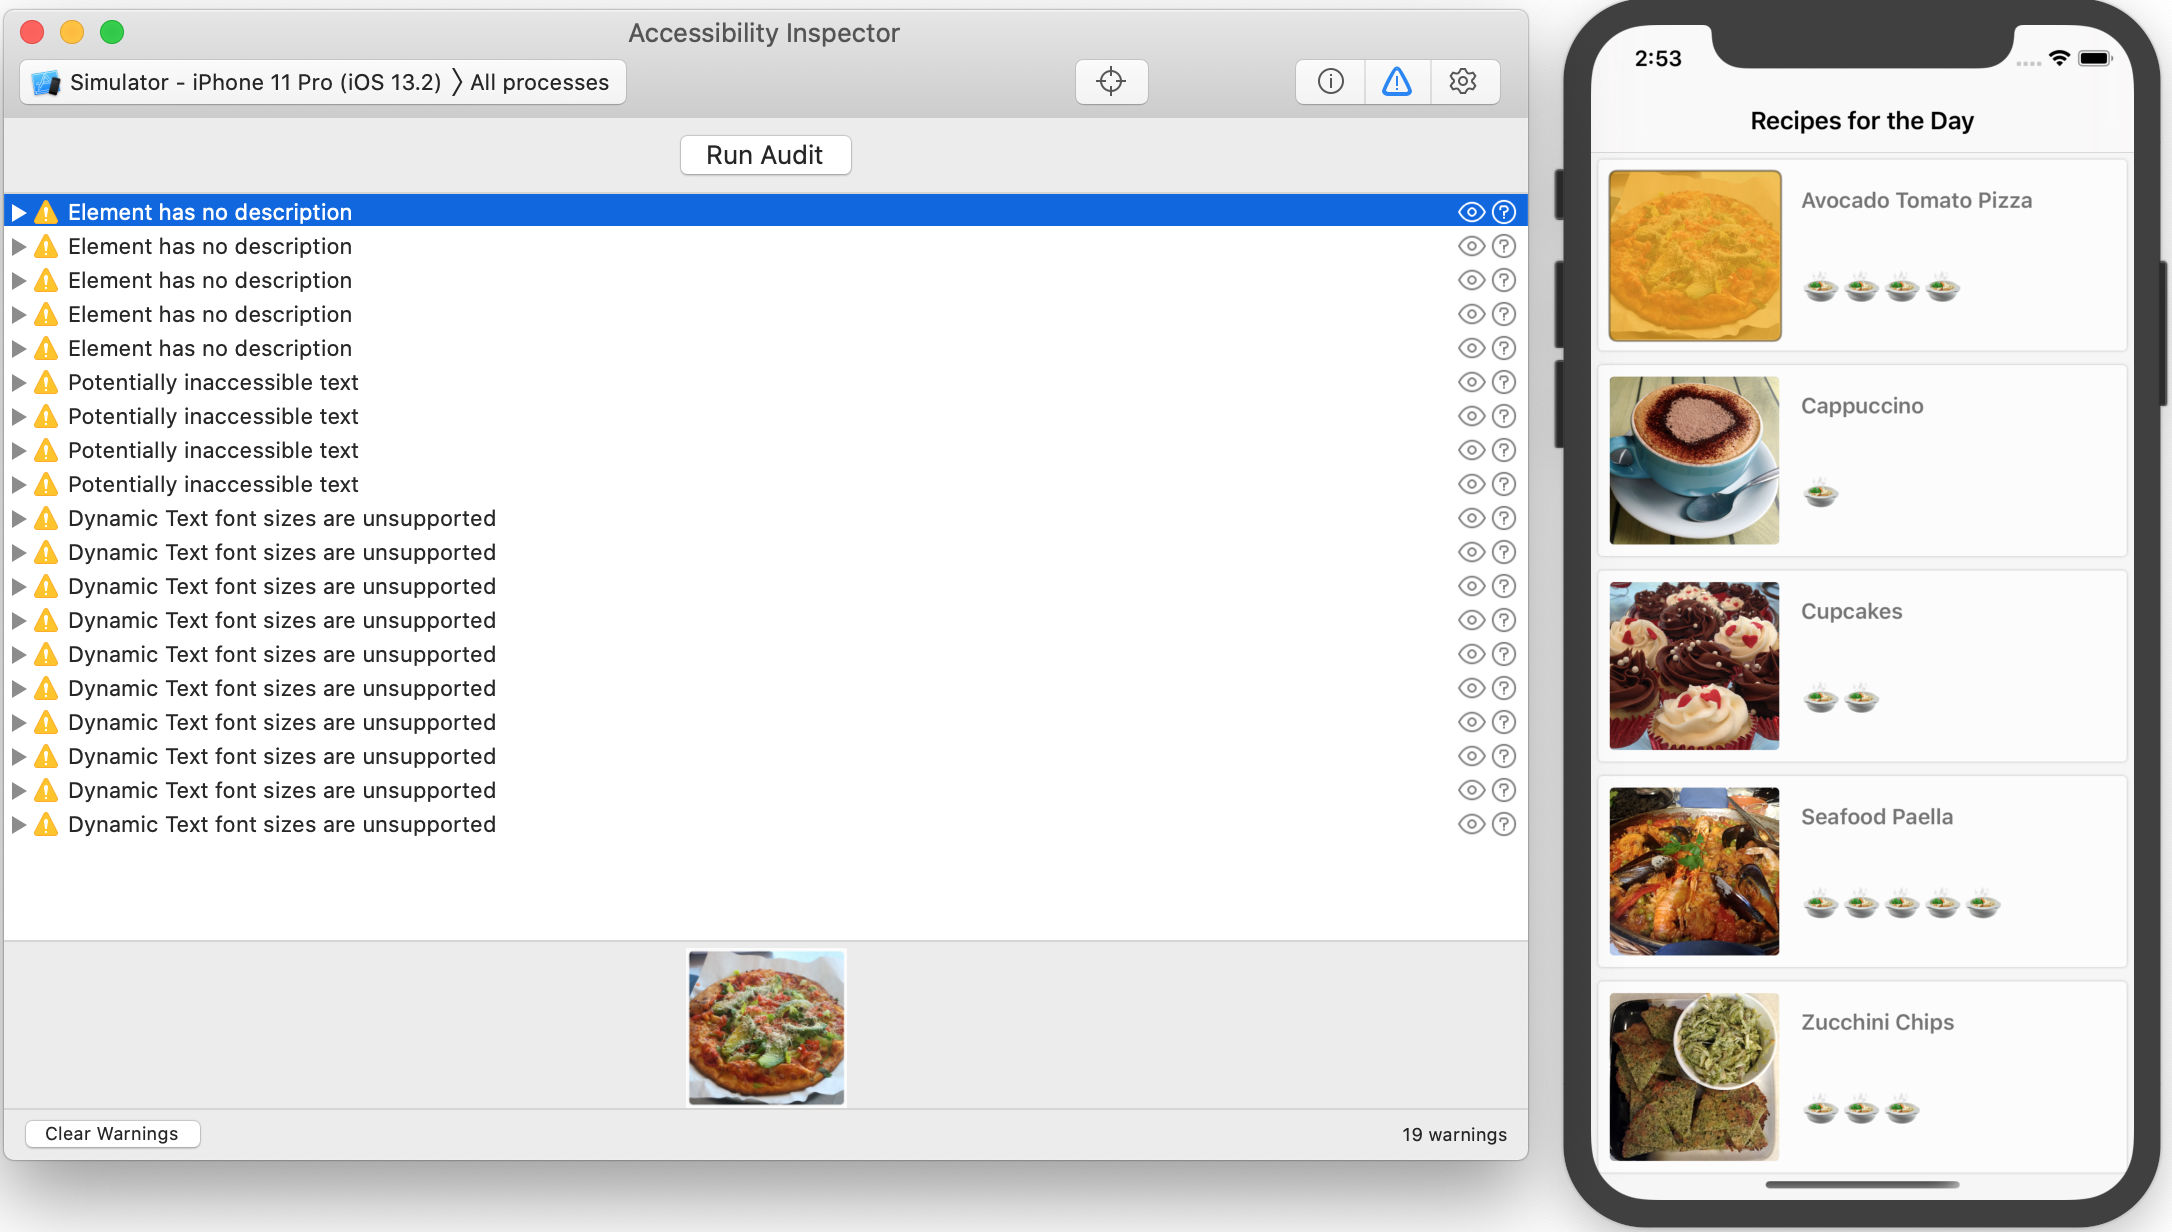
When you click a warning, Xcode highlights the related element in the simulator as well as at the bottom of the Inspector Audit screen.
In this case, the image views associated with the cells have no description. This means VoiceOver won’t be able to describe them to your readers.
Click the Suggest Fixes icon, which looks like a question mark in a circle, for one of the warnings and the inspector will offer suggestions about how to fix the issue. You’ll act on these suggestions later.

Click the Eye icon to take a snapshot of the app. This is useful for anyone in quality assurance who needs to create accurate bug reports.

There are a few more useful accessibility settings you can find in the inspector. Next, you’ll take a quick look at these features.