AVFoundation Tutorial: Adding Overlays and Animations to Videos
In this AVFoundation tutorial, you’ll learn how to add overlays and animations to videos, by using the AVVideoComposition CoreAnimationTool, which allows you to combine CALayers with videos to add backgrounds and overlays. By Marin Bencevic.
Adding a Background
Now that you have the app set up to compose a video, you can start working on adding flourishes to the video to make it look like a birthday card.
Draw the background layer underneath the video. Currently, the video is as large as the background, so you first need to crop the video to let the background show from underneath. The background layer will act as a border for the video. You’ll then add an image to the background layer so that the border fills up with confetti.
In makeBirthdayCard(fromVideoAt:forName:onComplete:), add the following code underneath where you create the three layers, right under the line where you set overlayLayer‘s frame:
backgroundLayer.backgroundColor = UIColor(named: "rw-green")?.cgColor
videoLayer.frame = CGRect(
  x: 20,
  y: 20,
  width: videoSize.width - 40,
  height: videoSize.height - 40)
Here, you add a background color to the layer so that you can clearly see what’s going on when you run the app. Next, you set the layer’s frame to be 20 points smaller on each edge, giving the video a 20-point-wide green border.
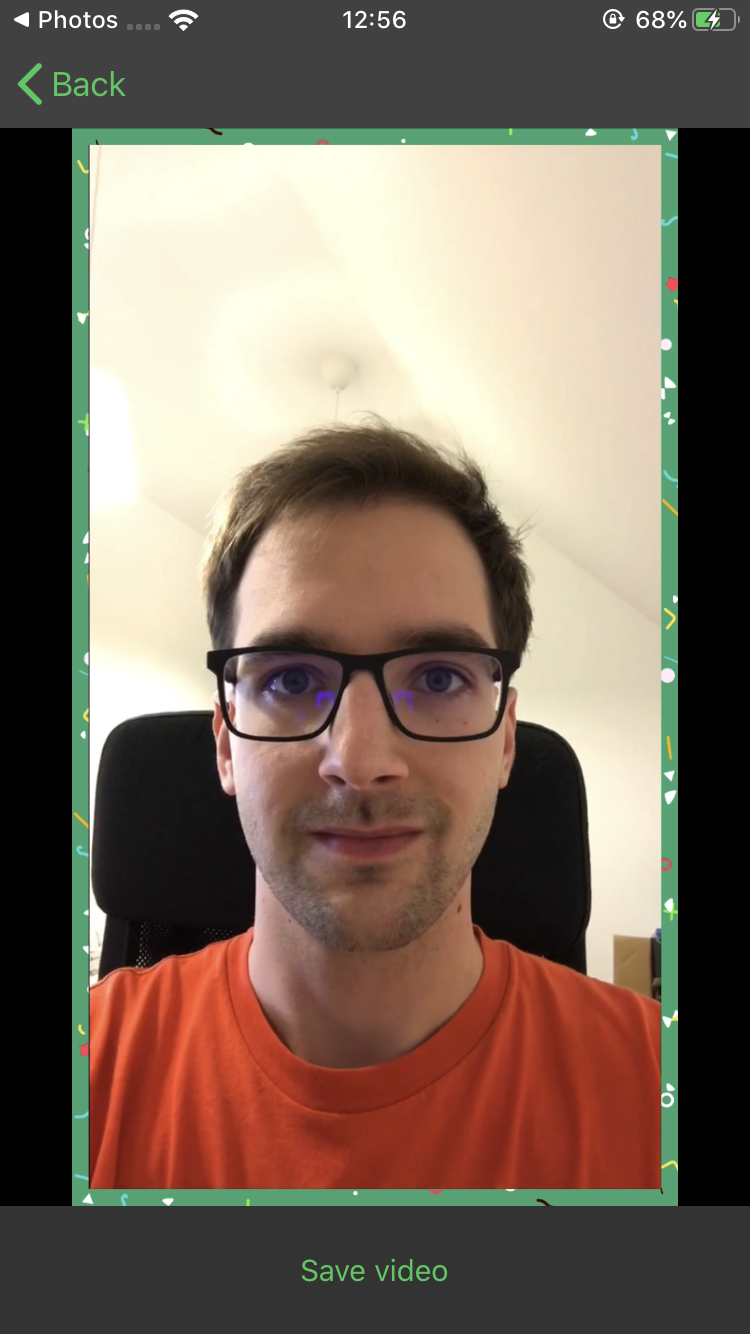
Build and run the project, choose a video, and after it’s exported you’ll see a border around your video.

Now that you can see the background around the video, add an image to the background layer by adding the following code underneath what you just wrote:
backgroundLayer.contents = UIImage(named: "background")?.cgImage
backgroundLayer.contentsGravity = .resizeAspectFill
To show an image with Core Animation, set a CALayer‘s contents to the image. Also set the contentsGravity to .resizeAspectFill to make sure the image always fills the size of the layer while maintaining its aspect ratio.
Build and run once again, and you’ll see your border, now full of cute little confetti!
Now that your background is set and done, you can work on what’s on top of the video.
Adding Images
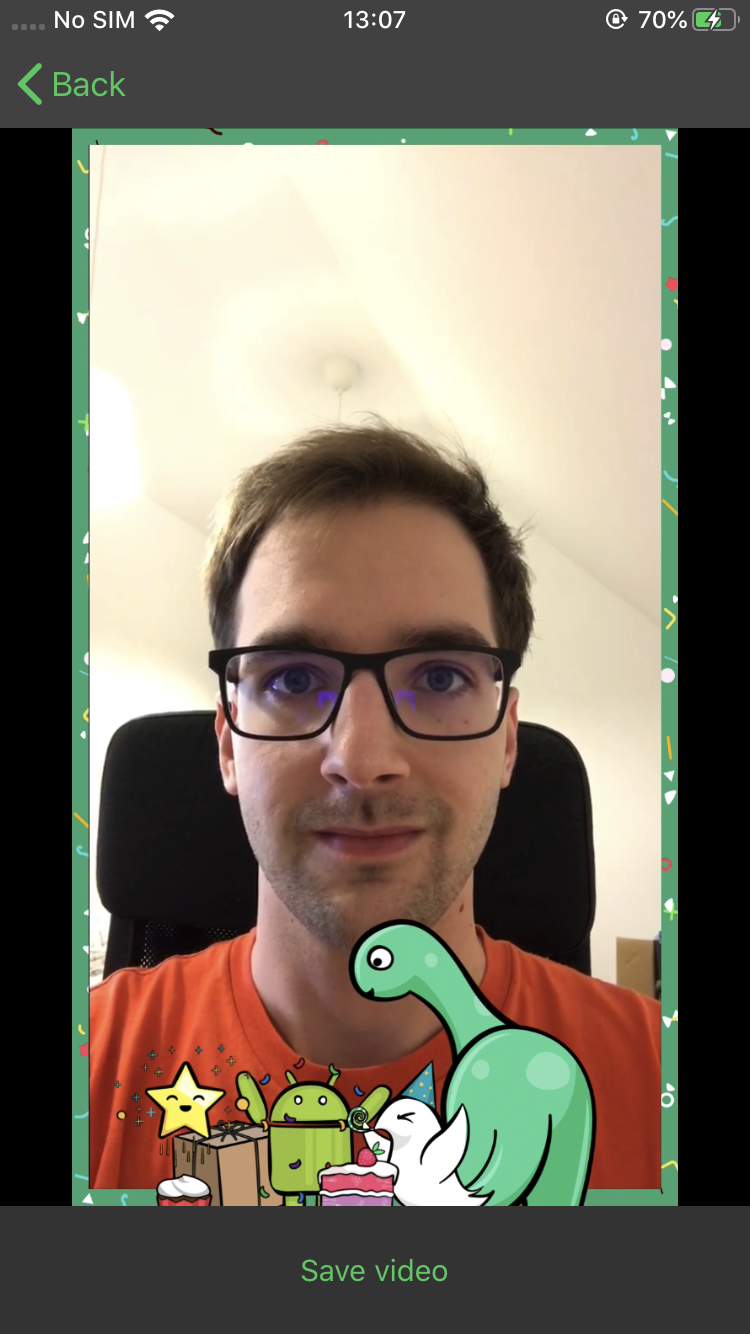
You’ll begin your video overlay journey by adding an image to the video. The starter project already includes an image of Swift, Android and a dinosaur (for some reason) all having a great time at a birthday party.

Add a new method in VideoEditor.swift that will add an image to a layer:
private func addImage(to layer: CALayer, videoSize: CGSize) {
  let image = UIImage(named: "overlay")!
  let imageLayer = CALayer()
}
Just like you did for the background, use a plain CALayer to hold the image. Next, add the following to the method to set the frame of the image so that it’s centered in the bottom of the video:
let aspect: CGFloat = image.size.width / image.size.height
let width = videoSize.width
let height = width / aspect
imageLayer.frame = CGRect(
  x: 0,
  y: -height * 0.15,
  width: width,
  height: height)
Here, you first calculate the image’s aspect ratio. The image will be as wide as the video, so you’ll have to use the aspect ratio to determine the image’s height. This lets you fit the aspect ratio, no matter the size of the image.
You don’t want the bottom of the image to show, so you set the y-coordinate of the image to a negative value, which will make sure the image starts below the video.
Next, add the image to the image layer and the image layer to the layer passed inside the method.
imageLayer.contents = image.cgImage
layer.addSublayer(imageLayer)
Back in makeBirthdayCard(fromVideoAt:forName:onComplete:), call your method after the background code, right after you set contentsGravity:
addImage(to: overlayLayer, videoSize: videoSize)
You’re no longer working on the background; instead, you want to show images on top of the video. That’s why you pass overlayLayer to the method.
Build and run the project, select a video and you should see the image show up on the video.
Now, you know how adding overlays to videos works. It’s starting to look like a real party! In the next section, you’ll improve the birthday card by adding some text.
Adding Text
This wouldn’t be much of a birthday card if it didn’t say “Happy Birthday,” so you’ll need to add text to the video. In VideoEditor.swift, add a new method:
private func add(text: String, to layer: CALayer, videoSize: CGSize) {
}
To display the text, you’ll use a CALayer subclass called CATextLayer. Since the subclass has a bit of a cumbersome API, you’ll use NSAttributedString to create and customize the text. Add the following code to the method you just created:
let attributedText = NSAttributedString(
  string: text,
  attributes: [
    .font: UIFont(name: "ArialRoundedMTBold", size: 60) as Any,
    .foregroundColor: UIColor(named: "rw-green")!,
    .strokeColor: UIColor.white,
    .strokeWidth: -3])
With this code, you create the attributed string and make sure it uses a big, round font. You make the text green, so it’s easy to see and add a white stroke so that the text works on all backgrounds. If you want your text to have both a stroke and a fill, you need to make the stroke width negative; otherwise, only the stroke will show. Don’t wonder why it’s like that, it just is. :]
Next, create a text layer with the attributed string:
let textLayer = CATextLayer()
textLayer.string = attributedText
textLayer.shouldRasterize = true
textLayer.rasterizationScale = UIScreen.main.scale
textLayer.backgroundColor = UIColor.clear.cgColor
textLayer.alignmentMode = .center
This creates a text layer and sets the text. You make sure the text is rasterized with a scale that matches the current screen’s scale so that it doesn’t look blurry. Finally, you give the layer a transparent background and center the text.
Now, set the text’s frame and add it to the layer:
textLayer.frame = CGRect(
  x: 0,
  y: videoSize.height * 0.66,
  width: videoSize.width,
  height: 150)
textLayer.displayIfNeeded()
layer.addSublayer(textLayer)
Before adding it to the layer, call displayIfNeeded() on the text layer. CALayers, just like UIViews, update asynchronously and sometimes Core Animation doesn’t show the text for the first second or two of the video. By calling this method, you ensure that Core Animation renders the text as soon as possible.
Finally, back in makeBirthdayCard(fromVideoAt:forName:onComplete:), call your new method right under the call to addImage(to:videoSize:):
add(
  text: "Happy Birthday,\n\(name)",
  to: overlayLayer,
  videoSize: videoSize)
Just like you did with the image, you add the text to the overlay layer.
Build and run the project, select a video, and enter your friend’s name. This tutorial will address the card to Ray. Once it exports, you’ll see a line of text wishing your friend a happy birthday!

Whether or not today is actually your friend’s birthday shouldn’t stop you from celebrating, because your birthday card is looking pretty good now! But one thing that’s still missing is movement. Keep reading to find out how to add animations to your overlays.