Windows and WindowController Tutorial for macOS
In this Windows and WindowController Tutorial for macOS, learn how to create a document based Cocoa app using modal windows and Sierra new tabbed interface. By Warren Burton.
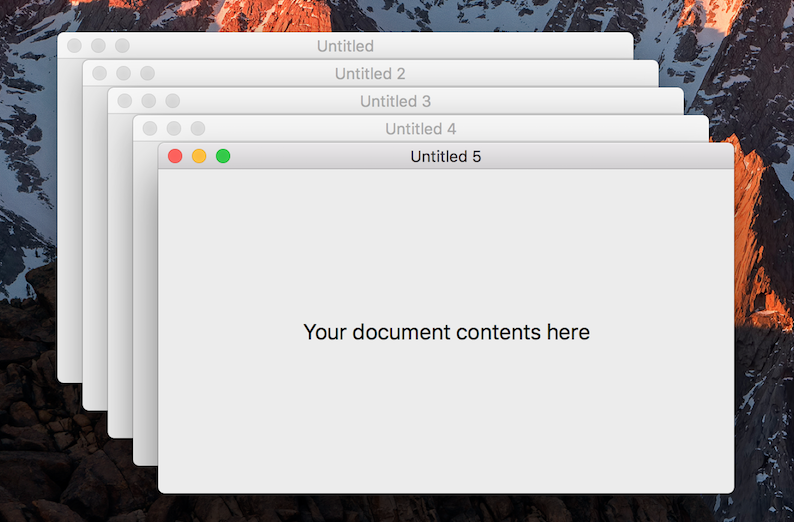
A Cascade of Windows
Remember how your document windows all opened on top of each other previously? You will now make your windows cascade across the screen as you create them. Open WindowController.swift and add the following code to the class implementation:
required init?(coder: NSCoder) {
  super.init(coder: coder)
  shouldCascadeWindows = true
}
You set the shouldCascadeWindows property to true to tell the window controller to cascade its windows.
Build and run and you will see each new window offsets itself from the previous one so all windows are visible at the same time.
Put it on the Tab
Cascading windows are nice, but they are a bit retro. So, how about using the latest hot Sierra API to switch to tabbed windows?
Open Main.storyboard and select the Window in the Window Controller scene. Then, open the Attributes Inspector and switch the Tabbing Mode control to Preferred.

And that’s it. With that single change your app has adopted the new tabbed style!
Build and run the app. Open several new documents and see how they all tab together in one window.

When you run BabyScript, macOS makes a few decisions regarding the size of the current screen and the requested window size to decide where to place a window and how large the actual window should be.
There are two ways to control this position and size. You will learn about them next.
Set the Window’s Position with Interface Builder
First you will use Interface Builder to set the initial position.
Open Main.storyboard, and select the Window in the Window Controller Scene. Then select the Size Inspector. Run BabyScript – or bring it to the front – and you should see the following screen:

Entering numeric values for the X and Y under Initial Position is one way to set the window’s position. You can also set it visually by dragging the gray rectangle in the tiny preview window just below the X and Y values.
If you click the red constraints around the gray window in the window preview, you can control the decisions that macOS makes when placing a new window on the screen. Notice how the pulldown menus below the preview change as you do this.
They are initially set to Proportional Horizontal and Proportional Vertical. This means that the window’s initial position will depend on the size of the screen that its being opened on. Now, make these changes:
- Set the two pulldowns to Fixed From Left & Fixed From Bottom.
- Set the initial position to X:200 and Y:200
Build and run. Notice how your first new window ends up in the exact same position regardless of screen size.

Set the Window’s Position Programmatically
In this section you’ll accomplish the same thing you did previously using Interface Builder, but this time you’ll do it programatically. This approach gives you runtime control of the window’s initial position. You might find this approach more flexible in some situations.
You will make your changes to the windowDidLoad method in your window controller. When windowDidLoad is called, the window has already completed loading all its views from the storyboard, so any configuration you do will override the settings in the storyboard.
Open WindowController.swift and replace the windowDidLoad implementation with the following:
override func windowDidLoad() {
  super.windowDidLoad()
  //1.
  if let window = window, let screen = window.screen {
    let offsetFromLeftOfScreen: CGFloat = 100
    let offsetFromTopOfScreen: CGFloat = 100
    //2.
    let screenRect = screen.visibleFrame
    //3.
    let newOriginY = screenRect.maxY - window.frame.height - offsetFromTopOfScreen
    //4.
    window.setFrameOrigin(NSPoint(x: offsetFromLeftOfScreen, y: newOriginY))
  }
}
The above code sets the window’s top-left corner 100 points offset in both the x and y directions from the top-left of the screen as follows:
- Get the
NSWindowandNSScreeninstances so you can calculate the geometry. - Ask for the
visibleFrameof the screen. - Subtract your window’s height along with the desired offset from the screens height. Remember you are trying to get the position for the bottom edge.
- Set the origin to the calculated point.
The visibleFrame property of NSScreen excludes the areas taken by the Dock and Menu Bar. If you didn’t take this into account, you might end up with the Dock obscuring part of your window.
Build and run. The window should now sit 100 points in each direction from the screen’s top-left corner.

Make BabyScript a Mini Word Processor
Cocoa has some amazing UI functionality just waiting for you to drag into your app window. Here, you’ll explore the super powerful and versatile NSTextView. But first, you need to know about the content view of NSWindow.
The Content View
The contentView is the root of the view hierarchy of a window. It sits inside the window’s chrome (Title Bar & Controls) and it’s the view where all the user interface elements are located. You can replace the default one with your own view by just changing the contentView property. You won’t do that in this tutorial, but it’s useful to know.

Add the Text View
Open Main.storyboard and remove the text field that says “Your document contents here” from the content view. Now, add a text view:
- Still in the storyboard, open the Object Library.
- Search for
NSTextView. - Drag the Text View and drop it on the content view.
- Resize the text view so its inset is 20 points on each side from the content view. The blue dotted alignment guides will help you here.
- In the Outline View, select Bordered Scroll View. Note that the text view is nested in the Clip View, which is nested inside a scroll view.
- Select the Resolve Auto Layout Issues control and select Reset To Suggested Constraints


Build and run — you should see the following:

Look at that friendly, blinking text insertion point inviting you to enter some text! Start your manifesto, or stick to a simple “Hello World”, and then select the text. Copy it with Edit / Copy or Command – C, and then paste several times, just to put the app through its paces.
Explore the Edit and Format menus to get an idea of what’s available. You might have noticed that Format / Font / Show Fonts is disabled. You’re going to fix that now.