Unity Beat ’Em Up Game Tutorial – Getting Started
Get started building your first beat ’em up game in Unity with this excerpt from our classic Beat ’Em Up Game Starter Kit, updated for Unity 2018.1! By Jonathan Simbahan.
Basic Unity Concepts
You have a basic understanding of how to get around in the Unity editor. Now get ready to absorb a few more core concepts that’ll help you make the most of this tutorial.
GameObjects
Meet the fundamental objects in Unity. Without them, you have…nothing.
They are the “things” that make up a game — literally what the name implies: objects in your game. They can be trees, lights, floors, cameras, a ball, a car, a slice of bacon, a hot buttered waffle, etc. (Hungry yet?)
The Hierarchy window lists GameObjects used in the current scene.

GameObjects are basically containers that can contain components, which are building blocks that define a GameObject’s capabilities. Components allow GameObjects to display images, play audio, think with an AI, handle physics, display 3D meshes and so much more!
Unity comes with many built-in components, but you can (and will) create some of your own by scripting — more on that later.
The following shows all the components that belong to the GameObject named Hero.
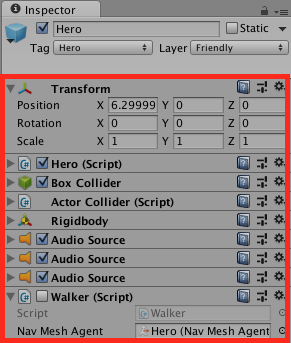
A GameObject doesn’t fly solo; it always has a transform component that determines the GameObject’s position, rotation and scale.
![]()
UI elements (still GameObjects) have a much more complicated transform called RectTransform. You’ll learn about them in a later chapter.
![]()
Parenting
Parenting is simple. Well, at least it is in the Unity engine! Any GameObject can become the child of another GameObject. The Hierarchy view is where you see and manipulate children and parents. Child GameObjects are indented beneath their respective parents.
There are no limits on how many children a parent can have, but each child can only have one parent.
The next image shows you an example of such a relationship: Image is a child of Joystick, and Joystick is a child of Controls Canvas. It’s just one big, happy family in there!

To make one GameObject a child of another, just drag one over another in the Hierarchy. To unparent, just do the opposite — it’s as easy as pie!
In the example, GameObject 1 is now a child of GameObject 2:
![]()
You’ve finished the Unity crash course and have the basic understanding you need to start creating a game!
Don’t worry if you’re not totally clear on everything so far. You can always come back to this part to refresh your memory, and trust me when I say you’ll become very familiar with the engine as you create PompaDroid.
Creating the Title Scene
You’ve created the project and are ready to build. When you first visit a new project, Unity greets you with a new, unsaved scene.
To save it, select File\Save Scene and name the scene MainMenu. Navigate to the Scenes folder and click Save.
Saving is simple enough. Look closer at the scene — contrary to what you might think it isn’t empty. By default, Unity created a Main Camera GameObject.
You don’t need it for the title scene, so select the Main Camera in the Hierarchy window, right-click and select Delete.
Your scene won’t stay empty for long!
Find the Images folder under Assets in the Project window.
Right-click and select Create\Folder. Name it MainMenu — this is where you’ll add all the assets you need to make the title screen.
Open MainMenu then right-click it and select Import New Asset. Navigate to the Chapter 1 Assets folder that comes with this tutorial.
Import bg_title.png, bg_title_touchtostart.png and bg_title_txt.png to MainMenu.

Now select the three assets you just imported in the Project window. Go to the Inspector and set Pixels Per Unit to 32 and set FilterMode to Point. Click on Apply to save your changes.

What did you just do?
- Setting the value of a world space unit in Pixels Per Unit means that 1 Unity world space unit equals 32 pixels.
- Setting Filter Mode to Point means textures will look blocky when magnified. Perfect for pixel art. This setting determines what happens when an image is stretched.
The assets are ready to use on the title screen — speaking of title screens, here’s what yours will look like:

How are you going to make that? By using Unity’s UI of course!
Setting Up the Canvas
In the Hierarchy window, click Create\UI\Image to create three new GameObjects and a plain white box:

A canvas comprises three components: canvas, canvas scaler and graphics raycaster. You’ll find them in the Inspector.
Remember that you’ll need to create a canvas for all UI objects in Unity.
- The Canvas represents the space where the UI is drawn. You’ll learn more about this later. For now, just keep in mind that all UI elements have an ancestor of a canvas component that renders on screen.
- The Canvas Scaler handles the overall size of the canvas. A common use case is when you want the game’s UI to scale automatically to the current screen size.
- The Graphics Raycaster determines if a raycast can hit a canvas. It’s important when setting up correct UI functionalities such as button clicks.
Secondly, Unity also created an Image GameObject as a child of the Canvas GameObject. It contains two components: a Canvas Renderer that’s required to render a UI object on a canvas, and an Image component that draws the sprite set in the source image field.
Lastly, there’s also a new EventSystem GameObject containing an Event System component that handles all the events the UI system uses. You won’t be able to interact with UI elements without this component. It also contains a Standalone Input Module to handle game input.
Adding the Background Image
Select the Image GameObject from the Hierarchy. Next, open Images\MainMenu from the Assets folder in the Project window, and drag bg_title to the Source Image field in the Image component.
Tadaaa! The white square on the screen now shows the bg_title image — you may need to zoom out to see it.


Take a closer look. It’s there…but why is it shrunken, squished and squared off?

It definitely shouldn’t look like this!