Android Things Tutorial: Getting Started
Did you ever want to tinker with all those little pins on hardware boards? Well in this tutorial, you’ll learn how to do just that, with AndroidThings! By Dean Djermanović.
Android Things is an Android-based operating system which Google manages that enables you to build hardware devices for the Internet of Things (IoT). In the broadest sense, the Internet of Things is a network of connected “things”. This includes everything from microwave ovens to the jet engine of an airplane. If a device has a switch or measures something, chances are you can adapt it, and expose it over an IoT network.
In this tutorial you’ll use Android Things to solve a real life problem by creating an app that simulates a doorbell. In the process, you’ll learn:
- What Android Things is and how it works.
- How hardware and software communicate.
- How to integrate Firebase with Android Things.
Note: This tutorial assumes that you have solid knowledge of Android development. If you’re completely new to Android development, please check out our Beginning Android Development with Kotlin series first. Other things that are used in this tutorial are the ADB, Firebase and LiveData. If you’re not familiar with these concepts please check out our tutorials for them as well.
This tutorial focuses on the using the Raspberry Pi. To complete the exercises, you will need the following hardware:
You will also need to have a Google account and access to a Wi-Fi network that allows for device-to-device communication.
Alternatively, you can complete this tutorial using the Pico Pi based Starter Kit for Android Things. If you are using this board/kit, you have the option of either connecting to your board via a Wi-Fi network/ethernet connection or directly with the USB cord. If you use the USB cord you can skip the connect to the Internet steps of this tutorial. Also, you will need to follow the instructions that come with the kit to assemble it before starting this tutorial.
- A Raspberry Pi 3 Model B and
- A Pimoroni Rainbow HAT for Android Things
- A power supply with a minimum of a 5volt, 2.0Amp rating
- An SD card that is at least 8GB
Developing for Android Things
Developing for Android Things is similar to developing mobile Android apps, but there are some key differences. It consists of these four things:
- Hardware – hardware is based on System-on-Module (SOM) design. SOM is a fully integrated component with a CPU, memory, Wi-Fi, Bluetooth and flash storage that is ready to use. You can think of using SOM as using libraries when writing software. Google certified the SOM, and provided a board support package that includes the kernel, drivers and libraries to support Android. With the Android Things 1.0 release, Google announced support for SOMs based on designs from NXP, Qualcomm and MediaTek, certifying them for production use.
- Android for IoT – Android Things is an optimized version of Android that can run with lower compute and storage requirements. Security features are built-in and ON by default. A fundamental part of security are timely, Over the Air (OTA), software updates. This means the device only needs network access with Wi-Fi or Ethernet to get updates, such as stability fixes and security patches which Google provides. Automatic updates are enabled for all devices by default. Because Android Things is optimized for embedded devices, there are fourteen sets of APIs that are currently not supported, including ones relating to telephony.
- Apps and services – with Android Things you can build apps using the rich framework the Android SDK provides, and Google Play Services. You can also easily integrate your apps with popular Google services like Firebase, which you’ll see later, Tensorflow or ML Kit. You can do this by using existing Android client libraries. Since Android Things is Android, you can use all of its languages and tools right out of the box. In this tutorial, you’ll be using Android Studio and Kotlin.
- Android Things console – management console is where you control what exactly goes into your devices. It’s where you get the access to the board support package that Google and board vendors are supporting, where you create full product builds with all of your apps and services included and where you manage releases and update channels over time.
Getting Started
While there are a number of different supported boards, this tutorial focuses on using Raspberry Pi 3 and, to a lesser extent, the Pico Pi. Using one of these two boards allows you to use a peripheral HAT(hardware on top) board with a Raspberry Pi standard pinout. This avoids the need to mess around with soldering, bare wires and breadboards that can make it easy to short out or cause smoke/fire to appear and ruin your Raspberry or Pico Pi. While some makers would consider smoke and fire to be a right of IOT passage, for this tutorial you will simply plug the hat into the Pi.
Connect the Hardware
Before you start, you need to assemble the hardware together.
-
- Plug the Rainbow HAT in to your Raspberry Pi. Make sure the pins are lined up and not off by one row.
- Plug the Rainbow HAT in to your Raspberry Pi. Make sure the pins are lined up and not off by one row.

-
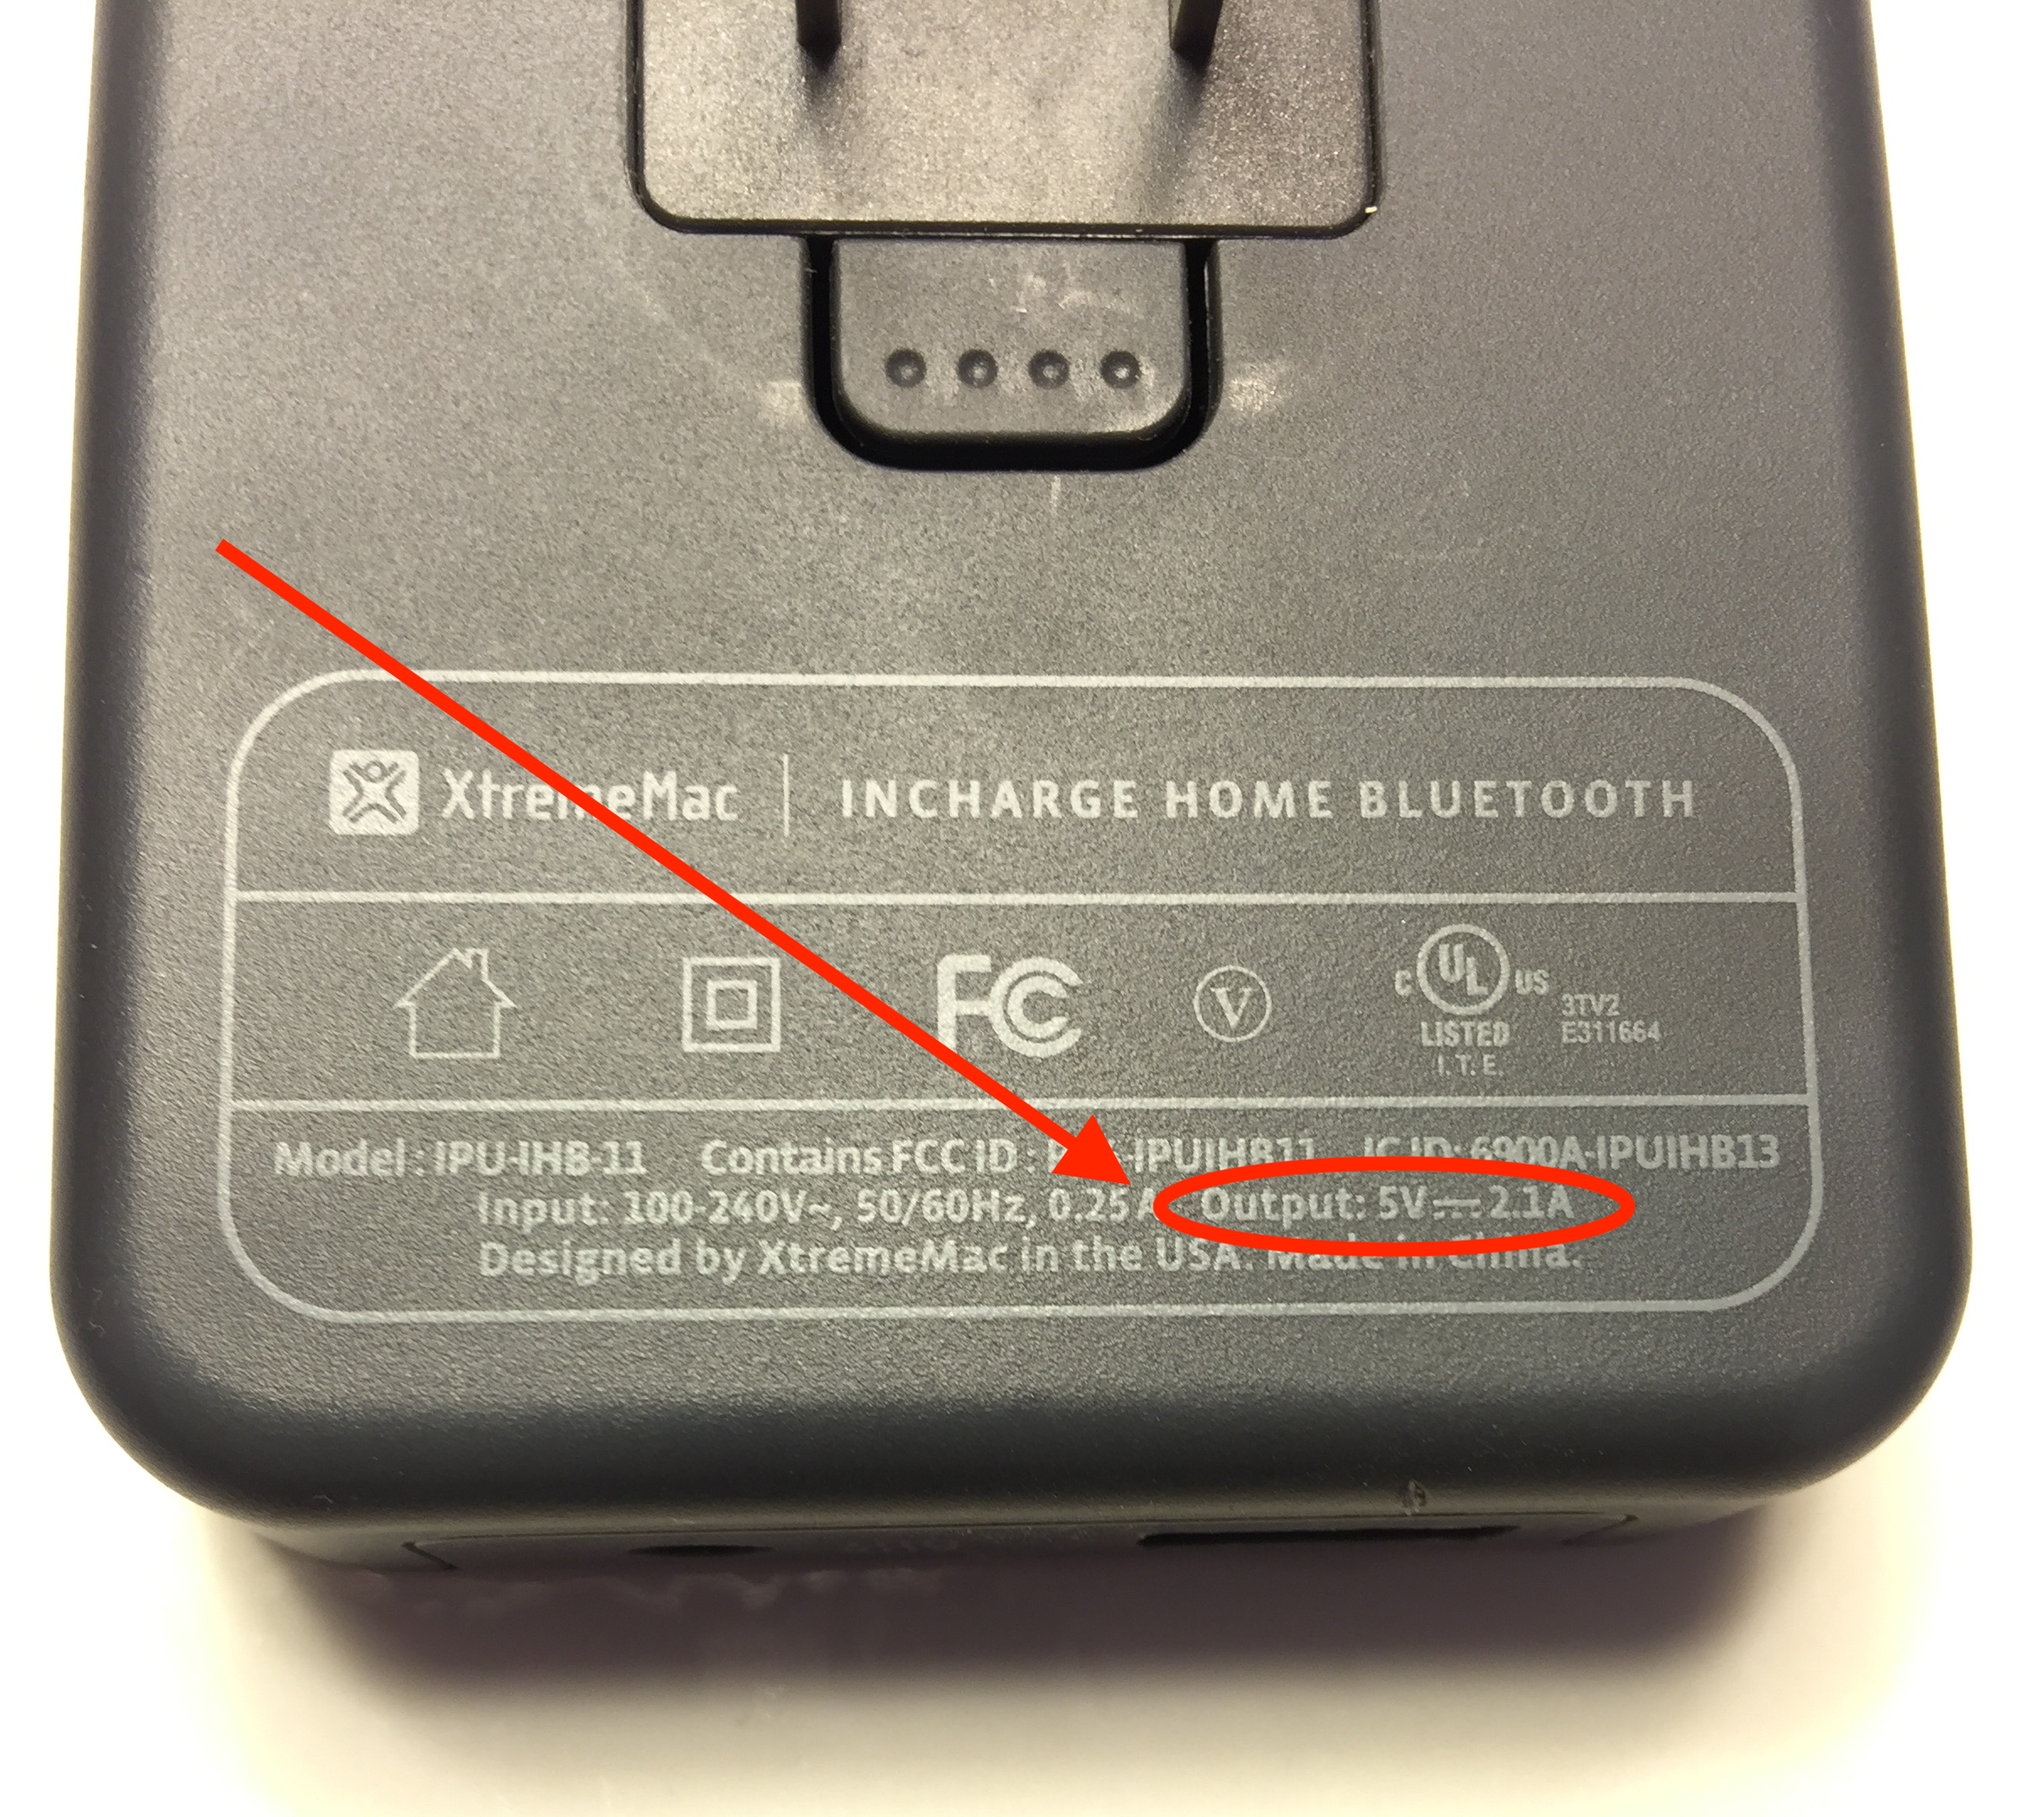
- Connect your Raspberry Pi to the power supply. Use a separate power supply, do not try to run it off your computer because that’s not recommended for Raspberry Pi 3’s. The power supply output you’re using should be rated at 5V 2.0A, at least. Check the small print on the power supply and make sure you’re using one with adequate specs.
- Connect your Raspberry Pi to the power supply. Use a separate power supply, do not try to run it off your computer because that’s not recommended for Raspberry Pi 3’s. The power supply output you’re using should be rated at 5V 2.0A, at least. Check the small print on the power supply and make sure you’re using one with adequate specs.
Install Android Things
In order to flash Android Things to the development board, you’ll use the Android Things Setup Utility tool. Most Android Things boards, including the Pico Pi, can be flashed by plugging them directly into the computer via USB. The Raspberry Pi requires you to flash an SD card. The steps stay the same, but you will need to mount an SD card.
-
- First, go to the Android Things console.
- First, go to the Android Things console.

-
- Next, click on the hamburger menu at the top-left corner and select Tools from the menu.
- Next, click on the hamburger menu at the top-left corner and select Tools from the menu.

-
- Now, click on the Download button to download the Setup Utility tool.
- Now, click on the Download button to download the Setup Utility tool.

-
- Finally, unzip the downloaded file and you’ll see three scripts for flashing Android Things images, for Linux, Mac OS and Windows. Choose the one appropriate to your environment.
- Finally, unzip the downloaded file and you’ll see three scripts for flashing Android Things images, for Linux, Mac OS and Windows. Choose the one appropriate to your environment.

The script will present you with the following menu:
-
- In this example, we used the Mac script. Open the Terminal and navigate to the folder with the scripts. If you are using a Raspberry Pi, mount your SD card. If your using a Pico Pi connect it to your USB port. Now, run the script. For example, on a mac it will be:
sudo ~/android-things-setup-utility/android-things-setup-utility-macos
- In this example, we used the Mac script. Open the Terminal and navigate to the folder with the scripts. If you are using a Raspberry Pi, mount your SD card. If your using a Pico Pi connect it to your USB port. Now, run the script. For example, on a mac it will be:
- In this example, we used the Mac script. Open the Terminal and navigate to the folder with the scripts. If you are using a Raspberry Pi, mount your SD card. If your using a Pico Pi connect it to your USB port. Now, run the script. For example, on a mac it will be:
sudo ~/android-things-setup-utility/android-things-setup-utility-macos
sudo ~/android-things-setup-utility/android-things-setup-utility-macos

-
- Select option one to install Android Things by typing
1and pressing Enter.
- Select option one to install Android Things by typing
- Select option one to install Android Things by typing
1and pressing Enter.

-
- Select the hardware you are using.
- Select the hardware you are using.

-
- Now you’ll see an option that allows you to choose a custom image which you can create in the Android Things console. A custom image is more flexible and is for more experienced developers. For this tutorial, you’ll use the default image. Select option one to download the default image.
- Once you download the image, you’ll see the following screen. Make sure you plugged in your SD card, into the computer and then press Enter.

-
- Select the drive by using arrow keys and press Enter. Type
yto confirm your selection and press Enter.
- Select the drive by using arrow keys and press Enter. Type
- Select the drive by using arrow keys and press Enter. Type
yto confirm your selection and press Enter.

-
- Once it’s completed, it’ll say Setup Complete. Type
nin the terminal to select that you don’t want to set up the Wi-Fi. You’ll connect the board to the Wi-Fi later. You can safely eject the SD card from the computer now.
- Once it’s completed, it’ll say Setup Complete. Type
- Once it’s completed, it’ll say Setup Complete. Type
nin the terminal to select that you don’t want to set up the Wi-Fi. You’ll connect the board to the Wi-Fi later. You can safely eject the SD card from the computer now.
