Basic UIView Animation Tutorial: Getting Started
Animations are everywhere in iOS. In this tutorial, you’ll learn to chain the basic UIView animations together to create incredibly satisfying effects! By Ehab Amer.
Open the Flood Gates! (Er, I mean, the Picnic Gates)
Next, you’ll animate opening the picnic basket doors. Because the picnic basket’s doors have Auto Layout constraints anchoring them to their superview, you’ll use a different technique to animate them. Rather than setting the doors’ positions, you’ll change the constraints that hold the doors in place, then let UIKit animate this change for you. Here’s how this type of animation works:
Whenever UIKit needs to calculate the position of constrained views, it uses the view’s Auto Layout constraints to calculate 4 core values of the frame: origin.x, origin.y, size.width and size.height. When you add a leading constraint to a view in relation to its superview, its origin.x is set to equal the x position of its superview, plus the constraint constant (which defaults to 0) times the constraint multiplier (this defaults to 1).
There’s an important catch when animating constraints: If you only set new constraint values, UIView animation doesn’t update the view’s frame. After you update a constraint, you also must instruct either the view itself, or its superview, to reset its layout. This lets UIKit know that it should visually update the frame property of this view. Since you want to animate your constraint change, you need to place the instruction to reset the layout inside the animation block. It doesn’t actually matter whether you set the new constraint values inside or outside the animation block, so long as you put your layout reset instruction within this block.
Open Main.storyboard, select the Basket Top and Basket Bottom views, and uncheck the Hidden property you enabled earlier.
Now open ViewController.swift and replace openBasket() with the following:
func openBasket() {
  basketTopConstraint.constant -= basketTop.frame.size.height
  basketBottomConstraint.constant -= basketBottom.frame.size.height

  UIView.animate(withDuration: 0.7, delay: 1.0, options: .curveEaseOut, animations: {
    self.view.layoutIfNeeded()
  }, completion: { finished in
    print("Basket doors opened!")
  })
}
This is very similar to openNapkins() in how it works. The only difference is that it adjusts the Auto Layout contraints instead of the directly modifying the frames.
Build and run to see your animation.

Cool! Now the basket doors and the napkins both animate out, each with different phasing and offsets. Technically, you’ve just combined two different animation techniques, and UIView animation has made it all look smooth and effortless. By the way: If you’d animated the constrained basket doors by directly setting their position, they would indeed animate. But as soon as these views or their superview recalculated their layouts, their constraints would suddenly slam them back to their original positions. Animating the constraints instead ensures that once your doors open, they’ll stay that way.
How To Chain Animations
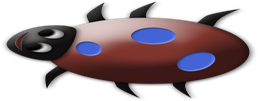
Your basket now opens nicely, but there’s a bug in your project — a literal one, instead of the code variety! You’ll soon e-squish this buggy (this is a humane tutorial, so no actual bugs get harmed). First, though, you’ll teach your bug to move back and forth, so it has a sporting chance. :]
Open ViewController.swift, and add these four methods to ViewController, right after openNapkins():
func moveBugLeft() {
  UIView.animate(withDuration: 1.0,
                 delay: 2.0,
                 options: [.curveEaseInOut , .allowUserInteraction],
                 animations: {
                  self.bug.center = CGPoint(x: 75, y: 200)
  },
                 completion: { finished in
                  print("Bug moved left!")
  })
}

func faceBugRight() {
  UIView.animate(withDuration: 1.0,
                 delay: 0.0,
                 options: [.curveEaseInOut , .allowUserInteraction],
                 animations: {
                  self.bug.transform = CGAffineTransform(rotationAngle: .pi)
  },
                 completion: { finished in
                  print("Bug faced right!")
  })
}

func moveBugRight() {
  UIView.animate(withDuration: 1.0,
                 delay: 2.0,
                 options: [.curveEaseInOut , .allowUserInteraction],
                 animations: {
                  self.bug.center = CGPoint(x: self.view.frame.width - 75, y: 250)
  },
                 completion: { finished in
                  print("Bug moved right!")
  })
}

func faceBugLeft() {
  UIView.animate(withDuration: 1.0,
                 delay: 0.0,
                 options: [.curveEaseInOut , .allowUserInteraction],
                 animations: {
                  self.bug.transform = CGAffineTransform(rotationAngle: 0.0)
  },
                 completion: { finished in
                  print("Bug faced left!")
  })
}
Each of these new methods is an animation step. When chained together, they make up the complete motion of the bug. Your bug starts out facing left, and the first step is to move it in that direction. Next, you’ll turn it around to face right, then move it back in that direction. Last, you’ll bring the buggy full circle, turning it back around to face left, as it did initially.
To chain these individual steps in a sequence, you’ll just call the next step you’d like to execute in the completion block of each step. It’s as simple as that.
In the completion block of moveBugLeft(), right after the print() statement, add:
self.faceBugRight()
Then, in the completion block of faceBugRight(), add:
self.moveBugRight()
Next, in the completion block of moveBugRight(), add:
self.faceBugLeft()
And last, to make the sequence a repeated one, in the completion block of faceBugLeft(), add:
self.moveBugLeft()
Great! Now you just need to set all this in motion. At the end of viewDidAppear(_:), add a call to trigger the first step in your “buggy” animation sequence. :]
moveBugLeft()
Build and run. You should see the bug moving from right to left in a repeating loop — exactly what you wanted (well, for the moment). Huzzah!

Bug Off, Bug!
The moment you’ve been waiting for has arrived: It’s time to squish that bug!
In ViewController.swift, add two new properties to ViewController, right after the @IBOutlet declarations:
var isBugDead = false
var tap: UITapGestureRecognizer!
Now, add this line of code at the top of each of the four bug animation methods you added in the previous section. Make sure to place this above each method’s call to animate(withDuration:delay:options:animations:completion:):
if isBugDead { return }
This makes sure that when you squish that bug, it will stop crawling around. Now it’s time to set up a UITapGestureRecognizer so you can do some serious power squashing. :]
Add the following method at the bottom of ViewController.swift
@objc func handleTap(_ gesture: UITapGestureRecognizer) {
  let tapLocation = gesture.location(in: bug.superview)
  if (bug.layer.presentation()?.frame.contains(tapLocation))! {
    print("Bug tapped!")
  } else {
    print("Bug not tapped!")
  }
}
Here’s what this code does:
When responding to a tap, you need to check whether the user actually tapped on your bug. Typically, you’d simply compare the tapLocation to the bug view’s frame. But here, you’re using the view’s presentation layer frame, bug.layer.presentation().frame, instead. What gives?
This is an important distinction and a very common source of confusion. UIView animation updates a view’s “presentation layer”, which represents what will be displayed on screen at any given moment. This contrasts with the view’s underlying frame itself, which does not change during animations. As your bug scoots back and forth, its underlying frame has already moved to its final position for that animation. All the in-between animation orientation and positioning details are handled in the presentation layer. This means that when you’re checking if a user has tapped on your bug, what you really want to know is whether that tap was within the presentation layer’s frame.
Now where is that picnic bug hiding?
OK! It’s time to get squishy! In ViewController.swift, find init(coder:), and immediately below the line super.init(coder: aDecoder) add:
tap = UITapGestureRecognizer(target: self, action: #selector(ViewController.handleTap(_:)))
This creates a gesture recognizer to detect your taps on the screen. Next, add this to the end of viewDidAppear(_:) to add the gesture recognizer to the view:
view.addGestureRecognizer(tap)
Build and run. Wait for the bug to start moving around and then tap on the screen. Depending on whether you tapped on the bug or not, you’ll either see “Bug tapped!” or “Bug not tapped!” in the Xcode console.
That’s good, but how about adding some squishy satisfaction. Locate handleTap() and add the following code inside its if block:
if isBugDead { return }
view.removeGestureRecognizer(tap)
isBugDead = true
UIView.animate(withDuration: 0.7, delay: 0.0,
               options: [.curveEaseOut , .beginFromCurrentState], animations: {
  self.bug.transform = CGAffineTransform(scaleX: 1.25, y: 0.75)
}, completion: { finished in
  UIView.animate(withDuration: 2.0, delay: 2.0, options: [], animations: {
    self.bug.alpha = 0.0
  }, completion: { finished in
    self.bug.removeFromSuperview()
  })
})
Here’s what this does:
- Once the bug is tapped, you first set
isBugDeadtotrueso the animation chain will stop. - Next, you remove the tap gesture recognizer from the view so that no more interaction can happen.
- Then, you start a new chain of animations:
- The bug gets flattened by applying a scale transform.
- It fades to nothingness by setting its alpha to 0 after a delay.
- Finally, you remove the bug from the superview.
- The bug gets flattened by applying a scale transform.
- It fades to nothingness by setting its alpha to 0 after a delay.
- Finally, you remove the bug from the superview.
Build and run: This time when you squish your bug, it gets well and truly squished!
Buggy be squished!