Core Location Tutorial for iOS: Tracking Visited Locations
In this Core Location tutorial, you will learn how to use visit monitoring to track a user’s visited locations. By Andrew Kharchyshyn.
Handle Fake Visits
It’s time to handle the location callback. For this, add the following code to AppDelegate‘s CLLocationManagerDelegate extension:
func locationManager(_ manager: CLLocationManager, didUpdateLocations locations: [CLLocation]) {
    // 1
    guard let location = locations.first else {
      return
    }

    // 2
    AppDelegate.geoCoder.reverseGeocodeLocation(location) { placemarks, _ in
    if let place = placemarks?.first {
      // 3
      let description = "Fake visit: \(place)"

      //4
      let fakeVisit = FakeVisit(
        coordinates: location.coordinate,
        arrivalDate: Date(),
        departureDate: Date())
      self.newVisitReceived(fakeVisit, description: description)
    }
  }
}
- Discard all locations except for the first one.
- Grab the location description, as you did before.
- Mark the visit as a fake one.
- Create a
FakeVisitinstance and pass it tonewVisitReceivedfunction.
Build and run the app. Turn on the Route location simulation. Close the app or lock your iPhone and you should get a new notification around once per minute.

Persisting Location Data
To save the visited locations, you’ll use Swift’s Codable protocol to encode the visited locations into JSON and write that to a file.
Saving Records on Disk
Open LocationsStorage.swift. At the bottom of the class, add the following function:
func saveLocationOnDisk(_ location: Location) {
  // 1
  let encoder = JSONEncoder()
  let timestamp = location.date.timeIntervalSince1970

  // 2
  let fileURL = documentsURL.appendingPathComponent("\(timestamp)")

  // 3
  let data = try! encoder.encode(location)

  // 4
  try! data.write(to: fileURL)

  // 5
  locations.append(location)
}
Here’s what you do with that code:
- Create the encoder.
- Get the URL to file; for the file name, you use a date timestamp.
- Convert the location object to raw data.
- Write data to the file.
- Add the saved location to the local array.
Now, open AppDelegate.swift and inside newVisitReceived(_:description:), right under this:
let location = Location(visit: visit, descriptionString: description)
add this:
LocationsStorage.shared.saveLocationOnDisk(location)
Now, whenever the app receives a visit, it will grab the location description, create a Location object and save it to disk.
To test this, you need to do the following two things:
- Allow the user to log his or her current location.
- Display all saved records in a
UITableViewController.
Saving a Current Location
To save the current location, open MapViewController.swift. Inside of addItemPressed(_:), add this code:
guard let currentLocation = mapView.userLocation.location else {
  return
}

LocationsStorage.shared.saveCLLocationToDisk(currentLocation)
As you can see, there is no saveCLLocationToDisk(_:) yet, so open LocationsStorage.swift and add this code to the bottom of the class:
func saveCLLocationToDisk(_ clLocation: CLLocation) {
  let currentDate = Date()
  AppDelegate.geoCoder.reverseGeocodeLocation(clLocation) { placemarks, _ in
    if let place = placemarks?.first {
      let location = Location(clLocation.coordinate, date: currentDate, descriptionString: "\(place)")
      self.saveLocationOnDisk(location)
    }
  }
}
Here, you create a Location object from clLocation, the current date and the location description from geoCoder. You save this location the same way as you did before.
Now, inside of the initializer, replace this line:
self.locations = []
with this:
let jsonDecoder = JSONDecoder()

// 1
let locationFilesURLs = try! fileManager
  .contentsOfDirectory(at: documentsURL, includingPropertiesForKeys: nil)
locations = locationFilesURLs.compactMap { url -> Location? in
  // 2
  guard !url.absoluteString.contains(".DS_Store") else {
    return nil
  }
  // 3
  guard let data = try? Data(contentsOf: url) else {
    return nil
  }
  // 4
  return try? jsonDecoder.decode(Location.self, from: data)
  // 5
  }.sorted(by: { $0.date < $1.date })
With this code, you:
- Get URLs for all files in the Documents folder.
- Skip the .DS_Store file.
- Read the data from the file.
- Decode the raw data into
Locationobjects — thanksCodable👍. - Sort locations by date.
With this code, when the app launches, LocationsStorage will have locations taken from disk.
Setting up the App to Use Stored Data
Setting up a Table View
Enough with the boring behind-the-scenes stuff!

Now, it's time for you to see the results.
For this, open PlacesTableViewController.swift. Replace tableView(_:cellForRowAt:) with the following implementation:
override func tableView(_ tableView: UITableView, cellForRowAt indexPath: IndexPath) -> UITableViewCell {
  let cell = tableView.dequeueReusableCell(withIdentifier: "PlaceCell", for: indexPath)
  let location = LocationsStorage.shared.locations[indexPath.row]
  cell.textLabel?.numberOfLines = 3
  cell.textLabel?.text = location.description
  cell.detailTextLabel?.text = location.dateString
  return cell
}
Build and run the app. You'll see something similar to this:
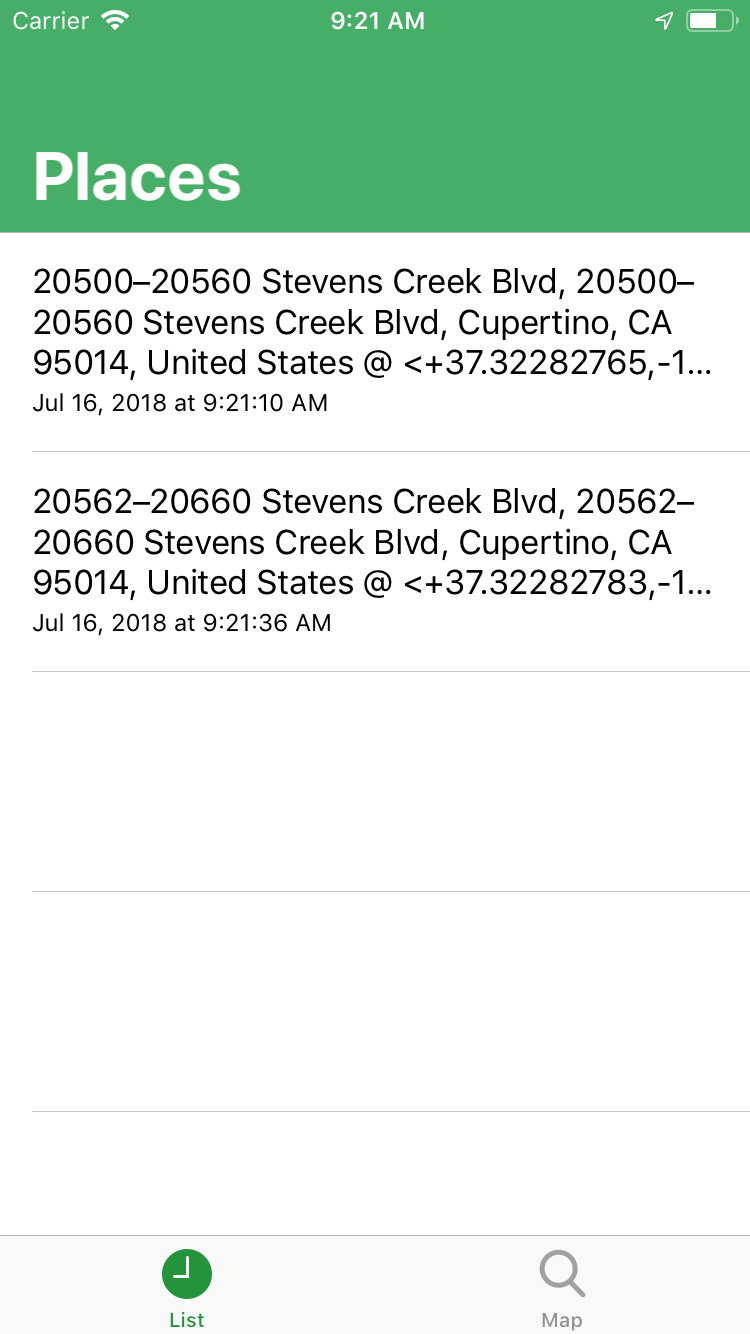
If you don't have any recorded visits, try saving them manually on the second tab and build run the app again. As you can see, in order to update the list, you need to re-run the app. You'll fix this next.
Updating the List When a Location is Logged
To keep the list updated, you need to post a notification for the app to know that a new location was recorded. Please note, however, that this is not UNNotification, but a Notification. This notification is for the app's internal usage, not for notifying users.
Open LocationsStorage.swift. At the bottom of the file, add this extension:
extension Notification.Name {
  static let newLocationSaved = Notification.Name("newLocationSaved")
}
This is the notification that you will post.
Now, at the end of saveLocationOnDisk(_:), add this code:
NotificationCenter.default.post(name: .newLocationSaved, object: self, userInfo: ["location": location])
Next, you need to listen to this notification in PlacesTableViewController.
Navigate to PlacesTableViewController.swift, and add the following code at the top of the class:
override func viewDidLoad() {
  super.viewDidLoad()

  // 1
  NotificationCenter.default.addObserver(
    self,
    selector: #selector(newLocationAdded(_:)),
    name: .newLocationSaved,
    object: nil)
}

// 2
@objc func newLocationAdded(_ notification: Notification) {
  // 3
  tableView.reloadData()
}
With the above code, you:
- Register a method to be called when your notification arrives.
- Receive the notification as a parameter.
- Reload the list.
Build and run the app. To save your current location, tap the plus button on the second tab. Opening the first tab, you should see that number of locations has increased:

Setting up MapView With All Logged Locations
The final part of this tutorial will show you how to display locations on a map with pins.
To add pins to the map, you need to convert locations to MKAnnotation, which is a protocol that represents objects on a map.
Open MapViewController.swift and add this method to the end of the class:
func annotationForLocation(_ location: Location) -> MKAnnotation {
  let annotation = MKPointAnnotation()
  annotation.title = location.dateString
  annotation.coordinate = location.coordinates
  return annotation
}
This creates a pin annotation with a title and coordinates.
Now, at the end of viewDidLoad(), add this:
let annotations = LocationsStorage.shared.locations.map { annotationForLocation($0) }
mapView.addAnnotations(annotations)
This code generates pins from locations that you've already created and adds them to the map.
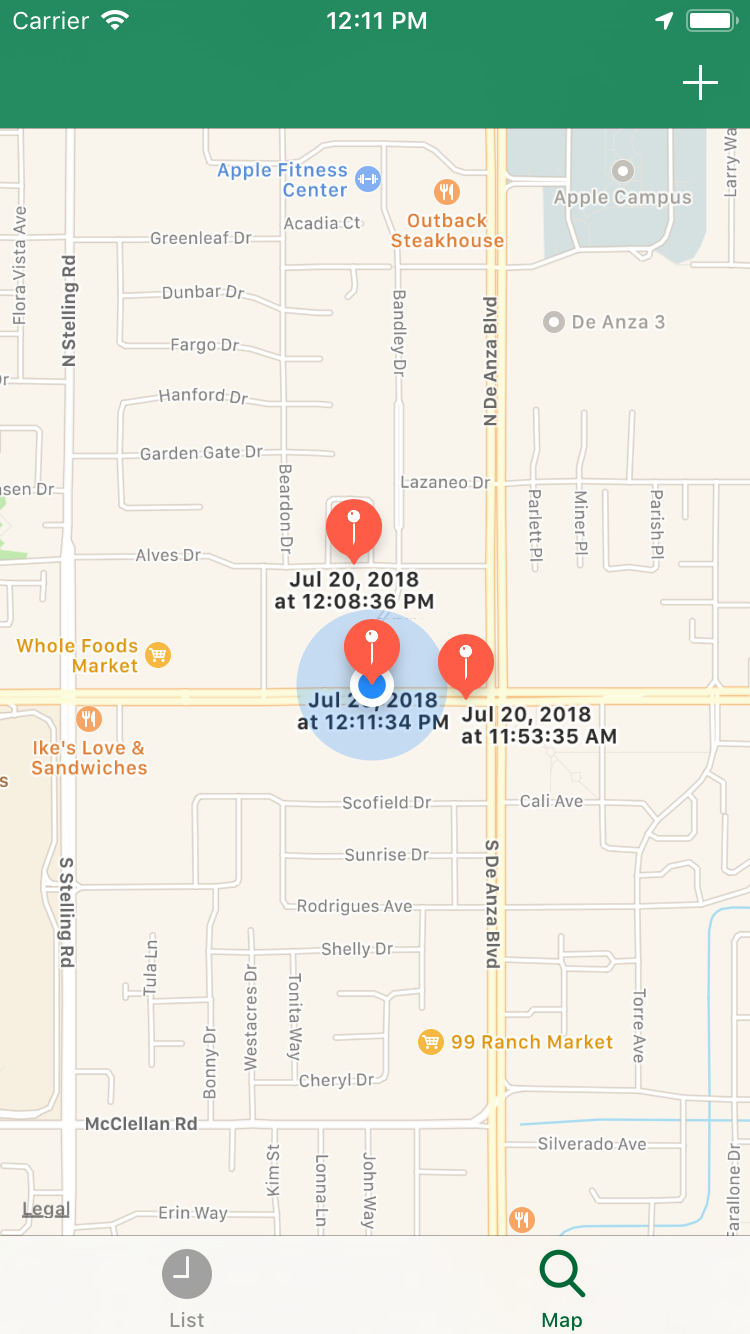
Build and run the app. You should see pins on the map, like this:

The only thing left to do is to add a pin when a new location is logged.
To do this, add the following function at the end of MapViewController:
@objc func newLocationAdded(_ notification: Notification) {
  guard let location = notification.userInfo?["location"] as? Location else {
    return
  }

  let annotation = annotationForLocation(location)
  mapView.addAnnotation(annotation)
}
Similarly to the first tab, you need to listen for the notification in order to know when this new location is recorded.
To subscribe to this notification, add this code to the end of viewDidLoad:
NotificationCenter.default.addObserver(
  self,
  selector: #selector(newLocationAdded(_:)),
  name: .newLocationSaved,
  object: nil)
Build and run the app. Log a new location on the second tab. A pin should appear on the map:
And that's your travel logger done! Feel free to walk around town and see what places it records! This feature enables you to see and react to where the user is going without draining too much battery. Just keep in mind that the data you're collecting is sensitive data, so collect it responsibly.