UISearchController Tutorial: Getting Started
In this tutorial, you’ll build a searchable Candy app based on a standard table view. You’ll add table view search capability, dynamic filtering and an optional scope bar using UISearchController, UISearchBar and friends. By Lorenzo Boaro.
Filtering With UISearchResultsUpdating
After you set up the search controller, you’ll need to do some coding to get it working. First, add the following property near the top of MasterViewController:
var filteredCandies: [Candy] = []
This property will hold the candies that the user searches for.
Next, add the following computed property to the main MasterViewController:
var isSearchBarEmpty: Bool {
  return searchController.searchBar.text?.isEmpty ?? true
}
isSearchBarEmpty returns true if the text typed in the search bar is empty; otherwise, it returns false.
Still within MasterViewController.swift, add the following method at the end of MasterViewController:
func filterContentForSearchText(_ searchText: String,
                                category: Candy.Category? = nil) {
  filteredCandies = candies.filter { (candy: Candy) -> Bool in
    return candy.name.lowercased().contains(searchText.lowercased())
  }

  tableView.reloadData()
}
filterContentForSearchText(_:category:) filters candies based on searchText and puts the results in filteredCandies, which you’ve just added. Don’t worry about the category parameter for now; you’ll use that in a later section of this tutorial.
filter(_:) takes a closure of type (candy: Candy) -> Bool. It then loops over all the elements of the array and calls the closure, passing in the current element, for every one of the elements.
You can use this to determine whether a candy should be part of the search results that the user receives. To do so, you need to return true if you want to include the current candy in the filtered array or false otherwise.
To determine this, you use contains(_:) to see if the name of the candy contains searchText. But before doing the comparison, you convert both strings to their lowercase equivalents using lowercased().
Remember UISearchResultsUpdating? You left it unimplemented. Well, you’ve just written a method that you want to call when you update the search results. Voilà!
Replace the TODO in updateSearchResults(for:) with the following code:
let searchBar = searchController.searchBar
filterContentForSearchText(searchBar.text!)
Now, whenever the user adds or removes text in the search bar, the UISearchController will inform the MasterViewController class of the change via a call to updateSearchResults(for:), which in turn calls filterContentForSearchText(_:category:).
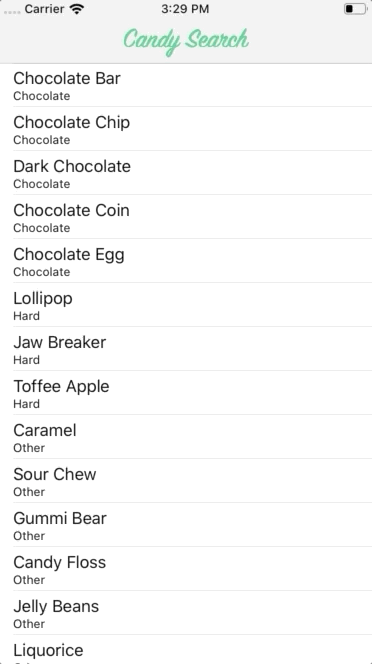
Build and run and you’ll notice that there’s now a search bar above the table. You may need to scroll down to see it.

However, when you enter search text, you still don’t see any filtered results. What gives?
This is simply because you haven’t written the code to let the table view know when to use the filtered results yet.
Updating the Table View
In the main MasterViewController class of MasterViewController.swift, add a computed property to determine if you are currently filtering results or not:
var isFiltering: Bool {
  return searchController.isActive && !isSearchBarEmpty
}
Next, replace tableView(_:numberOfRowsInSection:) with the following:
func tableView(_ tableView: UITableView,
               numberOfRowsInSection section: Int) -> Int {
  if isFiltering {
    return filteredCandies.count
  }

  return candies.count
}
Not much has changed here. You simply check whether the user is searching or not, then use either the filtered or the normal candies as the data source for the table.
Next, replace tableView(_:cellForRowAt:) with the following:
func tableView(_ tableView: UITableView,
               cellForRowAt indexPath: IndexPath) -> UITableViewCell {
  let cell = tableView.dequeueReusableCell(withIdentifier: "Cell", for: indexPath)
  let candy: Candy
  if isFiltering {
    candy = filteredCandies[indexPath.row]
  } else {
    candy = candies[indexPath.row]
  }
  cell.textLabel?.text = candy.name
  cell.detailTextLabel?.text = candy.category.rawValue
  return cell
}
Both methods now use isFiltering, which refers to the isActive property of searchController to determine which array to display.
When the user taps the search field of the search bar, isActive is automatically set to true. If the search controller is active and the user has typed something into the search field, the returned data comes from filteredCandies. Otherwise, the data comes from the full list of items.
Remember that the search controller automatically handles showing and hiding the results table, so all your code has to do is provide the correct data (filtered or non-filtered) depending on the state of the controller and whether the user has searched for anything.
Build and run the app. You now have a functioning Search Bar that filters the rows of the main table. Huzzah!
Play with the app for a bit to see how you can search for various candies.
But wait, there’s still one more problem. When you select a row from the search results list, you may notice the detail view is from the wrong candy! Time to fix that.
Sending Data to a Detail View
When sending information to a detail view controller, you need to ensure the view controller knows which context the user is working with: The full table list or the search results. Here’s how you handle that.
Still in MasterViewController.swift, in prepare(for:sender:), find the following code:
let candy = candies[indexPath.row]
And replace it with the following:
let candy: Candy
if isFiltering {
  candy = filteredCandies[indexPath.row]
} else {
  candy = candies[indexPath.row]
}
Here, you perform the same isFiltering check as before, but now you’re providing the proper candy object when segueing to the detail view controller.
Build and run the code at this point and see how the app now navigates correctly to the detail view from either the main table or the search table with ease.
Creating a Scope Bar to Filter Results
To give your users another way to filter their results, add a scope bar in conjunction with your search bar to filter items by category. The categories you’ll filter by are the ones you assigned to the candy object when you created candies: Chocolate, Hard and Other.
First, you have to create a scope bar in MasterViewController. The scope bar is a segmented control that narrows a search by only looking in certain scopes. The scope is whatever you define it to be. In this case, it’s a candy’s category, but scopes could also be types, ranges or something completely different.
Using the scope bar is as easy as implementing one additional delegate method.
In MasterViewController.swift, you’ll add another extension that conforms to UISearchBarDelegate. So after UISearchResultsUpdating, which you added earlier, add the following:
extension MasterViewController: UISearchBarDelegate {
  func searchBar(_ searchBar: UISearchBar,
      selectedScopeButtonIndexDidChange selectedScope: Int) {
    let category = Candy.Category(rawValue:
      searchBar.scopeButtonTitles![selectedScope])
    filterContentForSearchText(searchBar.text!, category: category)
  }
}
You call this delegate method when the user switches the scope in the scope bar. When that happens, you want to redo the filtering. Thanks to RawRepresentable conformance, you create a new category instance that retrieves the specified raw value from the selected scope button title. So you call filterContentForSearchText(_:category:) with the new category.
Now, modify filterContentForSearchText(_:category:) to take the supplied category into account:
func filterContentForSearchText(_ searchText: String,
                                category: Candy.Category? = nil) {
  filteredCandies = candies.filter { (candy: Candy) -> Bool in
    let doesCategoryMatch = category == .all || candy.category == category

    if isSearchBarEmpty {
      return doesCategoryMatch
    } else {
      return doesCategoryMatch && candy.name.lowercased()
        .contains(searchText.lowercased())
    }
  }

  tableView.reloadData()
}
This now checks to see if the category of the candy matches the category that the scope bar passes, or whether the scope is set to .all. You then check to see if there is text in the search bar and filter the candy appropriately. Now, replace isFiltering with the following:
var isFiltering: Bool {
  let searchBarScopeIsFiltering =
    searchController.searchBar.selectedScopeButtonIndex != 0
  return searchController.isActive &&
    (!isSearchBarEmpty || searchBarScopeIsFiltering)
}
Here, you update isFiltering to return true when the user selects the scope bar.
You’re almost finished, but the scope filtering mechanism doesn’t quite work yet. You’ll need to modify updateSearchResults(for:) in the first class extension you created to send the current category:
func updateSearchResults(for searchController: UISearchController) {
  let searchBar = searchController.searchBar
  let category = Candy.Category(rawValue:
    searchBar.scopeButtonTitles![searchBar.selectedScopeButtonIndex])
  filterContentForSearchText(searchBar.text!, category: category)
}
The only problem left is that the user doesn’t actually see a scope bar yet! Within MasterViewController.swift in viewDidLoad(), add the following code just after the search controller setup:
searchController.searchBar.scopeButtonTitles = Candy.Category.allCases
  .map { $0.rawValue }
searchController.searchBar.delegate = self
Since Candy.Category conforms to CaseIterable, the compiler can automatically synthesize allCases for any RawRepresentable enumeration, adding the titles that match the categories you assigned to your candy objects.
Now, when you type, the selected scope button will appear in conjunction with the search text.