Unreal Engine 4 Animation Tutorial
In this Unreal Engine 4 animation tutorial, you will learn how to import and use animations. By Tommy Tran.
4.7 (23) · 2 Reviews
What is a Blend Space?
A Blend Space is a type of animation asset. It interpolates between different animations based on input values. In this tutorial, you will use the player’s speed as the input.
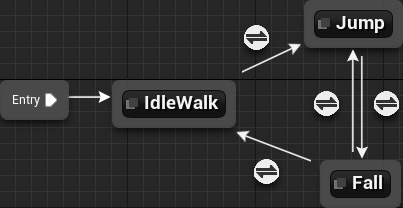
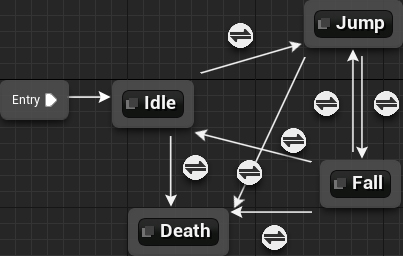
Blend Spaces can also help simplify your State Machines. Here’s what the Locomotion State Machine would look like if you didn’t use a Blend Space for the walk:

Using a Blend Space, all you have to do is replace the idle animation.
Now that you know of the magic of Blend Spaces, let’s create one.
Creating a Blend Space
Go to the Content Browser and click Add New. Select Animation\Blend Space 1D.
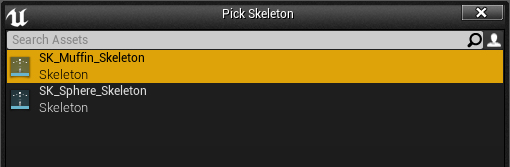
From the pop-up window, select SK_Muffin_Skeleton.
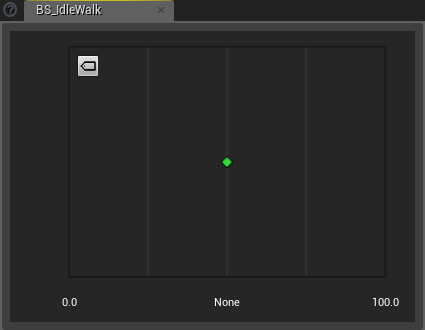
Rename the asset to BS_IdleWalk and then double-click on it to open it in the Animation editor.
When you open a Blend Space, you will see a panel at the bottom. This is the Blend Space editor and this is where you will add your animations.
Let’s add some animations to the Blend Space.
Adding Animations to a Blend Space
First, you will change the name of the axis value (the input). Go to the Asset Details panel and locate the Axis Settings section. Change the Horizontal Axis\Name property to Speed.
Now, you will add the animations. Go to the Asset Browser and drag-click the SK_Muffin_Idle animation. Move it to the left side of the Blend Space grid so that it snaps to the 0.0 value. Release left-click to add the animation.
Afterwards, add the SK_Muffin_Walk animation at the 100.0 value.

Now, the Blend Space will blend the idle and walk animations depending on the input value. If the input is 0, only the idle animation will play. If the input is 100, only the walk animation will play. Anything inbetween will be a blend.
You can change the values under the Axis Settings section in the Asset Details panel.
It’s time to use the Blend Space.
Using Blend Spaces
Close BS_IdleWalk and then open ABP_Muffin. Switch to the Locomotion State Machine and then open the Idle state.
First, delete the Play SK_Muffin_Idle node.
Next, add the BS_IdleWalk Blend Space using the drag and drop method. Afterwards, connect the BS_IdleWalk node to the Final Animation Pose node.
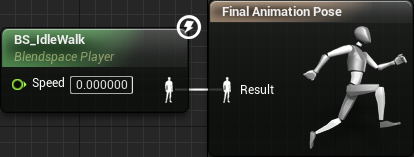
Now, BS_IdleWalk will automatically play because it is the default state. However, it will only show the idle animation. This is because its Speed input stays at 0.
To fix this, you need to supply it with the player’s speed.
Getting the Player’s Speed
Create a new float variable named Speed. Afterwards, switch to the Event Graph.
Add a new pin to the Sequence node and then add the highlighted nodes to it:
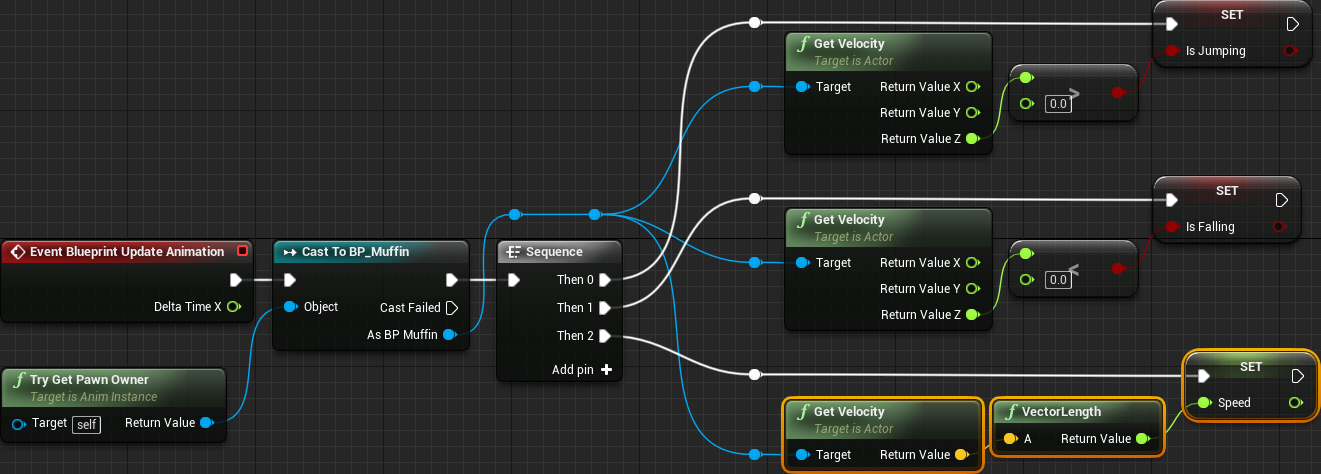
This setup will constantly set the Speed variable to the player’s speed.
Switch back to the Idle state’s graph. Connect the Speed variable to the Speed input of the BS_IdleWalk node.
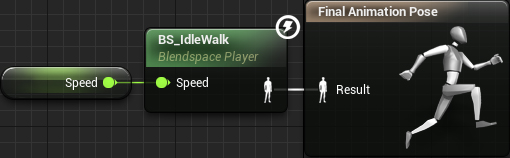
Now, BS_IdleWalk will be able to blend between the idle and walk animations.
Click Compile and then go back to the main editor. Press Play to test out the Blend Space.

There’s one more animation you still need to use: the death animation!
Using the Death Animation
In this game, you can only die while in the Idle state (on the ground). However, let’s imagine you could die from any state. Your first thought might be to create a Death state and connect every state to it. While this is an option, it can quickly lead to a messy graph.
A solution to this is to use a Blend Poses by bool node. This node can switch between two animations depending on the value of the input boolean.
Before you create one, you need a variable that holds the player’s death status.
Checking if the Player is Dead
Go back to ABP_Muffin and create a boolean variable named IsDead. Afterwards, switch to the Event Graph.
Add a new pin to the Sequence node and then add the highlighted nodes to it:
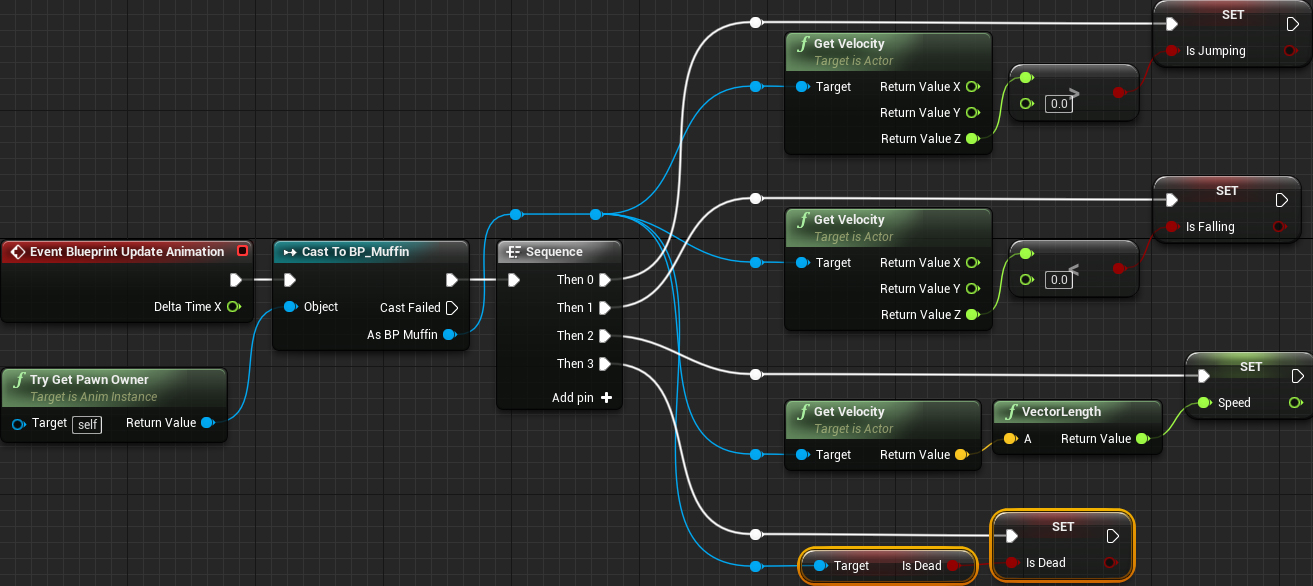
This will set the IsDead variable depending on the player’s death status.
Next, you will use the Blend Poses by bool node.
Using the Blend Poses by Bool Node
Switch to the Anim Graph and add the SK_Muffin_Death animation. With it selected, go to Details panel and uncheck the Loop Animation property.
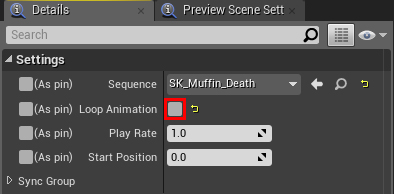
This will make sure the death animation only plays once.
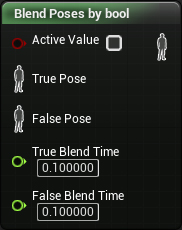
Next, create a Blend Poses by bool node.
With the Blend Poses by bool node selected, go to the Details panel. Under the Option section, check the Reset Child on Activation property.
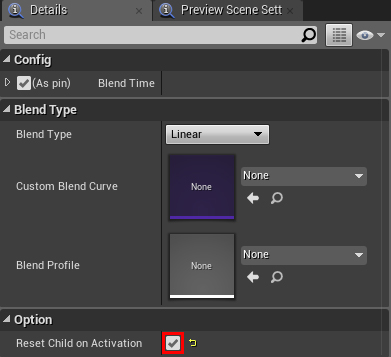
Since the death animation only plays once, this option will make sure the animation resets before playback.
Finally, add the IsDead variable and connect everything like so:
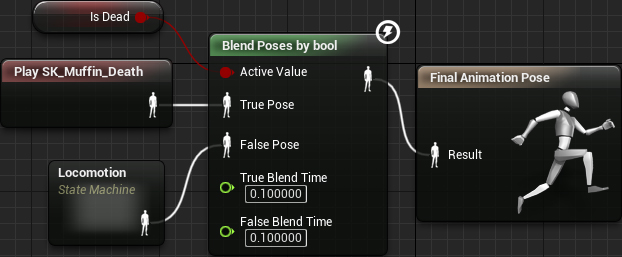
Now, if IsDead is true, the death animation will play. If IsDead is false, the current animation of the Locomotion State Machine will play.
Click Compile and then close ABP_Muffin. Press Play and test out the new death animation!
Where to Go From Here?
You can download the completed project here.
The game looks a lot more polished now, doesn’t it? Although you can do a lot with what you’ve learned so far, there’s still more! Check out the Skeletal Mesh Animation System page in the Unreal Engine documentation. Here, you can read about the other types of animation assets and how you can use them.
If you want to keep learning, check out the next post in the series, where I’ll show you how to add music and sound effects to your game.