Development Tutorial for iPhone X
In this iPhone X tutorial, you’ll learn how to update an existing app and create an app from scratch that is correctly designed for the new iPhone X. By Audrey Tam.
3x Screen Resolution
- Use PDF for flat vector artwork; provide @3x and @2x of rasterized artwork.
- An app doesn’t use 3x if it doesn’t have a LaunchScreen.storyboard.
Home Indicator Special Cases
- If your app uses the swipe-up-from-bottom gesture, turn on edge protect with
preferredScreenEdgesDeferringSystemGestures(): the user must swipe up twice to access the home indicator. - If your app includes passive viewing experiences, turn on auto-hiding with
prefersHomeIndicatorAutoHidden(): the home indicator fades out if the user hasn’t touched the screen for a few seconds, and reappears when the user touches the screen.
iPhone X Simulator vs Device
- Use the simulator to check portrait and landscape layout.
- Use an iPhone X device to test wide color imagery, Metal, front-facing camera.
Other Stuff
- Don’t reference Touch ID on iPhone X. Don’t reference Face ID on devices that support Touch ID.
- Don’t duplicate system-provided keyboard features like Emoji/Globe and Dictation buttons.
Updating an Existing App
What if you want to update an existing app for iPhone X? First, update its assets, including background images, to PDF or add @3x images. Then make sure it has a LaunchScreen.storyboard, and turn on Safe Area. Safe area layout guides change top, bottom and edge constraints, so check these, and fix them if necessary.
Check for any layout that depends on a 20-pt status bar or 44-pt tool bar, and modify it to allow for different heights. Or, if your app hides the status bar, consider unhiding it for iPhone X.
Next, set View as to iPhone X, and check every layout configuration. Move controls away from the edges, corners, sensor housing and home indicator.
Consider integrating search view controllers into the navigation bar.
Build and run the app on the iPhone X simulator, and check every layout configuration. In landscape, check that table view cell and section header content is inset, but the background extends to the edges.
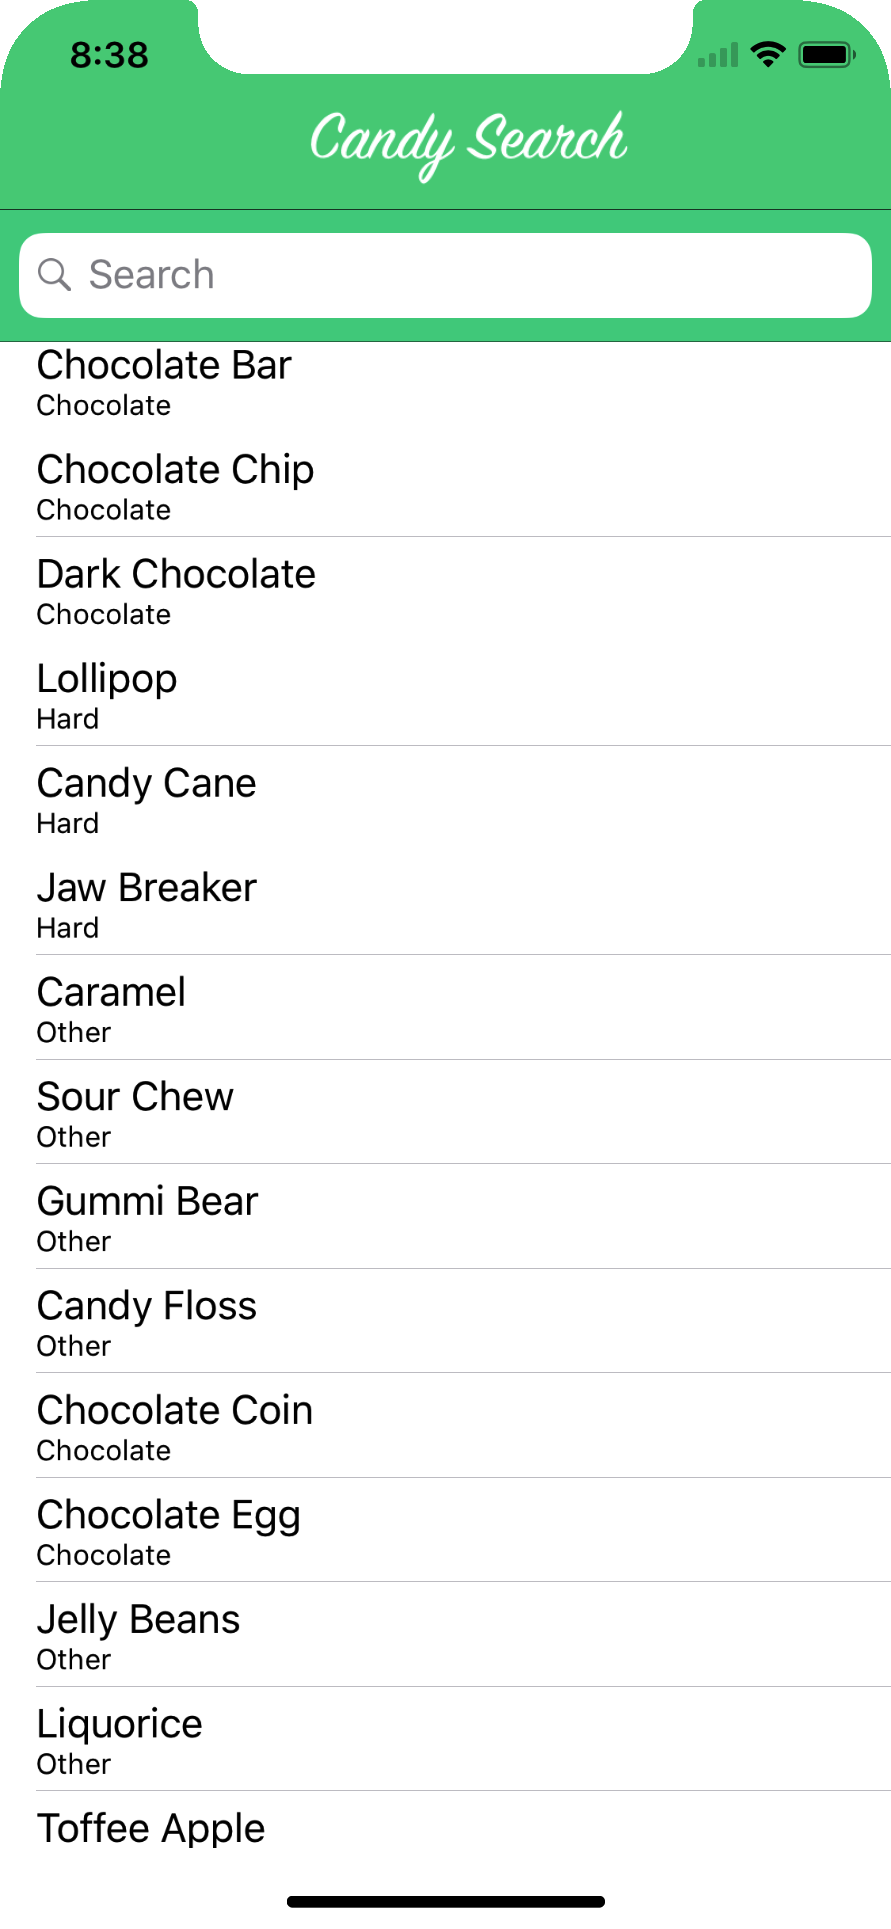
Here’s a simple example to work through. Download the (original) finished sample app from UISearchController Tutorial. This app was built with Xcode 9 beta, before Apple announced the iPhone X, so Tom Elliott couldn’t test it on the iPhone X simulator.
Build and run it on the iPhone X simulator. In portrait, it looks like NewCandySearch, plus the navigation bar has a candy-green background color and a fancy title image instead of a large title:
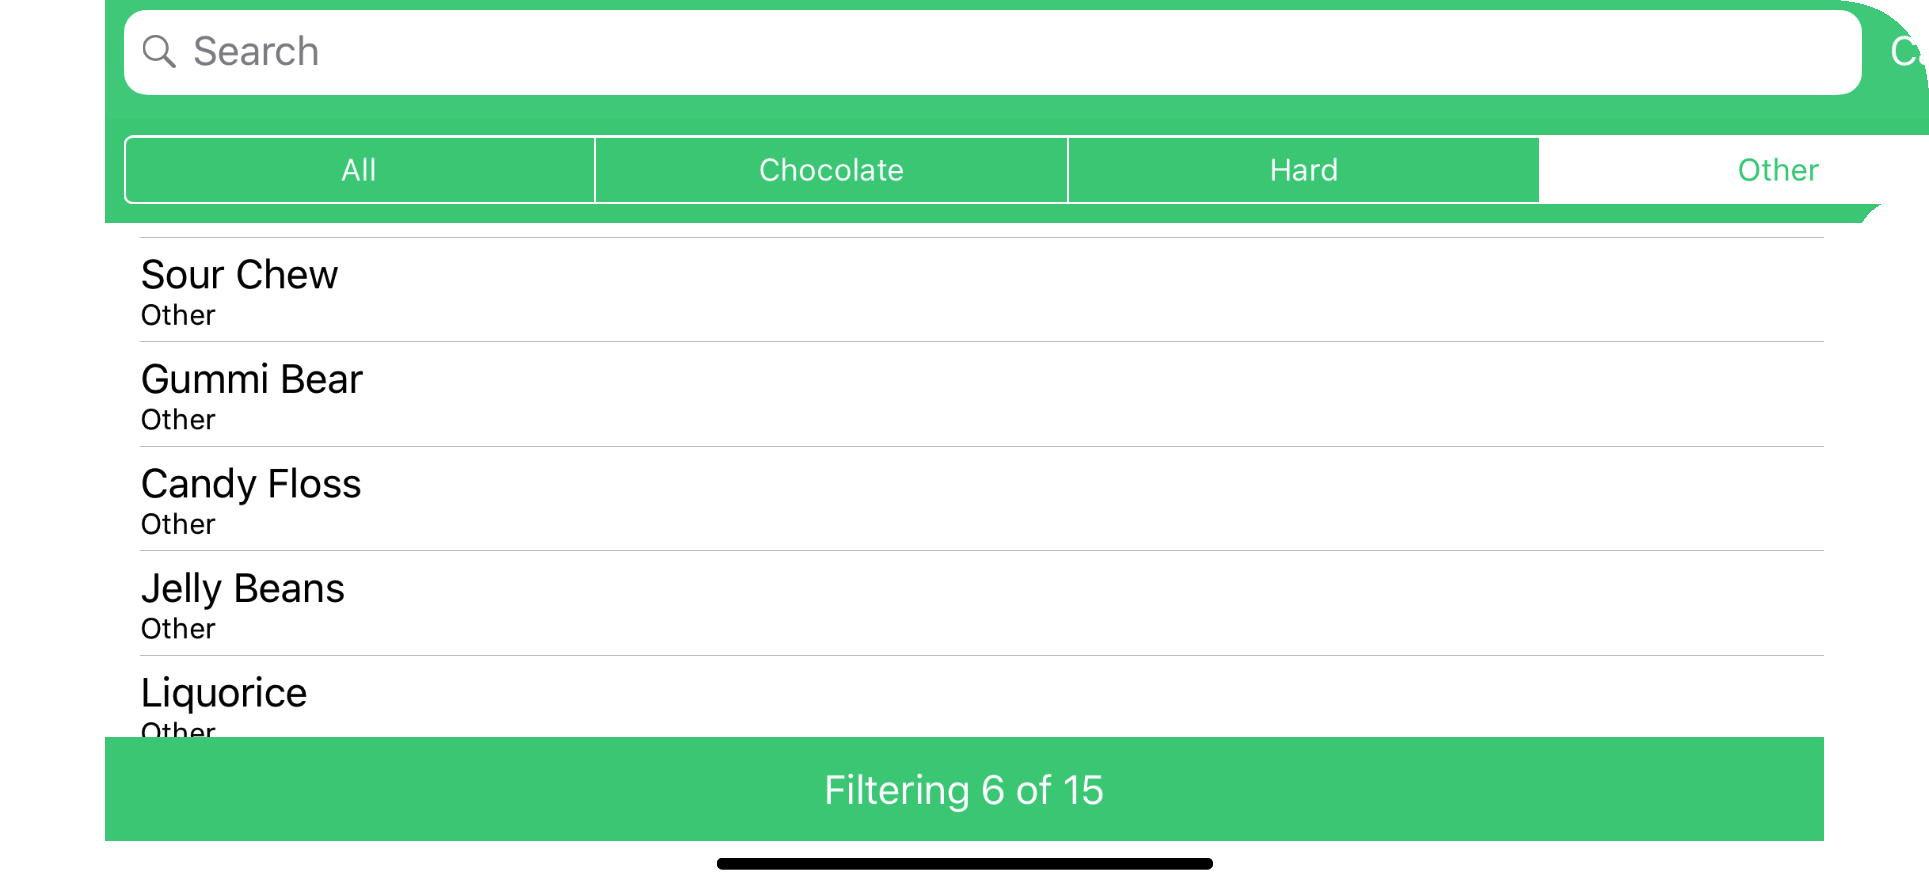
But there’s a line between the navigation bar and the search bar, because the search bar is in the table header view. It gets worse: tap in the search field to show the scope bar:

The search bar replaces the navigation bar, removing the background color from the status bar. The search bar is still candy-green, so it just doesn’t look right.
To see more problems, cancel the scope bar, then rotate to landscape:

The title image is slightly clipped, and the sensor housing cuts a bit off the lower left corner of the search bar. But the table view isn’t customized, so its cell contents are well clear of the sensor housing.
Again, tap in the search field to show the scope bar:

Now the rounded corners clip the search bar.
Turning on Safe Area
Open Main.storyboard, select one of the view controllers, and show the File Inspector:

This app doesn’t use safe area layout guides! So check that checkbox, then check the constraints now refer to Safe Area:

Build and run, and see how it looks in landscape, with the scope bar:
It’s even worse! The table header view extends far beyond its superview, although the table footer view is fine. This is possibly another iOS 11 bug, which might be fixed by the time you read this tutorial.
Even if Safe Area prevented the corner clipping, it’s not a good look for the status bar to lose its background color when the search bar replaces the navigation bar. You can fix that by moving the search bar into the navigation bar, so that’s what you’ll do next.
Integrating the Search Bar
Well, this is easy — just copy the NewCandySearch code that sets the navigation bar’s searchController into CandySearch. Open MasterViewController.swift in both projects, and copy these lines from NewCandySearch:
// replace tableHeaderView assignment with this
if #available(iOS 11.0, *) {
  self.navigationItem.searchController = searchController
  // Search bar is always visible
  self.navigationItem.hidesSearchBarWhenScrolling = false
} else {
  tableView.tableHeaderView = searchController.searchBar
}
In MasterViewController.swift of CandySearch, paste these lines in viewDidLoad(), and comment out this line:
tableView.tableHeaderView = searchController.searchBar
Now open AppDelegate.swift, and find these lines:
UISearchBar.appearance().barTintColor = .candyGreen
UISearchBar.appearance().tintColor = .white
UITextField.appearance(whenContainedInInstancesOf: [UISearchBar.self]).tintColor = .candyGreen
Delete or comment out the first line: the search bar will get its tint color from the navigation bar.
Build and run, and tap in the search field to show the scope bar:

So that’s fixed the status bar background color, but now the text field is also green, making it hard to see the search field prompt text and icon. The insertion bar is also green, but you can fix that — change the third appearance setting in AppDelegate.swift to:
UITextField.appearance(whenContainedInInstancesOf: [UISearchBar.self]).tintColor = .white
Below this, add the following line:
UITextField.appearance(whenContainedInInstancesOf: [UISearchBar.self]).backgroundColor = .white
This should make the text field background white but, at the time of writing this tutorial, it doesn’t work, which suggests another iOS 11 bug. As an interim fix, you could change the color of the search field prompt text and icons. For example, to make the prompt text white, add the following code to AppDelegate.swift in application(_:didFinishLaunchingWithOptions:):
let placeholderAttributes: [NSAttributedStringKey : Any] = [NSAttributedStringKey(rawValue: NSAttributedStringKey.foregroundColor.rawValue): UIColor.white, NSAttributedStringKey(rawValue: NSAttributedStringKey.font.rawValue): UIFont.systemFont(ofSize: UIFont.systemFontSize)]
let attributedPlaceholder: NSAttributedString = NSAttributedString(string: "Search", attributes: placeholderAttributes)
UITextField.appearance(whenContainedInInstancesOf: [UISearchBar.self]).attributedPlaceholder = attributedPlaceholder
To make the search icon and clear button white, add the following code to viewDidLoad() in MasterViewController.swift:
let textField = searchController.searchBar.value(forKey: "searchField") as! UITextField
let glassIconView = textField.leftView as! UIImageView
glassIconView.image = glassIconView.image?.withRenderingMode(.alwaysTemplate)
glassIconView.tintColor = .white
let clearButton = textField.value(forKey: "clearButton") as! UIButton
clearButton.setImage(clearButton.imageView?.image?.withRenderingMode(.alwaysTemplate), for: .normal)
clearButton.tintColor = .white
Again, this doesn’t work at the time of writing this tutorial, but it might be fixed by the time you read this.
