Social Network Integration on Android
Learn how to let your users authenticate into your app using Facebook and Twitter, and see how to make posts to both social networks. By Aaqib Hussain.
User Profile from the Graph API
You’ll now create a Kotlin object, whose sole purpose will be to contain the helper methods to connect to the Graph API.
Create an object called Helper in a new package com.raywenderlich.sharetastic.util.
Once created, write the method getFacebookUserProfileWithGraphApi() inside of it:
object Helper {

  fun getFacebookUserProfileWithGraphApi(context: Context) {

    if (AccessToken.getCurrentAccessToken() != null){
      val activity = context as Activity
      val request = GraphRequest.newMeRequest(
          AccessToken.getCurrentAccessToken()
      ) { jsonObject, _ ->
        val email = jsonObject?.get("email")?.toString() ?: ""
        val name = jsonObject.get("name").toString()
        val profileObjectImage = jsonObject?.getJSONObject("picture")?.getJSONObject("data")?.get("url").toString()

      }

      val parameters = Bundle()
      parameters.putString("fields", "id,name,link,picture.type(large), email")
      request.parameters = parameters
      request.executeAsync()
    }
  }
}
This method uses a call to GraphRequest.newMeRequest() to fetch the userid, name, picture and email of the user who is currently logged in.
To keep things clean, create a package com.raywenderlich.sharetastic.model and create a class in the package called UserModel to contain the user’s data after the Graph API returns the results.
Your UserModel class would look something like this:
class UserModel(val name: String, val userName: String, val profilePictureUrl: String, val socialNetwork: SocialNetwork) : Serializable

enum class SocialNetwork {
    Facebook, Twitter
}
I have created the enum class SocialNetwork in the same class; you could create a separate file for that if you wish. The enum class is only for identifying which social network account the user is currently logged in with.
Head back to Helper where you’ll now write the method that will help in sending the user to the Share screen.
fun startShareActivity(context: Context, user: UserModel) {
  val activity = context as Activity
  val intent = Intent(context, ShareActivity::class.java)
  intent.putExtra("user", user)
  activity.startActivity(intent)
  activity.finish()
}
This code takes the passed-in UserModel and sends it to the ShareActivity.
Go back to the method getFacebookUserProfileWithGraphApi() and after the line:
val profileObjectImage = jsonObject?.getJSONObject("picture")?.getJSONObject("data")?.get("url").toString() ?: ""
add the following:
val user = UserModel(name, email, profileObjectImage, SocialNetwork.Facebook)
startShareActivity(context, user)
These lines convert the user’s info to a UserModel and pass it into the method startShareActivity().
After completing that, go back to MainActivity. In the onSuccess inside of facebookSetup(), write:
Helper.getFacebookUserProfileWithGraphApi(context)
The user should only be sent to the Share screen when the user has a valid AccessToken, and this can happen only in the onSuccess block of code.
Additionally, you need to set up a few things in the ShareActivity.
Create a UserModel property in the class:
lateinit var user: UserModel
And inside onCreate(), add:
user = intent.extras.get("user") as UserModel
setData(user)
This piece of code is getting the passed in UserModel from the Intent method and passing the data to a new method setData().
The setData() method simply sets up the data in the UI, and includes conditionals that take slightly different actions depending on whether the logged in network is Facebook or Twitter.
fun setData(user: UserModel) {
  nameTextView.text = user.name
  userNameTextView.text =
      if (user.socialNetwork == SocialNetwork.Twitter)  "@${user.userName}"
      else user.userName
  connectedWithTextView.text =
      if (user.socialNetwork == SocialNetwork.Twitter) "${connectedWithTextView.text} Twitter"
      else "${connectedWithTextView.text} Facebook"
  characterLimitTextView.visibility =
      if (user.socialNetwork == SocialNetwork.Twitter) View.VISIBLE
      else View.GONE
  postButton.text =
      if (user.socialNetwork == SocialNetwork.Twitter) "POST"
      else "CREATE POST"
  Picasso.with(this).load(user.profilePictureUrl).placeholder(R.drawable.ic_user).into(profileImageView)
  postEditText.visibility = View.GONE
}
Now, run your app then tap on Continue with Facebook. You’ll be asked to give your app the permission to access the information. After this step, you’ll be redirected to the following screen:

You’ve successfully logged in!
Sharing on Facebook
It’s time to move on to posting a status to Facebook. For this, you need to change a few things.
Facebook recently changed its documentation and has removed the permission that was once required for the using the Graph API to share something on a user’s timeline. The alternative for that is now using the Facebook Share SDK.
Open the app build.gradle file, and add the following dependency in it:
implementation 'com.facebook.android:facebook-share:[4,5)'
Additionally, in your AndroiManifest.xml add the following line within the application tag:
<provider android:authorities="com.facebook.app.FacebookContentProvider{@string/facebook_app_id}"
  android:name="com.facebook.FacebookContentProvider"
  android:exported="true"/>
Now, open the ShareActivity class and write the method for posting status to Facebook:
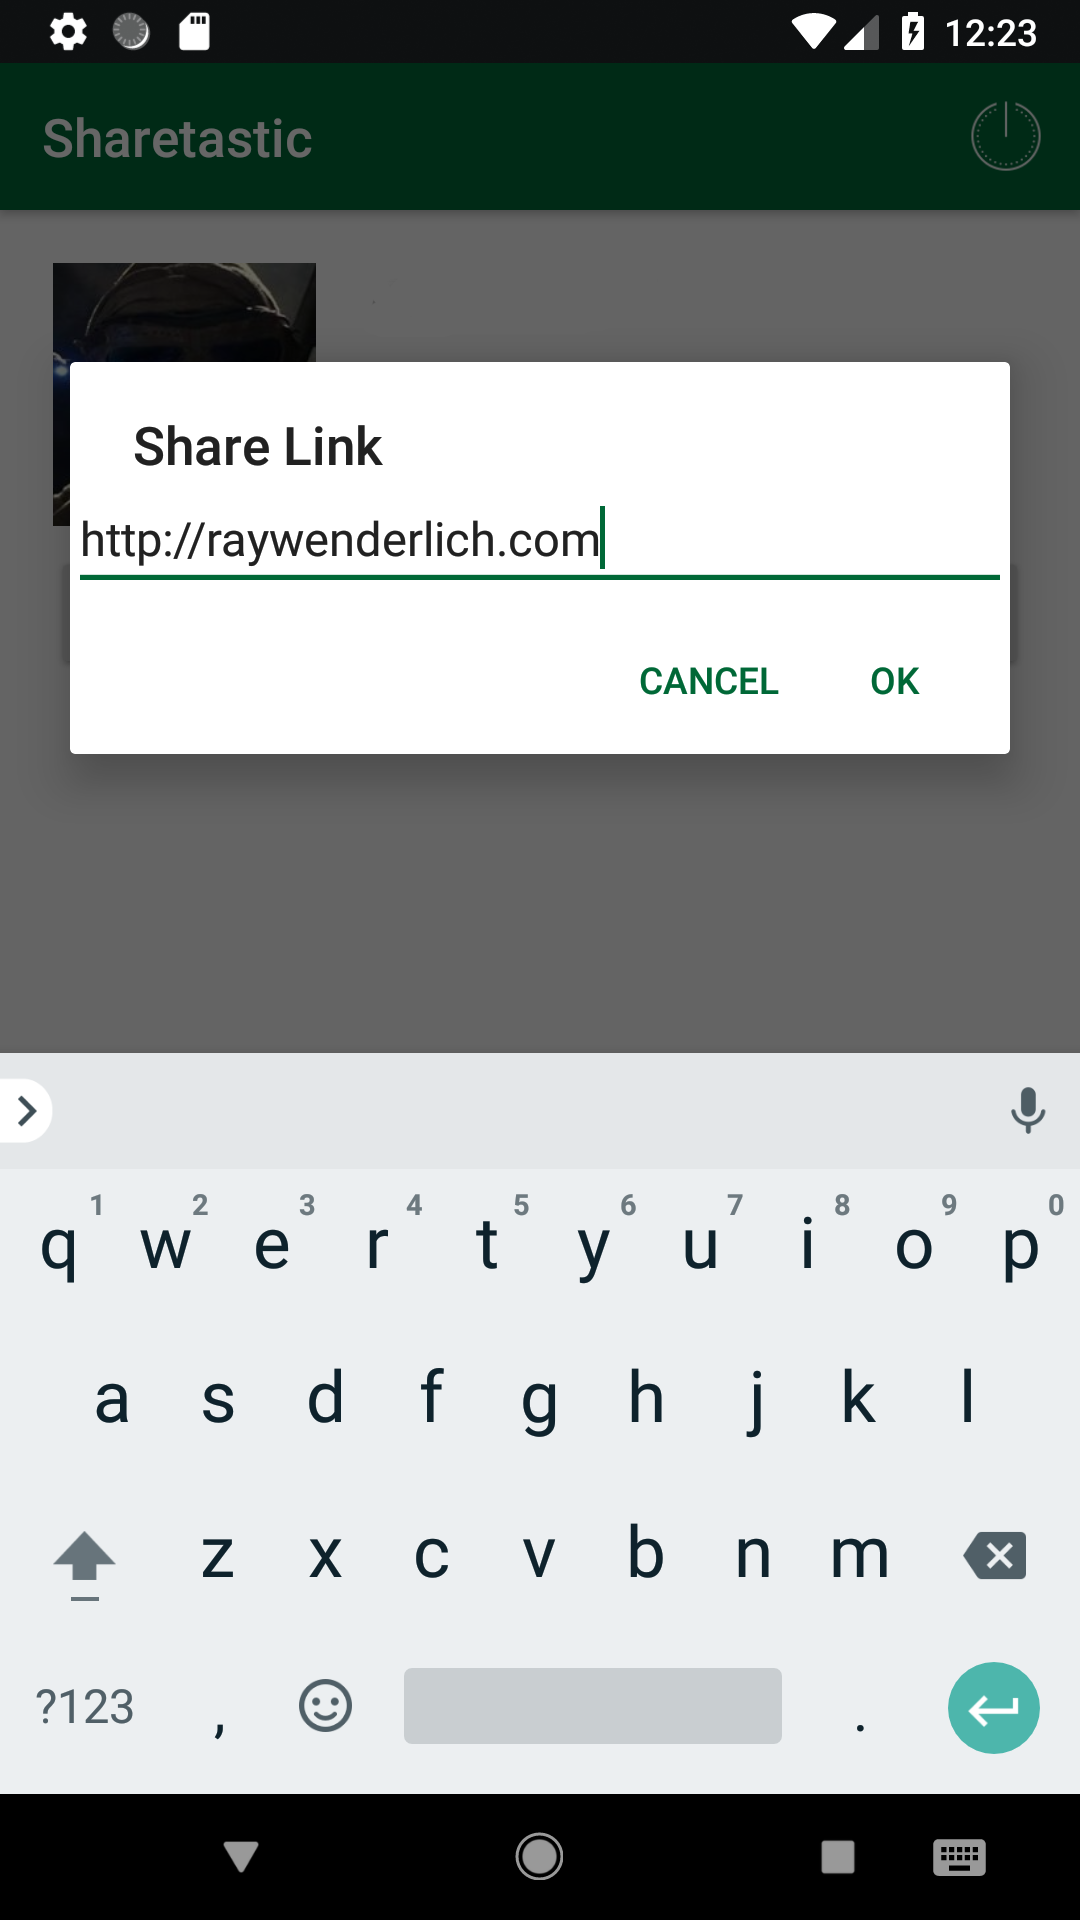
fun postStatusToFacebook() {
  val builder = AlertDialog.Builder(this)
  builder.setTitle("Share Link")

  val input = EditText(this@ShareActivity)
  val lp = LinearLayout.LayoutParams(
      LinearLayout.LayoutParams.MATCH_PARENT,
      LinearLayout.LayoutParams.MATCH_PARENT)
  input.layoutParams = lp
  builder.setView(input)

  builder.setPositiveButton(android.R.string.ok) { dialog, p1 ->
    val link = input.text
    var isValid = true
    if (link.isBlank()) {
      isValid = false
    }

    if (isValid) {
      val content = ShareLinkContent.Builder()
          .setContentUrl(Uri.parse(link.toString()))
          .build()
      ShareDialog.show(this, content)
    }

    dialog.dismiss()
  }

  builder.setNegativeButton(android.R.string.cancel) { dialog, p1 ->
    dialog.cancel()
  }

  builder.show()
}
This code will present an alert dialog to allow the user to enter a link to share, and then show the user the Facebook share dialog. We’re not doing any validation on the link other than to check that it’s not blank; you’d want to do some validation to make sure it’s a valid URL.
In later versions of the Facebook Share SDK, including the one you’re using in Sharetastic, you must provide some type of content to share. Your options are links, photos, videos, and other multimedia. See the Facebook Share SDK documentation for more details.
Next, in the postButtonAction() method, inside the setOnClickListener, add a call to the new function:
postStatusToFacebook()
Build and run the app again. You’ll need to tap logout on the Facebook button and re-connect. In a production app, you’ll want to saved the logged in state of the user so that they don’t have to log in again.
Click on CREATE POST. Now, try posting something to Facebook:

After pressing POST, go and check the Facebook app.

Hurray! Your status is posted to Facebook.

Logging Out of Facebook
Logging out is simply a one-line code, but, for logging out, you need to perform two additional tasks. You’ll now write a method in your ShareActivity that’ll do these tasks:
fun sendToMainActivity() {
  LoginManager.getInstance().logOut()
  finish()
  val intent = Intent(this, MainActivity::class.java)
  startActivity(intent)
}
Going over the above: the first line of code allows a user to log out of Facebook. The rest of the lines finish the current activity and take a user to MainActivity. Finally, call this method inside the onOptionsItemSelected like this:
R.id.action_logout -> {
  sendToMainActivity()
  return true
}
Once you tap the Logout button on top-right of the Share screen, you’ll be logged out from the app and taken to the Home screen.
Now, let’s connect the app with Twitter.