SwiftUI Testing With ViewInspector for iOS
Learn how to use the ViewInspector framework to write UI tests for SwiftUI apps. By Warren Burton.
Adding Tests for Changes
To ensure consistency in your app, you want to make sure those cells always look like that — time to add some tests to do this.
In the project navigator, return to the folder StepByStepTests and open StepByStepTests.swift. You’ll add test code for the test cases:
- The cell should show a default name when the recipe name is empty.
- The cell should show a default description when the recipe description is empty.
Add this test function to StepByStepTests:
func testRecipeDefaultText() throws {
  // 1
  let controller = RecipeController.previewController()
  let recipe = controller.createRecipe()
  let view = RecipeLineView(recipe: recipe)

  // 2
  let inspectedName = try view
    .inspect()
    .find(text: AppStrings.defaultTitle)
    .string()
  XCTAssertEqual(AppStrings.defaultTitle, inspectedName)
  let inspectedDescription = try view
    .inspect()
    .find(text: AppStrings.defaultDescription)
    .string()
  XCTAssertEqual(AppStrings.defaultDescription, inspectedDescription)
}
In this test, you:
- Create an empty recipe.
- Verify the placeholder text matches the expected values in the UI.
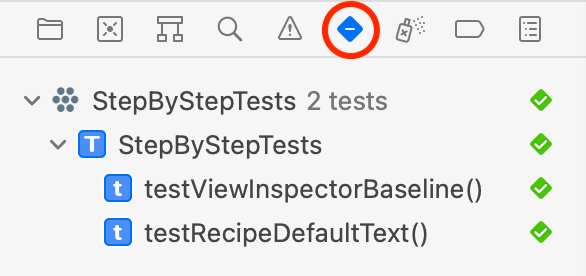
Click the test result icon in the source file to run all the tests in StepByStepTests:
![]()
Oh no! Your test fails with the error “Search did not find a match. Possible blockers: RecipeLineView”:
![]()
The expression “There’s no such thing as thing as a free lunch” applies when using ViewInspector. You’ll encounter two requirements when using this framework. The first is that your views and all their children conform to the Inspectable protocol — this is very easy to fix and is only needed in your test target. The other requirement, you’ll meet later in this tutorial.
Conform Your View to Inspectable
To add conformance to Inspectable, select the folder StepByStepTests in the project navigator and create a new Swift file called Inspectable+Model.swift.
Check that Inspectable+Model.swift was added to the target StepByStepTests in the file inspector:

Add the following code to the file:
import ViewInspector
@testable import StepByStep

extension RecipeLineView: Inspectable {}
Here, you conform RecipeLineView to Inspectable. As Inspectable requires nothing from its conforming object, you’re ready to go. Build and test. Open the test navigator, and you’ll be all green again.
You’ve tested that the placeholder text in the cell is correct. As an exercise, you could test that when you set name and longDescription on a Recipe, you can see those values in the UI.
Next, you’ll test the style of the name field. In the project navigator, open StepByStepTests.swift, and add this next test to StepByStepTests:
func testRecipeNameStyle() throws {
  let controller = RecipeController.previewController()
  let recipe = controller.createRecipe()
  let view = RecipeLineView(recipe: recipe)
  let inspectedName = try view.inspect().find(text: AppStrings.defaultTitle)
  // 1
  let fontStyle = try inspectedName.attributes().font().style()
  XCTAssertEqual(fontStyle, .title2)
  // 2
  let fontWeight = try inspectedName.attributes().fontWeight()
  XCTAssertEqual(fontWeight, .medium)
}
This test checks these two cases:
- The name field should use
title2font. - The name field should use
mediumfont weight.
find is the function you’ll use most often in ViewInspector. It has many variants that you can use. This version locates the first instance of the string AppStrings.defaultTitle.
Build and test, and you’ll see you now have three successful tests. Well done! You’ve learned how to test the string value and attributes of a view.

These tests may seem redundant, but consider a larger app with many views. You could create these test cases from a design document to prevent the inevitable cosmetic mistakes that happen during refactors.
In the next section, you’ll learn how to test with environment objects.
Working With Runtime Properties
Previously, you learned that using this framework has two requirements. The first requirement was to conform your views to Inspectable to work with ViewInspector. In this section, you’ll find out about the second requirement.
To test views that use @State, @EnvironmentObject and @Environment, you first need to add a small piece of code to the app target.
In the project navigator, select the folder StepByStep ▸ Help. Add a new Swift file named Inspection.swift.
Add this code to the file:
import Combine
import SwiftUI

internal final class Inspection<V> {
  let notice = PassthroughSubject<UInt, Never>()
  var callbacks: [UInt: (V) -> Void] = [:]

  func visit(_ view: V, _ line: UInt) {
    if let callback = callbacks.removeValue(forKey: line) {
      callback(view)
    }
  }
}
Here, you create an object that allows ViewInspector to trigger changes in your view at any point — such as on didAppear or one second after the view appears when an animation has finished.
How this works will become clearer when you write a test. Next, you need to add an Inspection instance to the view you want to test.
In the project navigator, open RecipeListView.swift, and below the line:
@EnvironmentObject var recipeController: RecipeController
Add this line:
internal let inspection = Inspection<Self>()
Finally, add this closure at the top level of body at the comment // add onReceive here:
.onReceive(inspection.notice) { self.inspection.visit(self, $0) }
Here, you tell onReceive to run the visit function of your Inspection property whenever someone publishes data to the notice publisher. When you’re running your UI tests, ViewInspector will use this publisher to trigger the lifecycle of the view.
You’re almost done!
In the project navigator, open Inspectable+Model.swift. Then, add this protocol conformance for Inspection:
extension Inspection: InspectionEmissary {}
This conformance connects the InspectionEmissary available in the test target to the Inspection. Your views can expect a visit from the friendly emissary of ViewInspectorVille soon! :]
Writing an Asynchronous Test
You’re now ready to write a test for RecipeListView. Your first test will check that when you tap Add Recipe, a Recipe is added to the database.
Still inside Inspectable+Model.swift, add this declaration for RecipeListView:
extension RecipeListView: Inspectable {}
Next, in the project navigator, open StepByStepTests.swift and add this test function:
func testAddRecipeAddsRecipe() throws {
  let controller = RecipeController.previewController()
  let view = RecipeListView()
  // 1
  let expectation = view.inspection.inspect { view in
    XCTAssertEqual(controller.recipes.count, 0)
    try view.find(button: "Add Recipe").tap()
    XCTAssertEqual(controller.recipes.count, 1)
  }
  // 2
  ViewHosting.host(view: view.environmentObject(controller))
  // 3
  self.wait(for: [expectation], timeout: 1.0)
}
In this test, you:
- Make an
XCTestExpectationthat you’ll be able to touch “Add Recipe”, after whichRecipeControllershould have oneRecipe. - ViewInspector supplies
ViewHosting.ViewHostingprovides aUIWindowand aUIHostingControllerfor your view to live in while testing. - Wait for all the asynchronous flow to complete and the
XCTestExpectationto be fulfilled. ViewInspector callsfulfill()on the expectation as part of the inspection process, so you don’t need to do that.
Build and test to see another green check in your test navigator:
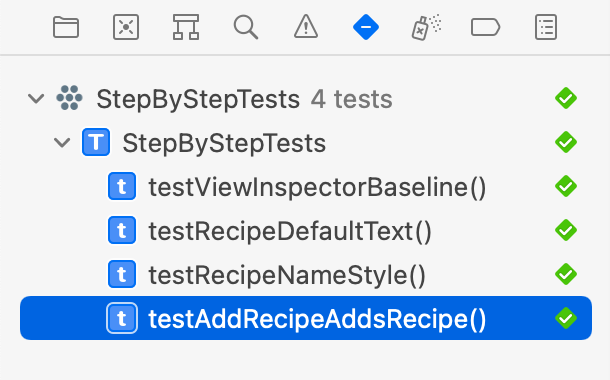
Part of the pleasure of writing tests is seeing the list of working tests grow and knowing that your app features will work in the future. Your effort now will save you a lot of time in the future.
You’ve learned enough to make simple tests of attributes and press a button, but there’s a lot more you can do. First, it’s time for some theory, though. :]