How to Make an Interactive eBook Without Any Code
This is a post by Tutorial Team Member Greg Pugh, author of the Colin Turtle children’s eBook app series. You can also find him on Google+. When people hear that I have written two children’s book apps, a common response I get is “I have an idea for a children’s book, could you help me […] By .
Sign up/Sign in
With a free Kodeco account you can download source code, track your progress, bookmark, personalise your learner profile and more!
Create accountAlready a member of Kodeco? Sign in
Sign up/Sign in
With a free Kodeco account you can download source code, track your progress, bookmark, personalise your learner profile and more!
Create accountAlready a member of Kodeco? Sign in
Contents
How to Make an Interactive eBook Without Any Code
35 mins
- Getting Started
- Introducing Kwik 2
- Preparing the Project
- The Hills are Alive, with the Sound of… Audio Files :]
- Setting up ‘Shop
- Creating the eBook
- Physics in Action
- Read to Me!
- Adding Page Navigation
- The Third Time’s a Charm
- Lights, Camera, Action!
- He Talks as Much as my Wife!
- Finishing Touches
- Where To Go From Here?
Physics in Action
Switch back to Photoshop. Open ball.png, ramp.png and square.png and then paste them one-by-one into page2.psd. Rename the layers “ball”, “ramp” and “square” respectively.
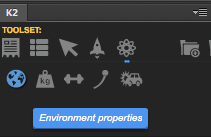
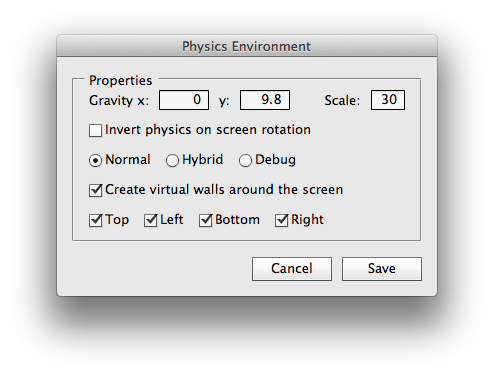
In the Kwik panel, go to the Physics tab, then to “Environment Properties”. Keep the default settings as-is, except check “Create virtual walls”, then save.
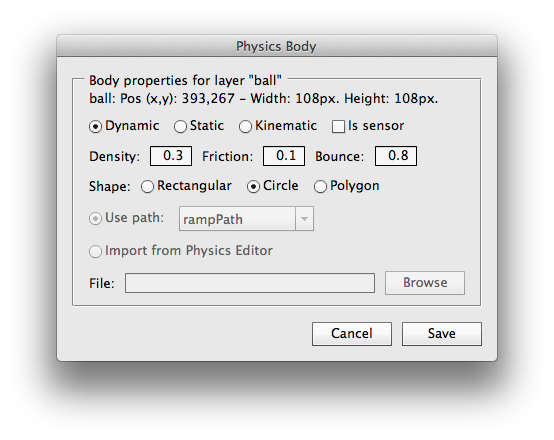
With the ball layer selected, click “Set Body Properties”. Set the ball as Dynamic, Density 0.3, Friction 0.1, Bounce 0.8 and Circle Shape then save.
Click “Publish”, and switch back to the CoronoaSDK simulator. Click “Read Myself” and watch your ball bounce around on the page.
Holy cow — you’ve just added a complex physics system to our book and you STILL haven’t written a single line of code! That’s pretty cool!
However, the square is stuck floating in mid-air, you can’t move the ball and it doesn’t interact with the ramp. Hmm, that’s not too interactive, is it? Time to fix that! :]
Back in Photoshop, select the square layer and set body properties the same way you did for the ball. You can experiment with different density, friction and bounce numbers, but for now use Density 0.5, Friction 0.3, and Bounce 0.9. Also set it to Dynamic and Rectangular.
Before you hit “Publish” and test out your newly added physics, add something a bit more complex to the ramp layer. If you don’t already have your Paths panel open, go to Window > Paths. Start a new path and use the Pen Tool to make three points around the ramp to trace the triangular shape. When you’ve connected the points together, rename the path layer “rampPath”.
Now select the “ramp” layer and open your “Set Body Properties” window from the Kwik panel again. This time set it as Static, Density 1.0, Friction 0.3, Bounce 0.2, Polygon Shape, and Use Path: rampPath.
Save your PSD file and click Publish in the Kwik panel. Now when you go to page 2 of your book, you’ll see the ball and square both bounce off each other, as well as bouncing off the ramp!
Watching objects bounce off each other is fun, but it’d be a lot more fun for the user if they got to move those objects around!
Switch back to Photoshop and select the ball layer again. In the Kwik panel, go to Interactions > Drag Object. Name it “ballBtn” and click Create.
In the Kwik panel, navigate to Physics > Set force properties. Set the Impulse for Auto, Curved trajectory and 2.75 X and Y Force.
Now repeat these two steps for the square. Select the square layer, select Interactions > Drag object, name it “squareBtn”, and click Create. Then navigate to Physics > Set Force Properties and apply the same force properties for the square layer as well.
Now Publish your project, and check out page 2! You’re now able to drag and drop both the ball and square around the screen, and they’ll bounce off the ramp — STILL without a single line of code!
Read to Me!
Okay, adding physics and interactions is a nice feature to have in your interactive eBook, but you’re missing a key component of any book…words!
Switch back to page2.psd in Photoshop, select the text tool, and type the sentences “Here is an example of physics that can be utilized. Drag and drop the ball and square.” Highlight all of the text and change the color to white, change the font to Arial and rename the text layer to “text”.
So your book now has words in it, but this is an interactive eBook — you can make it a bit more exciting than that! In the Kwik panel, go to Project and Pages > Add Audio. Browse for “page2.wav” in the “sound” folder of your project, set it as the Read Me file, disable Play when page starts, Loop 1 time and use channel 1.
Now select the “text” layer. In the Kwik panel, go to Layers and Replacements > Sync audio with text replacement. Use native system font, 10 pixel padding, Use page Read Me audio, click “Import from Audacity” and select page2.txt, and change the text highlighting color to black.
So now your book has the capability of reading the story to the reader — but you need to tell it when that should happen!
In Photoshop, open “readMe.png” from the images folder, paste it into page1.psd and rename the layer readMe. Follow the same steps that you did for the readSelf button (Interactions > Add Button), except this time leave the Enable Read to Me box checked – use “readMeBtn” for the name.
Publish and have a look at your eBook! Now, when you click the “Read to Me” button, the narration you recorded way back at the beginning of this tutorial will play, and the text will highlight accordingly. You can click the speaker icon to hear the narration play again.
Not bad for just a few mouse clicks, eh? :]
Adding Page Navigation
Now you need to need to create a way to get to page 3 from page 2. In Photoshop, open “arrow.png” from the images folder and paste it into page2.psd. Rename the layer “kwkBack”, duplicate the layer, rename the duplicated layer “kwkNext”, and using the free transform tool (command-T), make the duplicated arrow layer point to the right.
If you have trouble getting the transform to apply to the right layer, you could transform the arrow, then copy and paste it in as a right-pointing arrow rather than transforming in place.
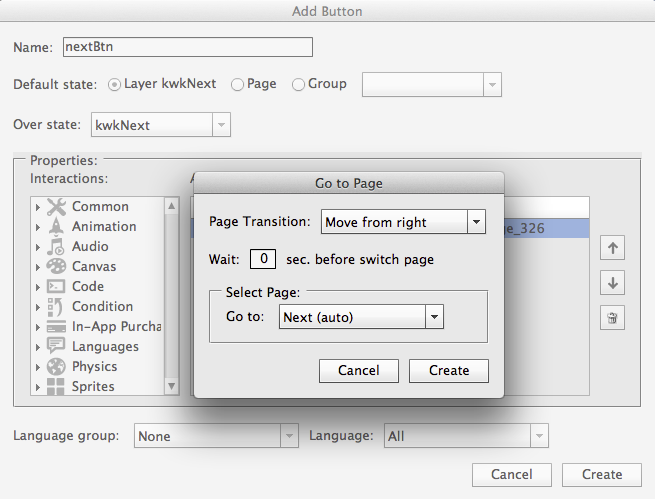
The reason you’ve named the layers using “kwk” is because they’re shared elements that will be used on multiple pages. This will reduce the file size when the book is published. Now with the “kwkBack” layer selected, in the Kwik panel go to Interactions > Add Button. Name it “backBtn”, choose “Go to Page” in the “Common” drop down menu, choose Move from left, 0 seconds, and Previous (auto).
Do the same steps with the “kwkNext” layer highlighted except name it “nextBtn” and choose Move from right and Next (auto).
Publish and test your project! Now when you’re on page 2, you’ll be able to navigate back to page 1. However, you won’t be able to go to page 3 because you haven’t created it yet!


