Android Studio Tips and Tricks
Master some hidden gems of Android Studio and improve your overall development efficiency with these Android Development tips and tricks. By Nishant Srivastava.
Mastering the Android Studio UI
Customizing the user interface of the tools you use helps you work more quickly and efficiently. The same applies to Android Studio. You can improve your experience by tweaking some features and using others in a smart way.
Grouping Your Projects
You can organize projects from the launch window in Android Studio. You can group individual projects to help keep the never-ending list of projects, tidy! This makes finding a specific Android project a lot easier.
Right click anywhere in the list of projects, and choose New Group giving it some name. Then right click on any project, and select Move to group and then select the newly created group. You can see an example of this below:
Avoid Jumping to Design Tab
Working with Design view for layout files isn’t for everyone. Many developers still prefer using the XML layout editor.
However, by default, Android Studio will always open in Design view. To set it to always open in XML view, you need to set your preference in Android Studio as shown below:
Using Better Fonts
Being able to write code effortlessly should be one of the top goals of any developer. Being able to read your code easily will help you reach that goal. So it’s best to pick a font in Android Studio that’s easy to read and whose size doesn’t force you to strain your eyes.
One such font is FiraCode, which has ligature support and is made with programmers and developers in mind.
To get it up and running, download the font and install it in your operating system. Once installed, restart Android Studio and navigate to Preferences ▸ Editor ▸ Font, then choose FiraCode.
Your eyes will thank you. :]

Now that you’ve set Android Studio up to be easy to use, find out how you can customize its functionality to work just the way you want it!
Plugins: Power-Ups for Android Studio
The Android Studio IDE is a complete package that includes everything a developer needs for Android Development.
For anything that the IDE doesn’t support out of the box, Android Studio fills the gap by giving you the ability to extend its powers via plugins.
Using plugins is like adding superpowers to the IDE. They enable interesting functionalities inside the IDE beyond what you’ll find in Android Studio’s base install.

To install plugins in Android Studio, navigate to Preferences ▸ Plugins and then search for plugins in the Marketplace.
Helpful Plugins for Android Studio
Here are a few interesting plugins you might want to try:
This plugin enables a small minimap view on the right side of your editor, which makes lets you scroll through your code very easily. This is especially useful if you have large class files and you want to be able to scroll to a section of code quickly.

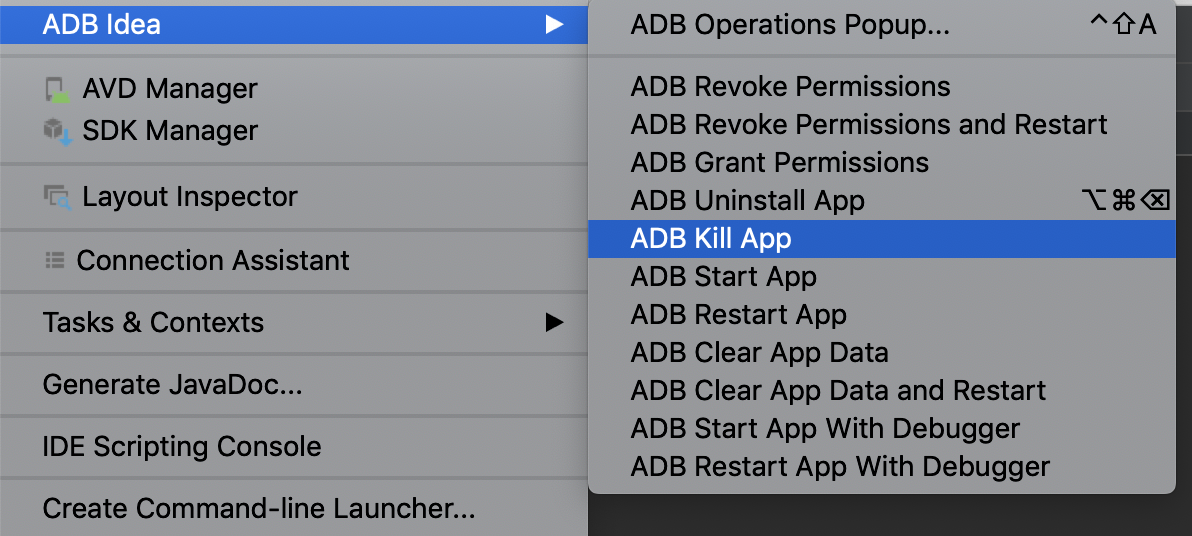
This plugin is super handy when it comes to interacting with your emulator/devices over adb.
ADB-Idea simplifies tasks such as uninstall, kill, start, restart, clear an application and clear the application data and restart it. You just have to start it from the GUI.
This Android Studio plugin lets you debug Android apps over Wi-Fi.

This plugin will help you to train yourself to use keyboard shortcuts more often than your mouse.
It displays an annoying pop-up every time you perform an action with your mouse. It also lists how many times you’ve called that action.

This plugin makes PNG compression much more convenient.


Miscellaneous Tricks
Now that you’ve covered some of the major areas where Android Studio tips can help you, it’s time for a round-up of miscellaneous tricks that can increase your productivity even more!

Create Command-Line Launcher
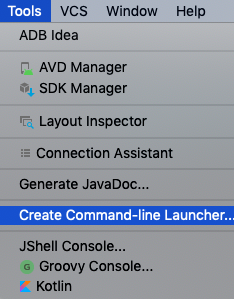
Tinkering with a terminal has more benefits than most people realize. Few people know this, but you can launch Android Studio from a terminal location.
All you need to do is create a command-line launcher. To do this, go to Tools ▸ Create Command-line Launcher…:
Hit OK in response to the dialog prompt:

Congratulations, studio is now available as a command in your terminal!
Executing studio with the path to the folder of the Android project will open the Android project. It also works when you are in your app’s root folder. You simply need to pass ./ in place of the path (i.e., studio ./), which will open the Android project.
Including On-Demand Dependency
Once upon a time, there were only a handful of support library dependencies. But nowadays, these libraries have evolved, and it’s not easy to remember their signatures. Developers usually need to search the official docs to find them.
Well, with the release of Android Studio 3.4.0, you now can easily include the library dependency to the Gradle build. All you need to do is to type the class name you want to use and then press ⌥ + Enter on MacOS or Alt + Enter on Windows or Linux. This will give you a suggestion from your IDE of the required library dependency to include.
Choose which one you want to add the library dependency and sync Gradle. Pretty rad, right?

Using Android Studio’s Local History
Most developers love the Git versioning system, but not everyone chooses to use it. Sometimes, you’ll mess up your git history, and that’s a real bummer. :[
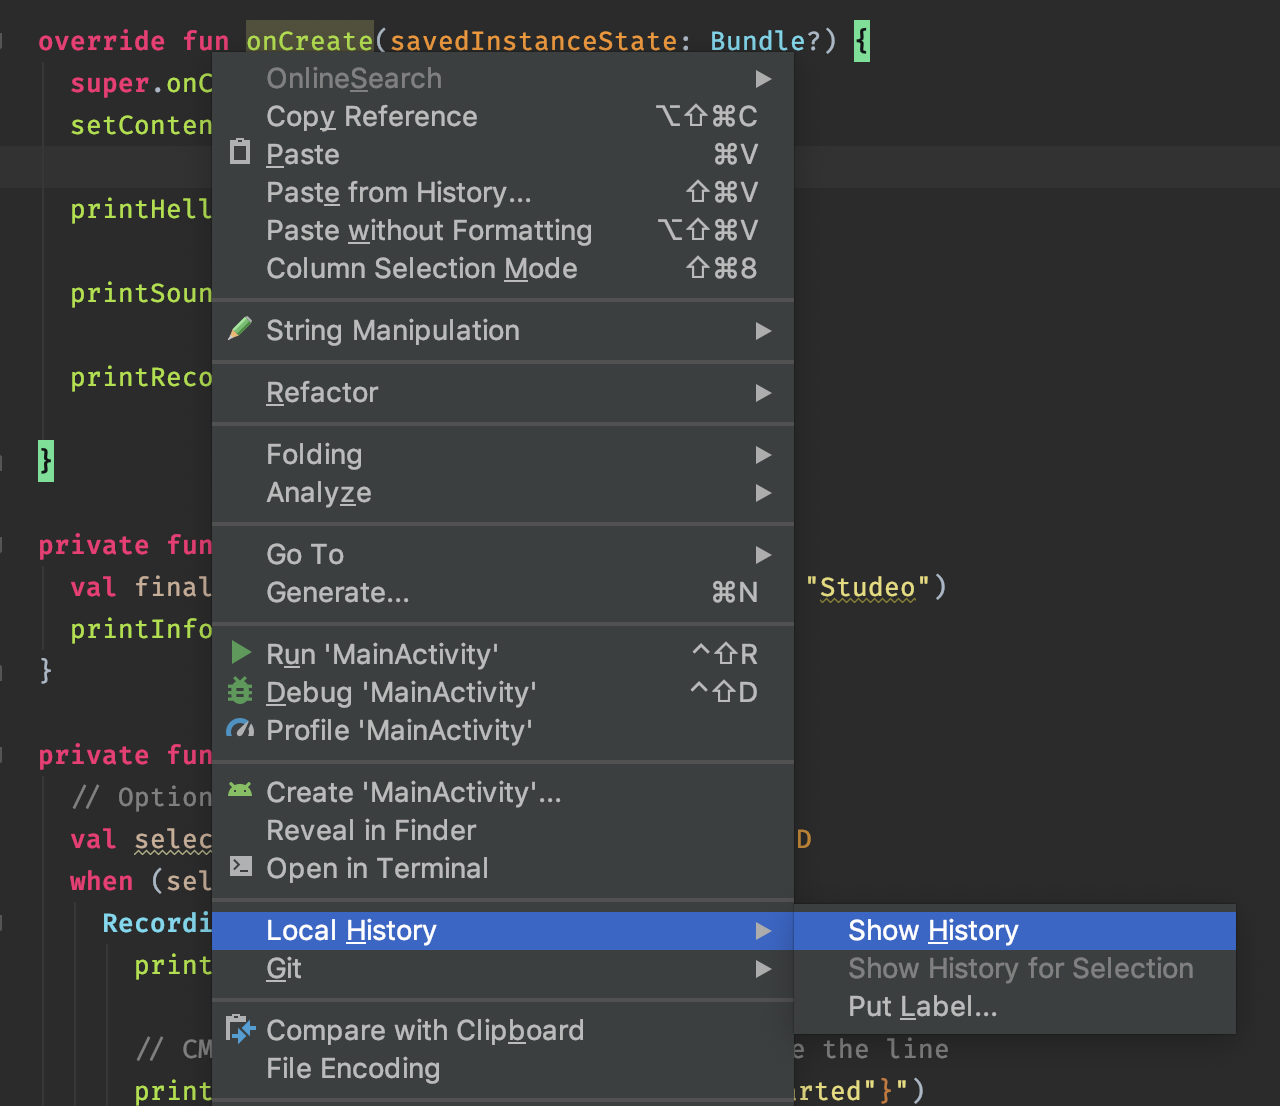
Luckily, Android Studio has a built-in Local History, which automatically saves a history of changes that you’ve made. When you’re stuck and want to revert to an earlier version, right-click inside the editor and select Local History ▸ Show History:
which opens a window with all the changes you’ve made in the past:

Once you select one of those changes, click on the Revert button at the top-left corner:
![]()
This can save you hours of fiddling with the codebase and manually attempting to restore earlier code. :]
Verifying Java-Kotlin Interop
Many apps in production still use Java and Kotlin side-by-side in their codebase. This is unavoidable since you can’t write the whole app in Kotlin overnight.
What do you do in such a situation? You write code in Java as well as Kotlin, making sure they can interop properly. There’s even a full guide on how to do this in the official documentation.
But checking the guide manually is error-prone and breaks the continuity in the development process. Here, Android Studio comes to the rescue once again.
This little-known feature isn’t enabled by default, but Android Studio has inspection rules that can validate Java-Kotlin interop compatibility as you write your code.
Find this feature under Preferences ▸ Inspection. Search for the keyword interop and enable the option Kotlin Interoperability.
