Swift Algorithm Club: Swift Dijkstra’s Algorithm
Learn how to implement a Swift Dijkstra’s Algorithm in this step-by-step tutorial by the Swift Algorithm Club team. By Ross O'Brien.
4 (1) · 1 Review
Generating the Tree
After the distance function, type this:
public func dijkstra(from source: Vertex<Element>, to destination: Vertex<Element>) -> [Edge<Element>]? {
  // you'll be writing code here
  return nil
}
This is your main ‘Dijkstra’ function. Given a source and destination Vertex, return the shortest path, if there is one.
Immediately inside the function, add this line to create the Vertex : Visit tree:
var visits : [Vertex<Element> : Visit<Element>] = [source: .source]
You ‘pre-load’ this with the source vertex and the Visit.source state.
Then you need to create a queue of vertices to explore. We’re going to be prioritising these vertices based on distance from the source vertex, so here’s where we’re going to use the Priority Queue data structure. Under the declaration of visits, add this:
var priorityQueue = PriorityQueue<Vertex<Element>>(sort: { self.distance(to: $0, in: visits) < self.distance(to: $1, in: visits) })
priorityQueue.enqueue(source)
Here you've created a PriorityQueue which sorts vertices, initialised with a closure which uses the distance function you've written to sort the vertices by distance. Then you enqueued the source vertex as the first vertex to explore.
Below that, type this to begin exploring the graph:
while let visitedVertex = priorityQueue.dequeue() { // 1
  if visitedVertex == destination { // 2
    return route(to: destination, in: visits) // 3
  }
  // Code for goal state not reached
}
Here's what you've done:
- You dequeued the first element from the priority queue, and called it
visitedVertex. - You checked whether the visited vertex is the destination.
- If the visited vertex is the destination, you returned the route from the source vertex to the destination vertex, as determined from the
visitstree.
If the visited vertex isn't the destination vertex, we're going to explore the vertex and add its neighbours. Replace the 'Code for goal state not reached' comment with this:
let neighbourEdges = edges(from: visitedVertex) ?? [] // 1
for edge in neighbourEdges { // 2
  if let weight = edge.weight { // 3
    // Code for adding the neighbour vertex
  }
}
Let's review this code:
- You're getting the list of neighbouring edges for the visited vertex, or creating an empty list if there aren't any.
- You're iterating through that list of neighbouring edges. If there aren't any, there'll be no iterations here.
- You're testing if the neighbouring edge has a weight value. This will be important in a moment.
There are two reasons to enqueue a neighbouring vertex. The first is that we've never encountered them before, and the second is that you have encountered them before but you have a shorter, higher-priority route for them. If we've encountered the vertex before but we've found a longer route to it than you have already, you want to ignore the new route.
Because of these reasons, now that you have a weighted edge to a neighbouring vertex, there's a little bit of duplication here in deciding to enqueue that vertex. Replace the 'Code for adding the neighbour vertex' with this:
if visits[edge.destination] != nil { // 1
  if distance(to: visitedVertex, in: visits) + weight < distance(to: edge.destination, in: visits) { // 2
    visits[edge.destination] = .edge(edge) // 3
    priorityQueue.enqueue(edge.destination) // 4
  }
} else { // 1
  visits[edge.destination] = .edge(edge) // 3
  priorityQueue.enqueue(edge.destination) // 4
}
Let's review this code:
- You tested whether the
visitstree already has an entry for the current vertex's neighbour. If there's no entry, you're going to enqueue this vertex. - If there is an entry, you test if the distance to the current vertex, plus the weight, would be less than the distance the priority queue is already using to prioritise the neighbour.
- You created, or overrode, the entry in the
visitstree for the neighbour. The tree will now use this entry to prioritise the vertex. - You added the neighbour to the priority queue.
And that's it! Congratulations - you've implemented Dijkstra's Algorithm in Swift.
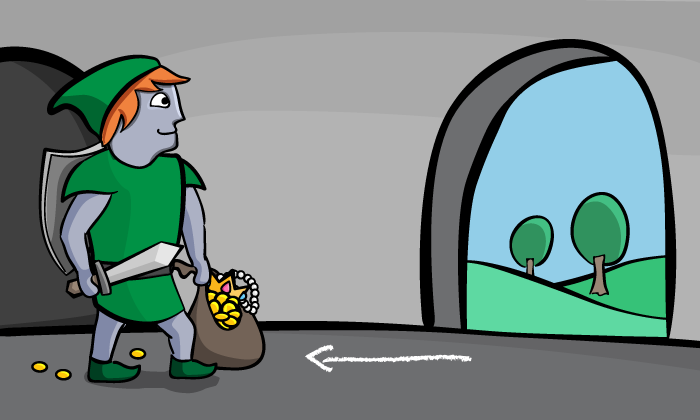
Testing it Out
Now let's test it out. Add the following to the bottom of your Playground:
let dungeon = AdjacencyList<String>()

let entranceRoom = dungeon.createVertex(data: "Entrance")
let spiderRoom = dungeon.createVertex(data: "Spider")
let goblinRoom = dungeon.createVertex(data: "Goblin")
let ratRoom = dungeon.createVertex(data: "Rat")
let treasureRoom = dungeon.createVertex(data: "Treasure")

dungeon.add(.undirected, from: entranceRoom, to: spiderRoom, weight: 11)
dungeon.add(.undirected, from: spiderRoom, to: goblinRoom, weight: 11)
dungeon.add(.undirected, from: goblinRoom, to: treasureRoom, weight: 11)
dungeon.add(.undirected, from: entranceRoom, to: ratRoom, weight: 31)
dungeon.add(.undirected, from: ratRoom, to: treasureRoom, weight: 12)

dungeon.description


if let edges = dungeon.dijkstra(from: entranceRoom, to: treasureRoom) {
  for edge in edges {
    print("\(edge.source) -> \(edge.destination)")
  }
}
You should see it print out the shortest path to the treasure thanks to Dijkstra's algorithm:
Entrance -> Spider
Spider -> Goblin
Goblin -> Treasure
There are some interesting implications of this code, particularly if compared to the Breadth-First Search implementation. In that algorithm you tried to reduce the work done by the algorithm by ensuring that a vertex could only be enqueued once.
This was a simple effort because vertices never changed priority in that algorithm - if a vertex exists in the queue, then it is already at its nearest position to the source vertex as measured by number-of-vertices-distance, and will never get nearer.
However, in Dijkstra's algorithm, shorter routes can be found during the exploration, so vertices often need to be prioritized higher in the queue. However, in this implementation, while enqueuing the vertex again does put it into the correct position in the priority queue, it does create a duplicate entry in the priority queue, and the duplicate entry can remain at it's higher-distance, lower-priority position in the queue.
The same vertex can be dequeued several times. However, this doesn't create complications because the vertex's neighbors will have already been enqueued at their shortest distance, and won't be enqueued again.
Where To Go From Here?
I hope you enjoyed this tutorial on Dijkstra's Algorithm in Swift!
You’ve extended the behavior of all Graphable data types, so you can search for a route from any vertex to any other vertex, and you can be sure it has the shortest distance.
Here is a playground file with the above code. You can also find the original implementation and further discussion in the Swift Dijkstra's Algorithm section of the Swift Algorithm Club repository.
This was just one of the many algorithms in the Swift Algorithm Club repository. If you're interested in more, check out the repo.
It's in your best interest to know about algorithms and data structures - they're solutions to many real world problems, and are frequently asked as interview questions. Plus it's fun!
So stay tuned for many more tutorials from the Swift Algorithm club in the future. In the meantime, if you have any questions on implementing Dijkstra's Algorithm in Swift, please join the forum discussion below!
 If you enjoyed what you learned in this tutorial, why not check out our Data Structures and Algorithms in Swift book, available on our store?
In Data Structures and Algorithms in Swift, you’ll learn how to implement the most popular and useful data structures and when and why you should use one particular datastructure or algorithm over another. This set of basic data structures and algorithms will serve as an excellent foundation for building more complex and special-purpose constructs.
As well, the high-level expressiveness of Swift makes it an ideal choice for learning these core concepts without sacrificing performance.
- You’ll start with the fundamental structures of linked lists, queues and stacks, and see how to implement them in a highly Swift-like way.
- Move on to working with various types of trees, including general purpose trees, binary trees, AVL trees, binary search trees and tries.
- Go beyond bubble and insertion sort with better-performing algorithms, including mergesort, radix sort, heap sort and quicksort.
- Learn how to construct directed, non-directed and weighted graphs to represent many real-world models, and traverse graphs and trees efficiently with breadth-first, depth-first, Dijkstra’s and Prim’s algorithms to solve problems such as finding the shortest path or lowest cost in a network.
- And much, much more!
By the end of this book, you’ll have hands-on experience solving common issues with data structures and algorithms — and you’ll be well on your way to developing your own efficient and useful implementations.