How To Make an eBook with iBooks Author Tutorial
In this iBooks Author tutorial, you’ll learn how to create a book in iBooks Author from scratch – complete with embedded video, interactive quizzes, and more. You’ll see how easy it is, and will be making your own book in no time! By .
Widgets, Widgets Everywhere — Adding Interactive Widgets to your iBook
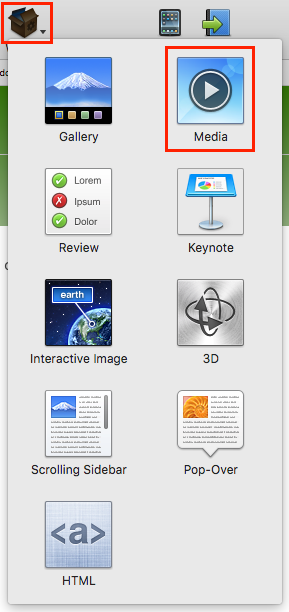
To insert different types of interactive media into your book, use the Widget drop down box at the top of the iBooks Author screen. You’ll be adding another movie to your iBook. In the Widgets drop down box, select Media.
The Widget popup box should appear that allows you to edit the movie’s properties. You can also drag and resize the video box to fit your page accordingly, as below:

In the Media folder from the starter project, locate jumpMovie.mov and drag it into the media box:

Save and Preview your iBook to see the video play!
You’ll notice that if you tap on the video to bring up the video controls, you can choose to make the movie fullscreen on your iPad. Neat!
Okay, interactivity is pretty cool. But what about interactive widgets that can help the reader learn as they go along?
Yep, iBooks Author provides a widget just for that — the Revew widget!
There Will be a Quiz at the End — Adding A Review Widget to Your iBook
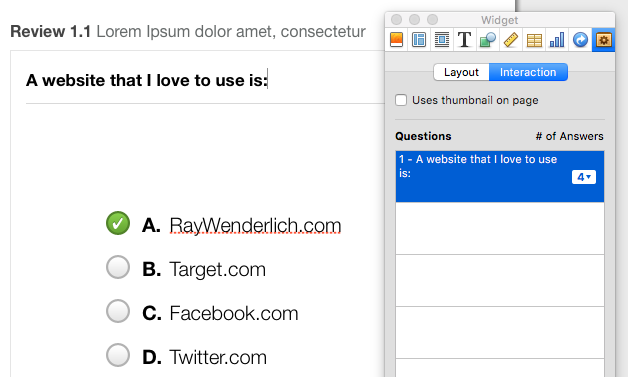
Another great tool available in iBooks Author is the Review widget, which allows you to create an interactive multiple-choice quiz for the reader.
Let’s add a Review widget to your iBook. To do this, simply open the Widget drop down box, and select Review, like so:

Using the Widget popup box, you can add multiple questions to present to your readers, as well as setting the number of answers per question. Add at least one question to your Review widget, and add a few possible answers.
To set the correct response for each question, click the radio button on the widget next to the right answer, as seen below:
The Review widget can be very handy for educational books to test the reader’s comprehension as they go through your iBook. Regular review of the concepts and ideas presented in your book will greatly increase the reader’s ability to retain that new-found knowledge!
So far you’ve covered interactive Video and Review widgets. But that’s not all — images can also be interactive in your iBook!
Illustrative Images — Adding Interactive Images to your iBook
Another neat feature of iBooks Author is the ability to add illustrative images. These are images where you can tap certain areas to reveal special popups with additional information. These are great for calling out bits of detail or providing more context. You might use them to label a complex diagram, or places on a map.
Since there’s enough going on in the first few pages, create a new blank page to place a new interactive image. Navigate to Insert\Pages\Pages\Blank, like so:

In the Widgets menu, choose Interactive Image. In the Media folder of the starter project, find interactivePicture.png and drag it onto the widget, as shown below:

You’ll see there are two sample labels on the image already. Go ahead and add some more labels to the image using the Inspector window – just hit the + button to add more. Here’s the breakdown:
- Create a label called Tap to Enlarge and point it towards the turtle picture on the bulletin board.
- Create a label called Turn on Light and point it towards the lamp.
- Create a label called Drag and Drop and point it towards the ball.
- Create a label called Menu Button and point it towards the menu button.
- Create a label called Navigation Arrows and point it towards the arrow.

Sometimes you have a bunch of related images to display, but you don’t want them to take up too much space in your book. How does iBooks Author handle these sorts of problems?
Image Gallery to the rescue! :]
Great Galloping Galleries — Adding a Gallery Widget to your iBook
To showcase a collection of images, you’ll add a Gallery widget to your iBook.
Select Gallery from the Widget menu and an empty gallery will appear on the current page.
Once you have the gallery widget on your page, locate image1.png and image2.png in your Media folder. You can select both images at the same time and drag them to the gallery, or alternately drag them in one at a time, like so:

You can also add, remove, and reorder images in your Gallery by using the Inspector window.
Interactive elements and text are nice, but books also need some kind of structure. It’s difficult for readers to get a sense of where they are and where they’re going without some sort of order or navigation structure.
Now would be a good time to organize your Chapters and Sections!
Adding Some Structure — Organizing Chapters and Sections in your iBook
iBooks Author uses chapters and sections to structure your content. There’s no self-nesting allowed, so you can’t have a section inside a section or a chapter inside a chapter. You can, however, have sections inside chapters, which is how any good iBook is structured!

To create a new chapter, navigate to Insert\Pages\Chapter\Chapter.

To add a new page to a Chapter, first select the Chapter in the Book pane, and then navigate to Insert\Pages\1 Column, like so:

You can use the left-hand Books pane to move your new Chapters and Pages around to suit.
Hot off the Presses — Getting Your Book to the Public
Creating a book in iBooks Author has been pretty simple so far. You’ve added your text, you’ve added interactive elements, and previewed the book on your device to make sure it looks and feels the way you want.
However, you still need to put your book out there in a format where your raving fans can read it. You have a few options at this point:
- Export your book in the iBooks format. Your book will have all the interactive elements and you can load it on your iPad or give it to a friend for their iPad. However, you can’t sell the book.
- Export your book as a PDF. You can then sell it on your own, give it away for free, post it on your web site, etc. If your book isn’t media intensive, this is a great option since PDFs can’t have embedded video, image galleries, or other sorts of interactive content.
- Publish through the iBookstore. This is similar to releasing a song on the iTunes Store, or publishing an app on the App Store. You get 70% of any sales and Apple gets 30%.
If you choose one of the first two options, you can simply export your book in the format of your choice and then distribute it however you like.
To simply export your book for distribution in iBooks Author, navigate to File\Export… Here you will see options to export your book as an iBooks file, PDF, or plain text document. A plain text export strips all the interactive elements so you can use edit the book text editor.
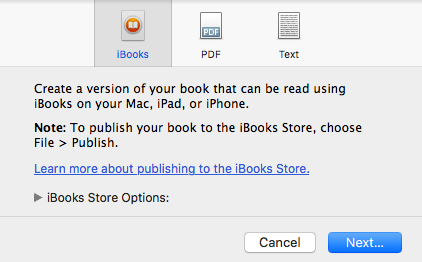
Simply choose your options here, hit Next, and follow the next few screens to finally save your file in the format you’ve chosen.
As you can probably guess, selling the book through the iBookstore is a little more complicated!