Using Spots Framework for Cross-Platform Development
In this Spots framework tutorial you’ll design an iOS app interface and port it over to macOS and tvOS, creating your very own cross-platform app interface. By Brody Eller.
Adding Your View to the Scene
To use your data, you’ll need to create a controller. Still inside viewDidLoad(), add the following below your model:
let component = Component(model: model)
The final steps to get your view on the screen are to create a SpotsController and add it to the screen, so let’s do that now. Still inside viewDidLoad(), add the following under your component:
let controller = SpotsController(components: [component])
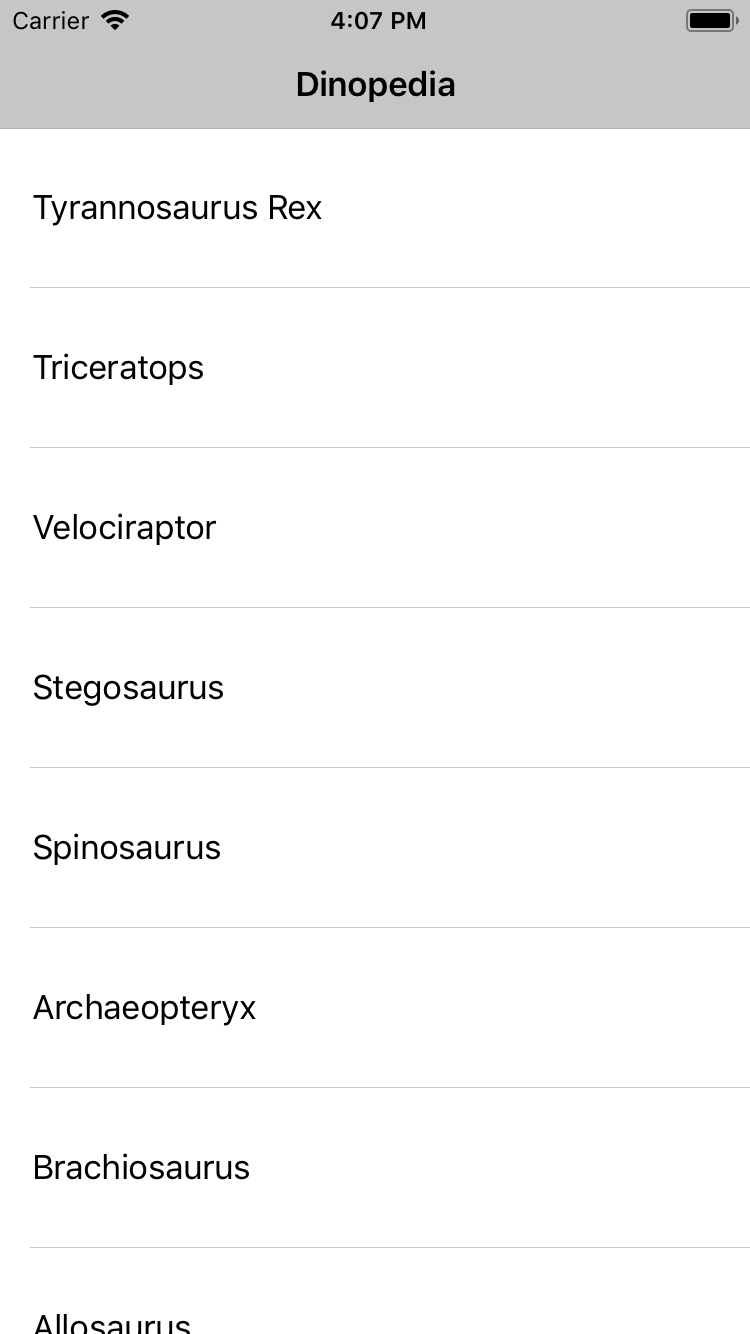
controller.title = "Dinopedia"
This will create a new SpotsController and set its title, which the UINavigationController will use.
Finally, add the controller to the UINavigationController with:
setViewControllers([controller], animated: true)
The code above sets the stack of the UINavigationController, which at this point consists of SpotsController. If you had more than one UIViewController that you wanted within the UINavigationController‘s stack, you would simply add it inside the Array that currently holds [controller].
Build and run to see your dinosaurs!
Responding to Taps on Dinosaurs
You’ll notice, however, that you can’t tap on the dinosaurs to see more information about them. To respond when the user taps a cell, you need to implement the component(itemSelected:) method of the ComponentDelegate protocol.
Still in ViewController.swift, at the bottom of the file, make a new extension and implement the method by adding the following code:
extension ViewController: ComponentDelegate {
  func component(_ component: Component, itemSelected item: Item) {

  }
}
In the code above, your ViewController adopts ComponentDelegate so that it has the ability to respond when a user taps on a cell. Your ViewController conforms to ComponentDelegate by implementing the required method inside the extension.
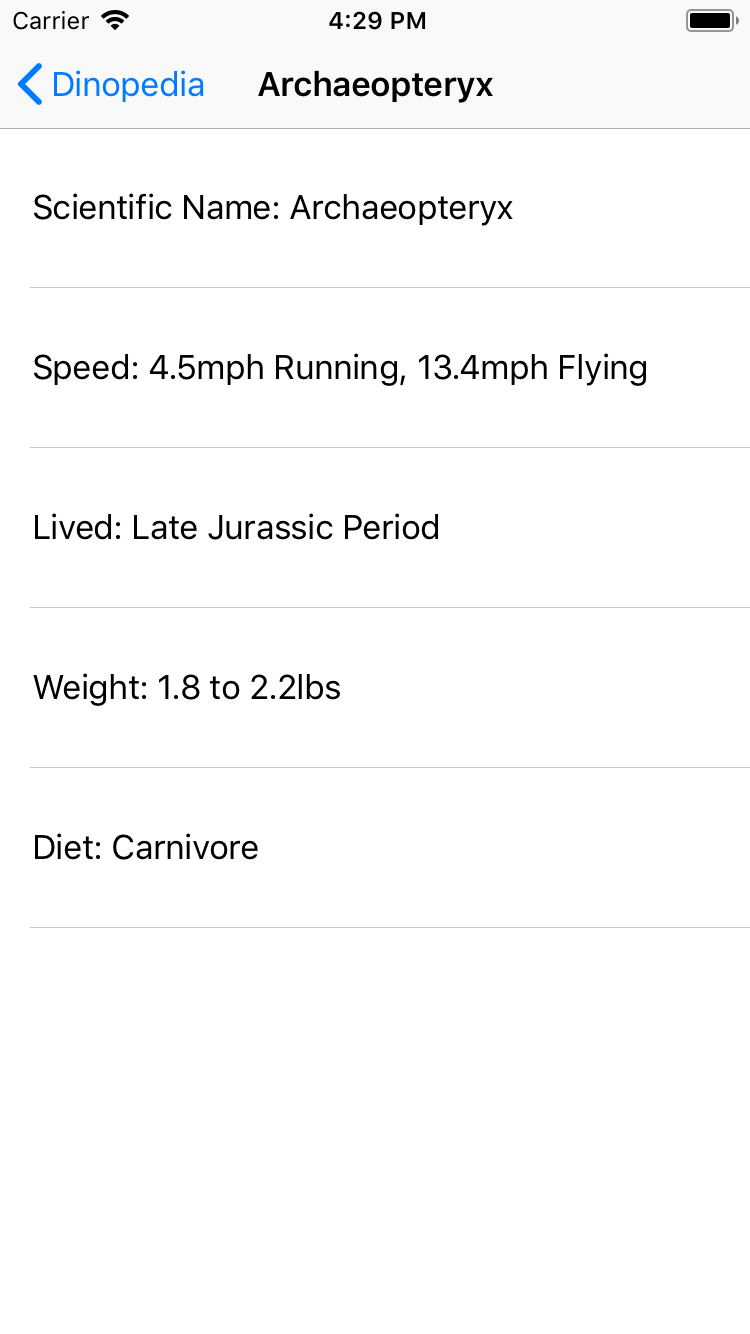
First, you’ll want to retrieve the information about each dinosaur. When you made the ComponentModel, you stored the information in the meta property. Inside the component(itemSelected:) method you just added, make a new ComponentModel by adding the following code:
let itemMeta = item.meta

let newModel = ComponentModel(kind: .list, items: [
  Item(title: "Scientific Name: \(itemMeta["ScientificName"] as! String)", kind: "Cell"),
  Item(title: "Speed: \(itemMeta["Speed"] as! String)", kind: "Cell"),
  Item(title: "Lived: \(itemMeta["Lived"] as! String)", kind: "Cell"),
  Item(title: "Weight: \(itemMeta["Weight"] as! String)", kind: "Cell"),
  Item(title: "Diet: \(itemMeta["Diet"] as! String)", kind: "Cell")
])
Here, you create a property itemMeta and set it to the meta property of the item which the user tapped. itemMeta is a Dictionary of String to Any. When creating newModel, you retrieve the value associated with each key in itemMeta. Like before, the kind parameter is the identifier of CellView.swift that you declared in the AppDelegate.
Finally, add the following code underneath that which you just added:
let newComponent = Component(model: newModel) //1
newComponent.tableView?.allowsSelection = false //2

let detailController = SpotsController() //3
detailController.components = [newComponent]
detailController.title = item.title
detailController.view.backgroundColor = UIColor.white

pushViewController(detailController, animated: true) //4
This creates the Component and SpotsController and adds it to the scene. Breaking it down:
- First you instantiate
newComponent, which has a property calledtableView. - You disable selection on the
tableView. - Next you instantiate
detailControllerand addnewComponentto thecomponentsproperty ondetailController. - Finally, you push the new controller.
If you were to build and run now, nothing would happen when you click on the cells. This is because you haven’t set the ViewController as the SpotsController‘s delegate.
Back inside viewDidLoad(), add the following where you defined the SpotsController:
controller.delegate = self
Build and run to see some more information about the dinosaurs in your app!
Converting to JSON
If you looked around in the project, you may have noticed the dinopedia.json file. Open it up and you’ll see that the JSON data looks very similar to the model you made. You’ll use this JSON file to port your app to tvOS and macOS. This is one of the selling points of Spots. You can create your controllers with simple JSON data. The idea being that you can move this JSON to come from your web server, making it very easy to create your views from data your server sends.
First, you’ll change your iOS app to use JSON instead of manually creating the model.
Open ViewController.swift and replace the contents of viewDidLoad() with the following:
super.viewDidLoad()

guard let jsonPath = Bundle.main.path(forResource: "dinopedia", ofType: "json") else { //1
  print("JSON Path Not Found")
  return
}

let jsonURL = URL(fileURLWithPath: jsonPath)
do {
  let jsonData = try Data(contentsOf: jsonURL, options: .mappedIfSafe)
  let jsonResult = try JSONSerialization.jsonObject(with: jsonData,
                                                    options: .mutableContainers) as! [String: Any] //2

  let controller = SpotsController(jsonResult) //3
  controller.delegate = self
  controller.title = "Dinopedia"

  setViewControllers([controller], animated: true) //4
} catch {
  print("Error Creating View from JSON")
}
Here’s what you’re doing above:
- First, you find the path of the JSON file and create a URL with it.
- Then you retrieve the data and parse it into a
Dictionary. - Next, you create a new
SpotsController, passing in the JSON. - Finally, you add it to the scene.
Build and run to see your app. It looks just as it did before, but now you’re using JSON!

Porting to tvOS
Now that you’ve spent time creating your app on iOS, it’s time to port to tvOS. Luckily, it’s very easy to port your app to tvOS using Spots. You’ll reuse all the code you wrote for iOS!
Add each Swift file from your iOS target to the tvOS target, including AppDelegate.swift, by checking the boxes in the File Inspector on the right-hand side of Xcode.

Inside the tvOS version of Main.storyboard, a UINavigationController has already been added for you. Since iOS and tvOS both use UIKit, you can conveniently share all of your files! Build and run the tvOS target to see your app beautifully ported to tvOS.

Porting to macOS
Unfortunately, macOS doesn’t use UIKit and takes a little more work to port. You can’t just reuse files like you did for tvOS. But you’ll reuse most of the code, with only a few minor changes here and there.
Inside the macOS target, open up Main.storyboard. A stack view is already set up for you. It contains a view on the left and right with a divider in the middle. Both views have outlets already made and wired up to ViewController.swift.
Now right click on the Dinopedia-macOS group and select New File…. Then select macOS\Cocoa Class and click Next. Name the class CellView with a subclass of NSView, and click Next. Then save it in the default location, making sure that the Dinopedia-macOS target is selected.
Now remove the call to draw() and add the following code to the top of the file:
import Spots
Inside CellView, define a new NSTextField called titleLabel:
lazy var titleLabel = NSTextField()
Implement the required methods for Spots:
override init(frame frameRect: NSRect) {
  super.init(frame: frameRect)

  addSubview(titleLabel)
}

required init?(coder decoder: NSCoder) {
  super.init(coder: decoder)
}
As with the implementation of iOS Dinopedia’s CellView, here the macOS CellView must override NSView‘s designated initializer.
Now, create the setupConstraints() method to set up the titleLabel:
func setupConstraints() {
  titleLabel.translatesAutoresizingMaskIntoConstraints = false
  NSLayoutConstraint.activate([
    titleLabel.centerYAnchor.constraint(equalTo: centerYAnchor),
    titleLabel.leadingAnchor.constraint(equalTo: leadingAnchor, constant: 16),
    titleLabel.trailingAnchor.constraint(equalTo: trailingAnchor, constant: -16),
    ])
}
Here you are constraining titleLabel so that it is centered vertically within its super view and so that it has a slight margin of 16 points on either side relative to its super view.
Now add the following code at the end of init(frame:):
setupConstraints()
This ensures that setupConstraints() is called when CellView is initialized.
Finally, create a new extension at the bottom of the file to set up the size of the view:
extension CellView: ItemConfigurable {

  func configure(with item: Item) {
    titleLabel.stringValue = item.title
    titleLabel.isEditable = false
    titleLabel.isSelectable = false
    titleLabel.isBezeled = false
    titleLabel.drawsBackground = false
  }

  func computeSize(for item: Item) -> CGSize {
    return CGSize(width: item.size.width, height: 80)
  }

}
Here you give the titleLabel some text and set certain properties on the NSTextField. You also create a method that returns the size of the item.
The last step in setting up your view is to register it in the AppDelegate. Switch to AppDelegate.swift (the one inside Dinopedia-macOS) and add the following code to the top of the file:
import Spots
Add the following inside the AppDelegate:
override func awakeFromNib() {
  super.awakeFromNib()
  Configuration.register(view: CellView.self, identifier: "Cell")
}
Just like you did with registering CellView.swift‘s identifier in the AppDelegate.swift for the iOS and tvOS targets, you are performing a similar action above. However, since you use the view in a storyboard, you need register the view in awakeFromNib().
Now it’s time to set up your ViewController. Open up ViewController.swift (again, the one in Dinopedia-macOS) and add the following code to the top of the file:
import Spots
Add the following code to the end of viewDidLoad():
guard let jsonPath = Bundle.main.path(forResource: "dinopedia", ofType: "json") else { //1
  print("JSON Path Not Found")
  return
}

let jsonURL = URL(fileURLWithPath: jsonPath)
do {
  let jsonData = try Data(contentsOf: jsonURL, options: .mappedIfSafe)
  let jsonResult = try JSONSerialization.jsonObject(with: jsonData,
                                                   options: .mutableContainers) as! [String: Any] //2

  let controller = SpotsController(jsonResult) //3
  controller.title = "Dinopedia" //4

  addChildViewController(controller) //5
  leftView.addSubview(controller.view)
  controller.view.translatesAutoresizingMaskIntoConstraints = false
  NSLayoutConstraint.activate([
    controller.view.leadingAnchor.constraint(equalTo: leftView.leadingAnchor, constant: 0),
    controller.view.trailingAnchor.constraint(equalTo: leftView.trailingAnchor, constant: 0),
    controller.view.topAnchor.constraint(equalTo: leftView.topAnchor, constant: 0),
    controller.view.bottomAnchor.constraint(equalTo: leftView.bottomAnchor, constant: 0)
    ])
} catch {
  print("Error Creating View from JSON")
}
There’s a lot going on there, but it’s relatively straightforward:
- First you find the path to the dinopedia.json file.
- You then retrieve that data and deserialize it into a
Dictionary. - Next you instantiate a new
SpotsController. - You subsequently set the
UINavigationController‘s title. - Finally, you add the
SpotsControlleras a childViewController ofViewControllerand constrain it withinViewController.
You’ll notice that this is the same code used for iOS, but you add constraints to the SpotsController and add it to the leftView. You add constraints to the view to make sure it fills the entire view.
Create a new extension at the bottom of the file and implement ComponentDelegate:
extension ViewController: ComponentDelegate {
  func component(_ component: Component, itemSelected item: Item) {

  }
}
Here you are adopting and conforming to ComponentDelegate so that ViewController responds when the user clicks a cell.
You can repeat the same code used to retrieve the data, so add the following to component(itemSelected:):
let itemMeta = item.meta

let newModel = ComponentModel(kind: .list, items: [
  Item(title: "Scientific Name: \(itemMeta["ScientificName"] as! String)", kind: "Cell"),
  Item(title: "Speed: \(itemMeta["Speed"] as! String)", kind: "Cell"),
  Item(title: "Lived: \(itemMeta["Lived"] as! String)", kind: "Cell"),
  Item(title: "Weight: \(itemMeta["Weight"] as! String)", kind: "Cell"),
  Item(title: "Diet: \(itemMeta["Diet"] as! String)", kind: "Cell"),
  ])
let newComponent = Component(model: newModel)
You’ll need to remove the SpotsController on the righthand pane and replace it with a new SpotsController whenever the user selects a new dinosaur. To do this you check if a SpotsController has been added to the right, and remove it if it has. Then you can add a new SpotsController to the right.
Add the following to the end of component(itemSelected:):
if childViewControllers.count > 1 {
  childViewControllers.removeLast()
  rightView.subviews.removeAll()
}
In this code, you determine if there is more than one view controller in childViewControllers. This check is important to make sure that childViewControllers.removeLast() can be successfully executed. If childViewControllers.removeLast() is called and there is not at least one childViewControllers, then the app would crash because childViewControllers.removeLast() would be trying to remove something that does not exist. You subsequently remove all the subviews on rightView since these subviews will be replaced with the user’s new dinosaur selection.
Now that you have a clear space to add your new SpotsController, add the following to the end of component(itemSelected:):
let detailController = SpotsController()
detailController.components = [newComponent]
detailController.title = item.title

addChildViewController(detailController)
rightView.addSubview(detailController.view)
detailController.view.translatesAutoresizingMaskIntoConstraints = false
NSLayoutConstraint.activate([
  detailController.view.leadingAnchor.constraint(equalTo: rightView.leadingAnchor, constant: 0),
  detailController.view.trailingAnchor.constraint(equalTo: rightView.trailingAnchor, constant: 0),
  detailController.view.topAnchor.constraint(equalTo: rightView.topAnchor, constant: 0),
  detailController.view.bottomAnchor.constraint(equalTo: rightView.bottomAnchor, constant: 0)
  ])
Again, this repeats from iOS, but adds constraints to the new view to fill the space.
Now that SpotsController conforms to ComponentDelegate, it’s time to set SpotsController as the delegate. Back inside viewDidLoad(), add the following where you defined the SpotsController:
controller.delegate = self
Before you build and run your macOS application, go to the macOS Project Editor and make sure you have a development team selected:

If a development team is not available, you may have to set up your macOS credentials. This Create Certificate Signing Request Tutorial is a helpful resource if you are unsure how to set up your credentials.
Now it is time to build and run to see your finished application running on macOS!
