How to Make Great App Store Screenshots
Learn how to make your app store screenshots stand out! By .
Felipe Has Something to Say
Now, Felipe is an outgoing bird, so you’ll need to add some text to his speech balloon. In the Tools panel, select the Text Tool (T).

In the Character panel, select the 8BIT WONDER font you installed and set the size to 40.

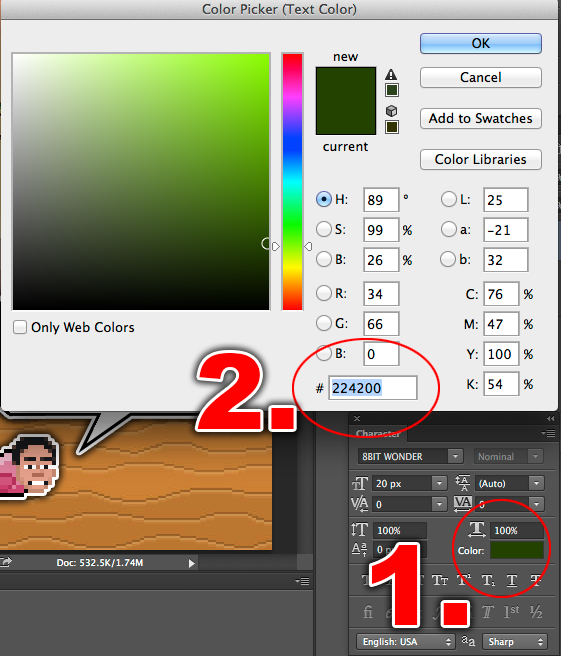
Then click the box next to Color and change the color to #224200 in the Color Picker Window. Click OK.
Next, in the Paragraph panel, select Center Text.

Make sure your balloon layer is still selected in the Layers window, and that your Text tool is still selected from the Tools panel. Then click and drag a rectangle over the balloon layer to create a text box.

Now type (without quotes) “FANTASTIC FELIPE FLAPPING FUN” into the text box you just created. If your text runs outside of the box, you can use the squares on the text box’s border to resize the text area.

Click on the Move Tool in the Tools Panel and adjust the position of the text with the arrow keys on your keyboard as needed. You’ll notice that the text layer has now automatically changed its name from “Layer 1” to “FANTASTIC FELIPE FLAPPING FUN”, so there’s no need to change the layer name.

And there you have it, your very own screenshot with a cartoon overlay!
All that is left is to Cmd+S/CTRL+S to save your changes to the .PSD file. Then go to File /Save For Web…, which will bring up the Save For Web (Cmd+Option+Shift+S) window. Here you can save it as a PNG-24 file and send it off to the App Store.
If you want to compare PSD files, you can download the completed version here.

What’s the Weather Like Today?
Now that you’ve mastered essential Photoshop skills, this next lesson shouldn’t take long to complete. This screenshot is going to combine the use of Screenshot Maker Pro and Photoshop to make a unique image.
Download the source images here. Save and unzip the folder to your Desktop and open it.
Here you’ll see screenshot.png, which was created using Screenshot Maker Pro and bg.png, which is just part of a picture taken for this tutorial. Open both images in Photoshop.

Now you need to past the screenshot.png image on top of the bg.png image.
- Select the screenshot.png tab
- Select All, and then Copy
- Then select the bg.png tab and Paste

- Double-click Layer 1
- Rename it screenshot
- Cmd+S to save your PSD file to the Weather_START folder
- Name your new Photoshop document Weather.psd
As noted before, software such as Screenshot Maker Pro, Promotee and PlaceIt do not export images to the exact sizes that app stores require. However, in Photoshop, you set the size of the image:
- Open the Image Size window by navigating to Image/Image Size… or use Cmd+Option+I
- Change the width to 1024 and height to 768
- Click OK

If you want to see the actual size of the image, navigate to View/100% and you’ll see your image in all of its 1024×768 glory.

If you’re on a Mac, change the font to Helvetica Neue, Thin, 60px in the Character panel. If you’re on a PC and don’t have Helvetica Neue, choose a comparable thin, sans-serif font.

In the Paragraph panel, select Center Text.

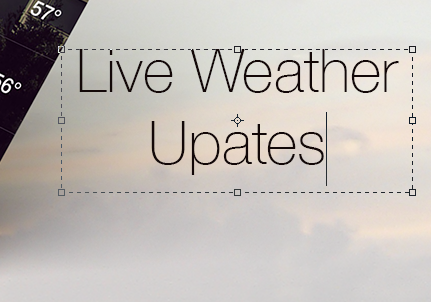
Select the Text Tool (T) in the Tools Panel and in the lower-right corner of the image, place a rectangle text box.

Now type (without quotes) “Live Weather Updates” with “Updates” going on its own line. If it doesn’t fit, resize the text box by dragging its corner until it fits neatly.
Select the Move Tool from the Tools Panel to fine-tune the text’s position and there you go! Now File/Save For Web… (Cmd+Option+Shift+S) and save as a PNG-24 file. Make sure the size is set to 1024 x 768.
Just like that, you’ve created two enhanced screenshots ready for the App Store!

If you’d like to compare PSD files, you can download the final version here.
Where to Go From Here?
Always remember to take advantage of every available slot for screenshots when you upload to an app store.
If you’re allowed 5 screenshots, don’t rest on your laurels at 3 or 4, go big and use all 5 because just having a couple more can make a big difference to your sales and downloads.
Browse the app stores and look at your favorite apps’ screenshots.
- Are they just plain screen grabs from the simulator or are they enhanced in some way?
- Are they shown on an actual device? Do they have cartoony overlays or mascots?
- Do any of the pictures show a user interacting with the app or use animation to show how it works?
Use the ideas you see to inspire you as you create screenshots for your apps.
Try to replicate some of the effects you see from popular apps’ screenshots in Photoshop using the tools that you’ve learned in this tutorial. A great exercise is to use the .png graphic files from your app and combine them in Photoshop to see what you can create.
Don’t be afraid to try out new tools that you find online for screenshot creation. You never know if you’ll find the one that works the best for you.
Thanks for taking the time to join me for this tutorial. If you have questions or ideas that would help other developers, or perhaps just want to show off your new screenshot skills, feel free to leave your thoughts below.