Scene Kit Tutorial: Getting Started
Learn how to easily create 3D scenes in your iOS apps or games in this Scene Kit tutorial! By Ricardo Rendon Cepeda.
Molecules
As you may remember from science class, molecules are groups of two or more atoms held together by chemical bonds. All carbon compounds comprise of molecules of varying complexity. In this section of the tutorial, you’ll build 3D models for various molecules, using your new atoms as building blocks.
You’ll learn about and build each molecule separately, but they’ll all follow a similar pattern. Your first task is to lay the foundation of your molecules, so open up Molecules.swift and add the following lines inside the Molecules class:
class func methaneMolecule() -> SCNNode {
  var methaneMolecule = SCNNode()
  return methaneMolecule
}
class func ethanolMolecule() -> SCNNode {
  var ethanolMolecule = SCNNode()
  return ethanolMolecule
}

class func ptfeMolecule() -> SCNNode {
  var ptfeMolecule = SCNNode()
  return ptfeMolecule
}
Just like your atoms, you develop your molecules as type methods, which return nodes that you can plug directly into your scene.
Next, open up ViewController.swift and add the following lines inside segmentValueChanged(sender:):
// 1
geometryNode.removeFromParentNode()
currentAngle = 0.0

// 2
switch sender.selectedSegmentIndex {
case 0:
  geometryLabel.text = "Atoms\n"
  geometryNode = Atoms.allAtoms()
case 1:
  geometryLabel.text = "Methane\n(Natural Gas)"
  geometryNode = Molecules.methaneMolecule()
case 2:
  geometryLabel.text = "Ethanol\n(Alcohol)"
  geometryNode = Molecules.ethanolMolecule()
case 3:
  geometryLabel.text = "Polytetrafluoroethylene\n(Teflon)"
  geometryNode = Molecules.ptfeMolecule()
default:
  break
}

// 3
sceneView.scene!.rootNode.addChildNode(geometryNode)
Here’s the breakdown for the code:
- Whenever you select a new segment, your scene changes to display a new model. To clean up the previous model, it must be removed from its parent node (i.e. the scene’s root node) and have its rotation angle reset.
- A new model is assigned to
geometryNode, andgeometryLabelis updated accordingly with the model’s name. - Finally, the new model is added to the scene.
Build and run! Try selecting different segments, and you’ll notice an empty scene for Methane, Ethanol and PTFE, since you haven’t created the molecules yet. Make sure the label’s text changes for each segment. Also, note that Atoms will always display with its default starting position upon selection.
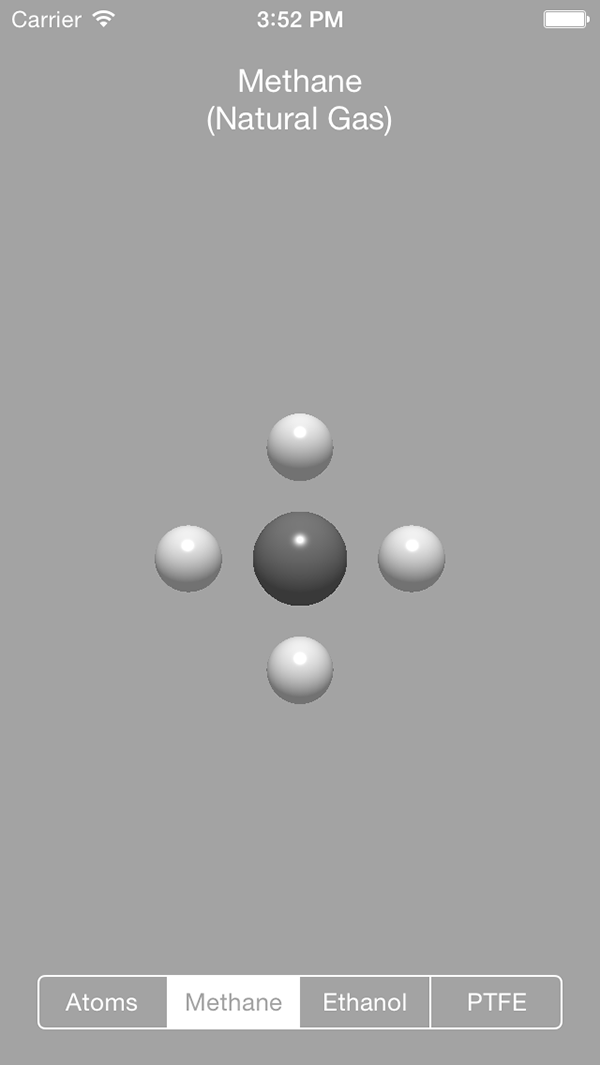
Methane
Methane is the main component of natural gas. It’s composed of one carbon atom and four hydrogen atoms, with the molecular formula CH4. This molecule is very easy to convert into a 3D model, with carbon in the middle and hydrogen evenly spaced around it, so jump right in!
Open up Molecules.swift and add the following function inside the Molecules class, at the very end:
class func nodeWithAtom(atom: SCNGeometry, molecule: SCNNode, position: SCNVector3) -> SCNNode {
  let node = SCNNode(geometry: atom)
  node.position = position
  molecule.addChildNode(node)
  return node
}
All atoms added to a molecule follow a generic procedure, where they:
- Initialize a new node
- Are given a position
- Are added as a child to the molecule node
The previous function does just that and will be put to use for every atom of a molecule.
Next, replace your methaneMolecule stub with the following:
class func methaneMolecule() -> SCNNode {
  var methaneMolecule = SCNNode()

  // 1 Carbon
  let carbonNode1 = nodeWithAtom(Atoms.carbonAtom(), molecule: methaneMolecule, position: SCNVector3Make(0, 0, 0))

  // 4 Hydrogen
  let hydrogenNode1 = nodeWithAtom(Atoms.hydrogenAtom(), molecule: methaneMolecule, position: SCNVector3Make(-4, 0, 0))
  let hydrogenNode2 = nodeWithAtom(Atoms.hydrogenAtom(), molecule: methaneMolecule, position: SCNVector3Make(+4, 0, 0))
  let hydrogenNode3 = nodeWithAtom(Atoms.hydrogenAtom(), molecule: methaneMolecule, position: SCNVector3Make(0, -4, 0))
  let hydrogenNode4 = nodeWithAtom(Atoms.hydrogenAtom(), molecule: methaneMolecule, position: SCNVector3Make(0, +4, 0))

  return methaneMolecule
}
It’s a large block of code, but still pretty straightforward. Here, you’re adding one carbon atom at the center of your molecule (0, 0, 0) and four hydrogen atoms around it (think north, east, south, west).
Build and run! Switch to the Methane segment to see the beginnings of your new molecule:
Awesome – now you’re rendering in style!
Where To Go From Here?
Here is the completed project with all of the code and resources for this Beginning Scene Kit tutorial. You can also find its repository on GitHub.
Congratulations, you’ve taken a great first step into Scene Kit and learnt the basics of this new and exciting 3D API!
So far, your atoms are in place but you still have to create bonds between them. You’ve also yet to experiment with COLLADA files and procedural geometry. So, what are you waiting for then?
If you want to learn more, check out iOS 8 by Tutorials. I go a bit further with this example there and show you how to implement the remaining molecules, and Jake Gundersen also has another entire chapter on more advanced Scene Kit techniques.
If you have any questions, comments or suggestions, feel free to join the discussion below!