Drag and Drop Tutorial for SwiftUI
Learn how to use the drag and drop API in SwiftUI by building your own simple iPadOS and iOS bug reporting app. By Warren Burton.
Receiving a Drop
In this section, you’ll receive the drop of the arrow then render that arrow on top of the image.
In the Project navigator, in the Views folder, open PhotoView.swift. Replace the innermostZStack with this code:
// 1
GeometryReader { geometry in
  ZStack {
    Image(uiImage: uiimage)
      .resizable()
      .aspectRatio(contentMode: .fit)
      .clipped()
      // 2
      .onDrop(
        of: [ArrowTool.uti],
        delegate: ToolDropController(
          bugID: bug.bugID,
          bugController: bugController,
          geometry: geometry,
          imageSize: uiimage.size))
        // insert ElementView here
  }
}
The changes from the starter version of this view are as follows. You:
- Wrap the innermost
ZStackin aGeometryReader.GeometryReaderprovides information about the frame of the view that contains the reader. - Call
onDrop(of:delegate:)onImage, passing an array ofUTTypeand aDropDelegateto this method.ToolDropControllerconforms toDropDelegate, so you use an instance of that class here.
Last, add this view under // insert ElementView here:
ElementView(
  bugID: bug.bugID,
  imageSize: ToolDropController
    .adjustedImageRect(
      geometry: geometry,
      imageSize: uiimage.size).size)
You place ElementView above Image in the inner ZStack. ElementView draws the arrows on top of the image. The view needs to know how large the on-screen image is, so you use ToolDropController to generate that size.
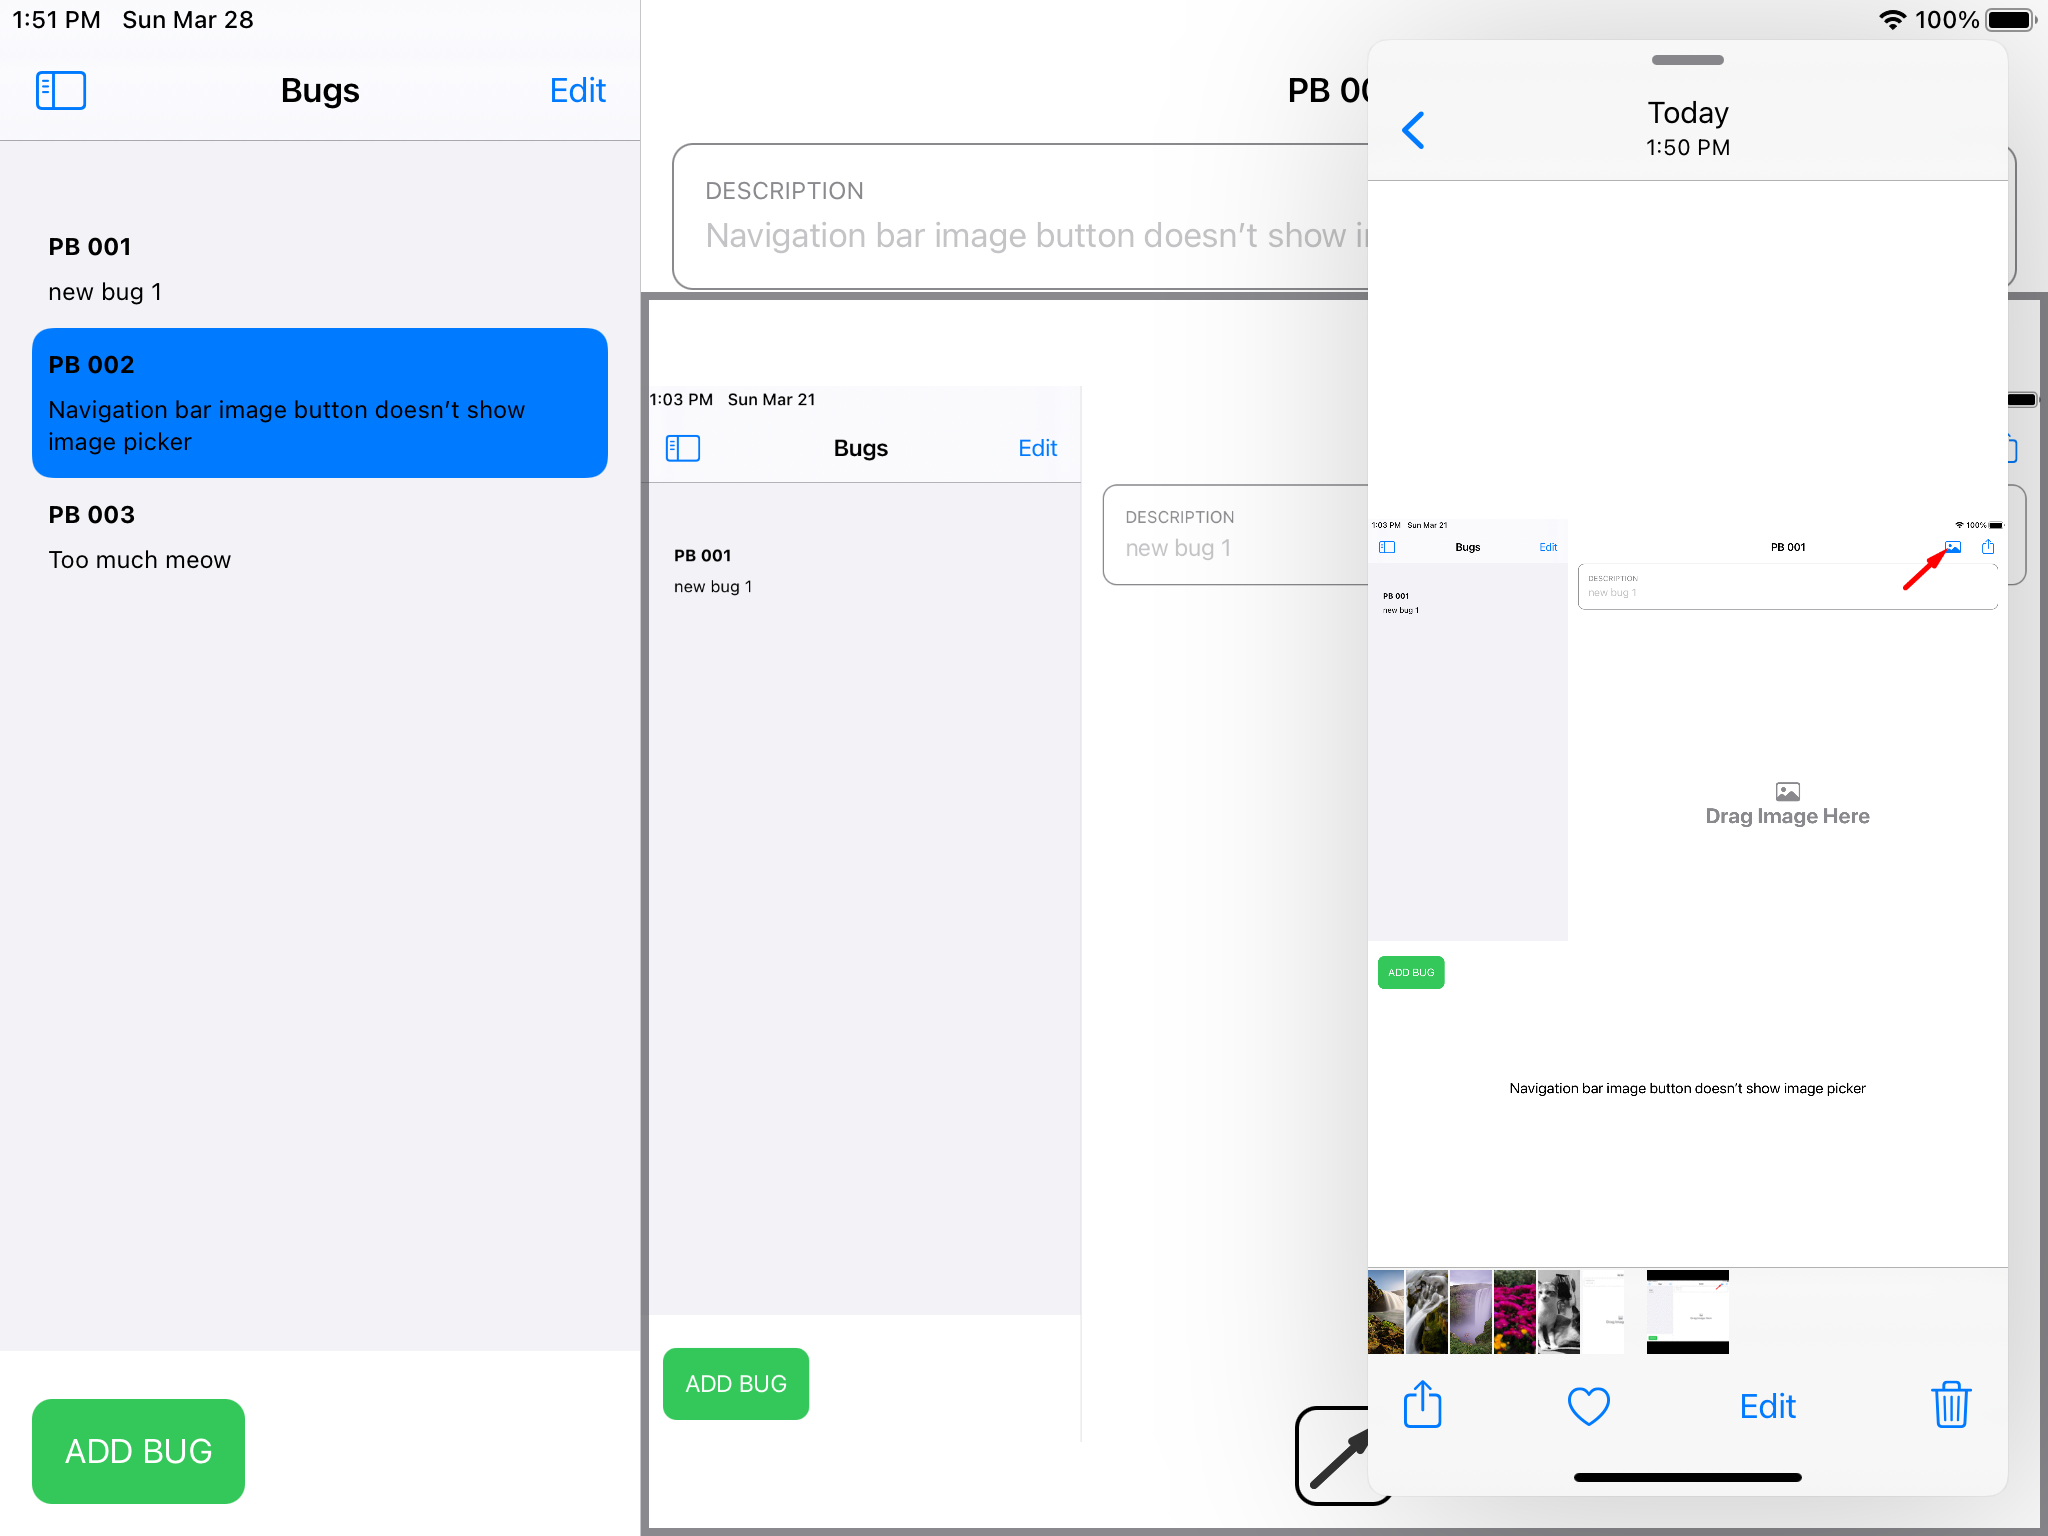
You’re ready to drag, so build and run. Select the bug in the master list that shows the missing image picker. Drag the arrow icon to point at the image button in the navigation bar:
![]()
Here, you observe that when you drop the arrow on the image, ToolDropController updates the model by attaching a new DisplayElement to the selected Bug. SwiftUI observes the changes in the model and redraws the view.
You now have a way of marking a bug in a screenshot. This isn’t going to do much good unless you can share that information. You’ll do this in the next section.
Dragging Content Outside the App
To drag a bug out of the app, you need a way of turning your bug model into a universally readable form. In this section, you’ll turn your bug into an image, then drag it out of the app into Photos.
You’ll use UIKit to draw the bug description into a UIImage. That image will be the data that’s placed on the pasteboard.
Rendering Content with UIGraphicsImageRenderer
In the Project navigator, in the folder Controller, open BugRenderer.swift. BugRenderer is a utility class that takes a Bug and draws that model into a UIImage.
The method you’ll use to do the work is render(). render() uses UIGraphicsImageRenderer to create the context to draw into. UIGraphicsImageRenderer and UIGraphicsPDFRenderer are quite useful classes you can use for generating images at runtime. You can learn more about these classes from the Apple Documentation.
The image for the Bug is assembled as follows:
- First, draw the image.
- Next, on top of that, draw any
DisplayElements. - Finally, draw the text in the image.
Now that you know about BugRenderer, you can do the final setup task to allow you to drag your information outside the app.
Creating an NSItemProvider
Remember that you used an item provider to ask iOS to load the dropped content? This item provider comes from either your app or other apps. As a developer, you can define a content provider for draggable views.
In the Project navigator, inside the group Model open Bug.swift. Add this extension to the end of the file:
extension Bug {
  func itemProvider() -> NSItemProvider {
    if let image = BugRenderer(bug: self).render() {
      return NSItemProvider(object: image)
    } else {
      return NSItemProvider(object: text as NSString)
    }
  }
}
This code uses BugRenderer to create a UIImage. Because UIImage conforms to NSItemProviderWriting, a protocol that allows an item provider to retrieve data from it, you can return an NSItemProvider using that image.
Dragging That Thing
Open BugListView.swift. In the body of BugListView, call this method on NavigationLink inside ForEach:
.onDrag {
  bug.itemProvider()
}
That’s all you need to do to set up the drag. You return the NSItemProvider you set up before.
Build and run. Bring the Photos slide-over window back in. In Photos, select Albums and then the Recents album. You can now drag a bug with an image from the list of bugs to Photos. You might need to drag over the top of the other photos to get the drag to work:

The image will appear in your Photos collection when you drop it.
You’ve added the ability to drag and drop all over the app and even to other apps like Files or Photos. Your app is now a good iPad citizen.
Where to Go From Here?
You can download the completed project files by clicking the Download Materials button at the top or bottom of the tutorial.
In this tutorial, you learned concepts including:
- SwiftUI collections have extra drag and drop capabilities you can enable with the API you covered.
- Any
Viewcan support drag and drop. - How to discover and decode different types of data from the dragging pasteboard.
- Creating and exporting UTI values.
- Using separate controller modules to keep logic outside of your views and increase code reuse and testability.
Adding drag and drop to your app can make it stand out and add joy for your users. Think about how you could add these features to an app. To learn more about implementing drag and drop on iOS, check out Drag and Drop Tutorial for iOS.
Hopefully, this tutorial wasn’t a drag for you. I look forward to seeing what you can do with this API in your apps. You can post any questions or comments in the forum linked below.