LiquidFun Tutorial with Metal and Swift – Part 1
In this LiquidFun tutorial, you’ll learn how to simulate water on iOS using LiquidFun, and render it on screen with Metal and Swift. By Allen Tan.
Creating a Physics World
To work with LiquidFun, you first need to create a world object. The world object manages and contains a collection of physics objects that interact with each other.
Go to LiquidFun.h and add the following code above the @interface line:
#ifndef LiquidFun_Definitions
#define LiquidFun_Definitions

typedef struct Vector2D {
  float x;
  float y;
} Vector2D;

#endif
Then declare the following method inside the LiquidFun interface:
+ (void)createWorldWithGravity:(Vector2D)gravity;
You’ve declared your very first wrapper method and created a structure called Vector2D that holds x- and y-coordinates. LiquidFun has its own structure for holding the same information, called b2Vec2, but since you can’t expose any C++ code to Swift, you’ve created a new Swift-compatible structure in the wrapper’s public interface.
CGPoint. However, CGPoint contains CGFloat x- and y-coordinates instead of regular floats. A CGFloat is a regular float type in a 32-bit architecture but becomes a double type in a 64-bit architecture. LiquidFun and Swift are similar in that they both deal with float explicitly, so having this kind of auto-conversion may lead to unpredictable results.Next, switch to LiquidFun.mm and add the following lines just above the @implementation line:
#import "Box2D.h"

static b2World *world;
Then add the following method to the LiquidFun class implementation:
+ (void)createWorldWithGravity:(Vector2D)gravity {
  world = new b2World(b2Vec2(gravity.x, gravity.y));
}
You import the main header of LiquidFun so you can use its classes and methods inside the wrapper. Then, you create a static b2World variable to keep a global reference to the world object you’ll create later. Since you won’t be creating any instances of the LiquidFun wrapper class, a static variable is as close as you can get to a class variable.
createWorldWithGravity: is a pass-through method to LiquidFun’s b2World constructor. This method creates a new b2World instance with the supplied gravity. Since the constructor method expects a b2Vec2 coordinate structure, you use the Vector2D type as input and create a counterpart b2Vec2 structure out of it.
All right, it’s time to create your world in Swift!

Switch to ViewController.swift and add the following constant to the ViewController class:
let gravity: Float = 9.80665
Here you create a gravity constant to match the value of Earth’s standard gravity.
Next, add the following line to viewDidLoad:
LiquidFun.createWorldWithGravity(Vector2D(x: 0, y: -gravity))
This uses the LiquidFun wrapper class to create the world object with a negative y-gravity so that every object inside this world will fall down vertically.
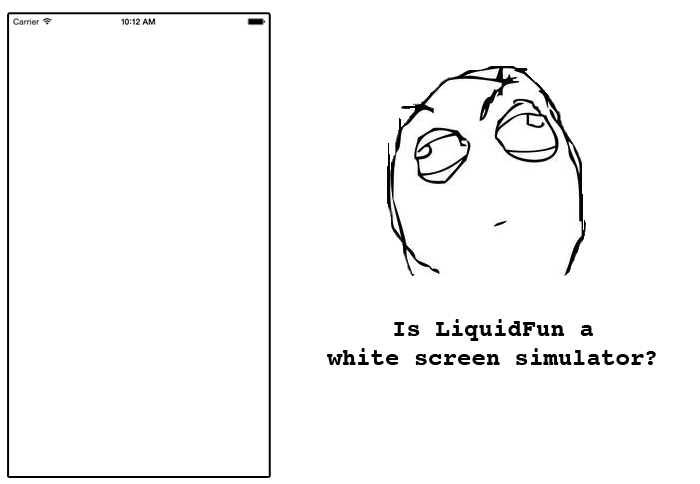
Build and run to again see none of your work reflected on the screen. :]

Simulating Water
You now have an empty world to play with, so it’s time to get to the main topic—water simulation. Ironically, water simulation is the easiest part of this tutorial due to the fact that LiquidFun makes it so simple.
Open LiquidFun.h and add the following structure after #define LiquidFun_Definitions:
typedef struct Size2D {
  float width;
  float height;
} Size2D;
Then add the following method declarations to the LiquidFun interface:
+ (void *)createParticleSystemWithRadius:(float)radius dampingStrength:(float)dampingStrength
                            gravityScale:(float)gravityScale density:(float)density;
+ (void)createParticleBoxForSystem:(void *)particleSystem
                          position:(Vector2D)position size:(Size2D)size;
You define another convenience structure named Size2D that contains width and height information. Next, you declare the two methods needed to create water in LiquidFun.
The foundation of LiquidFun’s water simulation is the particle system, defined by a b2ParticleSystem object. If each particle represents a water droplet, the particle system is their parent and enforces properties common to them all.
Each particle system is a subsystem within the larger simulation defined by the world object it belongs to. That is, a world object could contain multiple different particle systems, and once created, each particle system can generate particles discretely or in groups.
Switch to LiquidFun.mm and add this method:
+ (void *)createParticleSystemWithRadius:(float)radius dampingStrength:(float)dampingStrength
                            gravityScale:(float)gravityScale density:(float)density {
  b2ParticleSystemDef particleSystemDef;
  particleSystemDef.radius = radius;
  particleSystemDef.dampingStrength = dampingStrength;
  particleSystemDef.gravityScale = gravityScale;
  particleSystemDef.density = density;

  b2ParticleSystem *particleSystem = world->CreateParticleSystem(&particleSystemDef);

  return particleSystem;
}
This method creates a particle system with an initial set of properties defined by a b2ParticleSystemDef:
- A particle is round, so you need to define a
radiusfor each particle in the system. - You’ll use
dampingStrengthto reduce the velocity of particles over time. - A particle system doesn’t need to strictly follow the physics world’s gravity, so it uses
gravityScaleto adjust the effect of the physics world’s gravity on its particles. -
densityaffects the mass of the particles, and this affects how the particles interact with other physics bodies in the simulation. However,densitydoesn’t change how particles interact with each other.
b2World is the overall manager of the simulation, so you use it to create a new b2ParticleSystem with the properties you defined. After the particle system is created, this method returns a reference to it so you can access the particle system again later. Note that this method returns a pointer of type void *, a generic pointer to an address in memory, because Swift doesn’t know about the b2ParticleSystem type.
Still in LiquidFun.mm, add this method:
+ (void)createParticleBoxForSystem:(void *)particleSystem
                          position:(Vector2D)position size:(Size2D)size {
  b2PolygonShape shape;
  shape.SetAsBox(size.width * 0.5f, size.height * 0.5f);

  b2ParticleGroupDef particleGroupDef;
  particleGroupDef.flags = b2_waterParticle;
  particleGroupDef.position.Set(position.x, position.y);
  particleGroupDef.shape = &shape;

  ((b2ParticleSystem *)particleSystem)->CreateParticleGroup(particleGroupDef);
}
To create a group of particles, you first need to define a shape for it (i.e. the shape of the container for the particles). This method uses a box shape defined by a size parameter for the group – later you will pass in a 50×50 point box at the bottom of the screen for this container box.
Next, you create a b2ParticleGroupDef to define properties for the group of particles to be produced. Since you want to simulate water, you specify the b2_waterParticle flag as the type of particle and place the group in a starting position.
b2ParticleFlag documentation to learn more about the different types of flags available.Finally, you ask the particle system to create a group of particles with the defined properties. This method expects to be given a reference to a previously created particle system, so you must use it in conjunction with createParticleSystemWithRadius:dampingStrength:gravityScale:density:, which you defined earlier.
Open ViewController.swift and add the following properties:
let ptmRatio: Float = 32.0
let particleRadius: Float = 9
var particleSystem: UnsafeMutablePointer<Void>!
Here’s a breakdown of the properties you’ve just added:
-
ptmRatiois the points-to-meters conversion ratio. LiquidFun is optimized to work with objects sized from as small as 0.1 meters to as big as 10 meters. Since a 0.1-point sized object won’t be visible on your device, you need a ratio to convert LiquidFun’s units—meters—to screen coordinates in points. With this ratio, a 1-meter object in LiquidFun’s physics simulation would occupy 32 points onscreen. -
particleRadiusdefines the radius you’ll use, in points, for your water particles. -
particleSystemwill hold a reference to the particle system you’ll create later. TheUnsafeMutablePointer<Void>type is Swift’s way of representing thevoid *type you used in your wrapper class earlier.
Still in ViewController.swift, add the following to the end of viewDidLoad:
particleSystem = LiquidFun.createParticleSystemWithRadius(
  particleRadius / ptmRatio, dampingStrength: 0.2, gravityScale: 1, density: 1.2)

let screenSize: CGSize = UIScreen.mainScreen().bounds.size
let screenWidth = Float(screenSize.width)
let screenHeight = Float(screenSize.height)

LiquidFun.createParticleBoxForSystem(particleSystem,
  position: Vector2D(x: screenWidth * 0.5 / ptmRatio, y: screenHeight * 0.5 / ptmRatio),
  size: Size2D(width: 50 / ptmRatio, height: 50 / ptmRatio))
First, you create a particle system and store a reference to it. You divide the particle radius by the points-to-meters ratio you defined earlier so that LiquidFun doesn’t produce huge water particles. Your particles will still show up as 9 points onscreen, but in LiquidFun coordinates it will be 9.0 points / 32.0 points per meter = 0.28 meters.
Next, using the particleSystem you just created, you add a group of particles in a 50×50-point box at the center of the screen. To compute for the center, you get the screen bounds from UIScreen and convert the retrieved width and height values to Swift Floats from CGFloat. As before, you divide all values using ptmRatio.
Build and run to make sure everything still compiles correctly.