Google Glass App Tutorial
In this Google Glass app tutorial, you will learn how to make your first Google Glass app – a simple shopping list app! By Evan Dekhayser.
Saving & Retrieving Items
Select the MainActivity file in the Project Navigator (this makes sure your new file goes into the right group) then go to File\New… and create a new Java class named DataManager. Replace everything in the file after the package statement with the following:
import android.content.Context;
import android.content.SharedPreferences;
import java.util.ArrayList;
import java.util.Collections;
import java.util.HashSet;
import java.util.Set;
//1
public class DataManager {

    private Context context;
    private static final String StoredStringsKey = "com.raywenderlich.shoppinglist.storedstringskey";
    private static final String PreferencesLocation = "com.raywenderlich.shoppinglist";

    public DataManager(Context c){
        context = c;
    }
//2
    public ArrayList<String> getStoredStrings(){
        SharedPreferences preferences = context.getSharedPreferences(PreferencesLocation, Context.MODE_PRIVATE);
        Set<String> stringSet = preferences.getStringSet(StoredStringsKey, Collections.<String>emptySet());
        return new ArrayList<>(stringSet);
    }
//3
    public void setStoredStrings(ArrayList<String> strings){
        SharedPreferences preferences = context.getSharedPreferences(PreferencesLocation, Context.MODE_PRIVATE);
        SharedPreferences.Editor editor = preferences.edit();
        Set<String> stringSet = new HashSet<>(strings);
        editor.putStringSet(StoredStringsKey, stringSet);
        editor.apply();
    }
}
This code creates a utility class that saves and retrieves the user’s shopping list items. Here’s a breakdown of what’s going on:
- The Context is a way for this class to access the
SharedPreferencesfor this application, and this variable is set in the constructor (the publicDataManager(...) code). -
SharedPreferencesis a key-value store, and it acts like a dictionary — if you’ve ever used Cocoa’s NSUserDefaults it will look a little familiar. The key for the stored values isStoredStringsKey, and the values are set in thesetStoredStrings function. - When you want to get these values back in
getStoredStrings()this just asks theSharedPreferences, “Hey, what are the values that are attached to the string here inStoredStringsKey?”
Replace the two occurrences of “com.raywenderlich” with whatever identifier you used when you created the project.
Open MainActivity.java. After the declaration of onMenuItemSelected, add the following method:
protected void onActivityResult(int requestCode, int resultCode, Intent data) {
    if (requestCode == R.id.add_menu_item && resultCode == RESULT_OK) {
        // 1
    } else if (requestCode == R.id.remove_menu_item && resultCode == RESULT_OK) {
        // 2
    }
    super.onActivityResult(requestCode, resultCode, data);
}
onActivityResult is called when the speech-recognizing Intent completes. The Intent usually completes with a result code of RESULT_OK of RESULT_CANCEL. You only care about what happens if the Intent completes successfully, so in both cases, you check to make sure that resultCode == RESULT_OK.
requestCode is the same code that you gave the Intent when you called startActivityForResult, which is either R.id.add_menu_item or R.id.remove_menu_item.
If the code is R.id.add_menu_item, you want to take the item that the user dictated and add it to the strings stored in the DataManager class.
Add the following code at // 1:
//Part A
List<String> results = data.getStringArrayListExtra(RecognizerIntent.EXTRA_RESULTS);
String spokenText = results.get(0);

//Part B
DataManager dataManager = new DataManager(getBaseContext());
ArrayList<String> storedStrings = dataManager.getStoredStrings();
storedStrings.add(spokenText);
dataManager.setStoredStrings(storedStrings);

//Part C
mView = buildView();
mCardScroller.getAdapter().notifyDataSetChanged();
Again, at the top of the file import these classes:
import java.util.ArrayList;
import java.util.List;
A lot of this code should look new to you, so let me explain each part:
- Part A: Take the Intent and get the spoken text from its “extra results.”
- Part B: Create a new DataManager instance using the base context. After you get a copy of the strings already stored in the DataManager, you add the spoken text to this copy. Then, you set the DataManager’s stored strings to the new values.
- Part C: You update the view to show the new data.
Now, add the following code at //2:
List<String> results = data.getStringArrayListExtra(RecognizerIntent.EXTRA_RESULTS);
String spokenText = results.get(0);
DataManager dataManager = new DataManager(getBaseContext());
List<String> storedStrings = dataManager.getStoredStrings();
if (storedStrings.contains(spokenText)){
    storedStrings.remove(spokenText);
    dataManager.setStoredStrings(new ArrayList<>(storedStrings));
}
mView = buildView();
mCardScroller.getAdapter().notifyDataSetChanged();
This code is similar to the code added at // 1, except that you remove the spoken text instead of adding it.
What About the UI?
Both of these code snippets end by updating the user interface. Because you haven’t really looked at that yet, let’s look through the automatically generated code that shapes the app’s appearance.
Inside the onCreate implementation, you have the following code:
mView = buildView();

mCardScroller = new CardScrollView(this);
mCardScroller.setAdapter(new CardScrollAdapter() {
    @Override
    public int getCount() {
        return 1;
    }

    @Override
    public Object getItem(int position) {
        return mView;
    }

    @Override
    public View getView(int position, View convertView, ViewGroup parent) {
        return mView;
    }

    @Override
    public int getPosition(Object item) {
        if (mView.equals(item)) {
            return 0;
        }
        return AdapterView.INVALID_POSITION;
    }
});

mCardScroller.setOnItemClickListener(new AdapterView.OnItemClickListener() {
    @Override
    public void onItemClick(AdapterView<?> parent, View view, int position, long id) {
        // Plays disallowed sound to indicate that TAP actions are not supported.
        AudioManager am = (AudioManager) getSystemService(Context.AUDIO_SERVICE);
        am.playSoundEffect(Sounds.DISALLOWED);
    }
});
setContentView(mCardScroller);
The app gives you two variables from the get-go: mView and mCardScroller, and mView is just a generic view.
mCardScroller is a CardScrollView. If you have multiple views that should be displayed side by side, you change the adapter methods, which are located in the setAdapter block, to display these views. The individual views shown in a CardScroller are called “cards.”
Next, you call setOnItemClickListener on your mCardScroller, and the code inside the block plays an alert to inform the user that tapping is not allowed in this app. When users tap, they hear the sound and that’s it.
Finally, you set the content view to be the card scroller, and it only has one view — mView — so that is the view/card that shows on-screen.
When you create the mView, you call buildView(). Jump down to the implementation of buildView() to see how this is implemented:
private View buildView() {
    CardBuilder card = new CardBuilder(this, CardBuilder.Layout.TEXT);
    card.setText(R.string.hello_world);
    return card.getView();
}
Hello world? That’s not a 3 Musketeers. You want to show the list of items, not a default “Hello World!”
Replace this method with the following:
private View buildView() {

    // 1
    CardBuilder card = new CardBuilder(this, CardBuilder.Layout.TEXT);

    // 2
    DataManager dataManager = new DataManager(getBaseContext());
    ArrayList<String> strings = dataManager.getStoredStrings();

    // 3
    StringBuilder builder = new StringBuilder();
    if (strings.size() == 0){
        builder.append("No Items!");
    // 4
    } else {
        for (String s : strings) {
            builder.append("- ").append(s).append("\n");
        }
    }

    // 5
    card.setText(builder.toString());
    return card.getView();
}
Let’s review how this works:
- First, you create a new CardBuilder with a Text layout. For reference, CardBuilders generate cards or views, for your CardScroller to present.
- The next two lines of code should look familiar; you’re simply getting the stored strings from the DataManager.
- Next, you instantiate a new StringBuilder instance to create the card’s text. If there’s nothing in the shopping list, then you want to show “No Items!”
- Otherwise, you create a bulleted list comprised of each string in the shopping list by adding a hyphen, the item and then a new line.
- Finally, you set the CardBuilder’s text to the string you just created, and return the CardBuilder’s view.
Run your Shopping List, and you’ll find everything working as expected!
In the Shopping List, speak “OK Glass… Add Item… Samsung Galaxy Gear.” Someone has to want one, right?
Now, the app should show this screen, with the smart watch in the list:
It works!!!

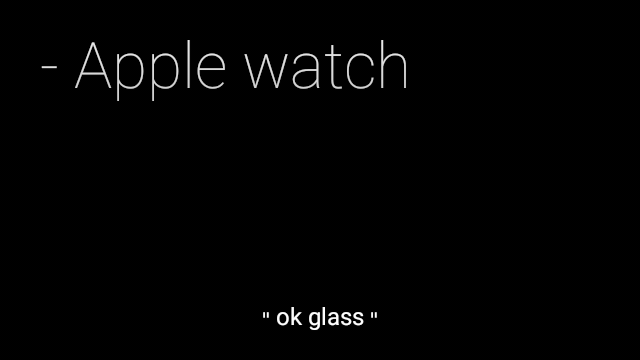
After thinking about it a little bit, you realize that you really want an Apple Watch. Tell your Glass, “OK Glass… Add Item… Apple Watch.” Your list should have two items in it, as shown below:

Now you have two smart watches in your list at once! Maybe you should reconsider that Samsung.
Tell your Glass, “OK Glass… Remove Item… Samsung Galaxy Gear.” Make sure that you say the item’s name exactly as it appears in the app, because otherwise it will stay on the list.
Hasta la vista, baby.
Your shopping list is now completed — congratulations on creating your very own Google Glass app!